# A B C D E F G H I J K L M N O P Q R S T U V W X Y Z

Panasonic TH-42PH20U TH-50PH20U User Guide

Summary

This comprehensive guide provides everything needed for operating and maintaining your High Definition Plasma Display. It covers essential topics including setup instructions, connections, basic controls, power operations, on-screen menus, and detailed safety precautions. Designed for the consumer or professional user, this manual ensures safe and optimal performance of the plasma display by detailing maintenance best practices and warranty information.
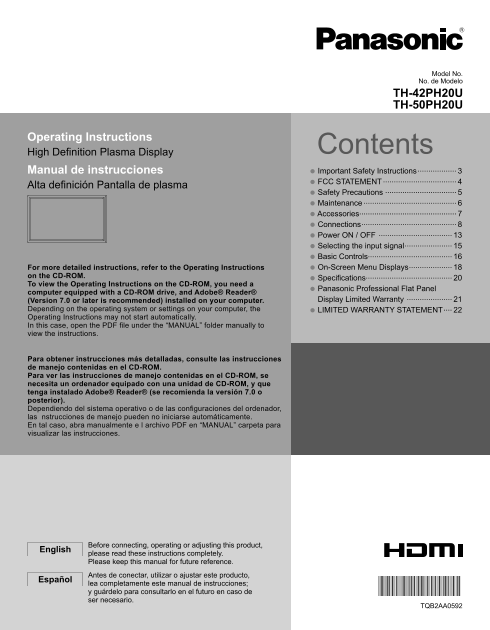
📄 Preview 📖 Table of Contents Contents PAGE OF 24

Page 1 Text Content

Model No. No. de Modelo

TH-42PH20U TH-50PH20U

Operating Instructions

High Defi nition Plasma Display Contents

Manual de instrucciones • Important Safety Instructions ..................

Alta defi nición Pantalla de plasma • FCC STATEMENT .................................. • Safety Precautions ................................. • Maintenance ........................................... • Accessories............................................. • Connections ............................................ • Power ON / OFF .................................. • Selecting the input signal ...................... • Basic Controls.......................................

For more detailed instructions, refer to the Operating Instructions • On-Screen Menu Displays .................... on the CD-ROM.

• Specifications........................................

To view the Operating Instructions on the CD-ROM, you need a computer equipped with a CD-ROM drive, and Adobe® Reader® • Panasonic Professional Flat Panel

(Version 7.0 or later is recommended) installed on your computer. Display Limited Warranty .....................

Depending on the operating system or settings on your computer, the

• LIMITED WARRANTY STATEMENT ....

Operating Instructions may not start automatically. In this case, open the PDF fi le under the “MANUAL” folder manually to view the instructions.

Para obtener instrucciones más detalladas, consulte las instrucciones de manejo contenidas en el CD-ROM. Para ver las instrucciones de manejo contenidas en el CD-ROM, se necesita un ordenador equipado con una unidad de CD-ROM, y que tenga instalado Adobe® Reader® (se recomienda la versión 7.0 o posterior). Dependiendo del sistema operativo o de las confi guraciones del ordenador, las nstrucciones de manejo pueden no iniciarse automáticamente. En tal caso, abra manualmente e l archivo PDF en “MANUAL” carpeta para visualizar las instrucciones.

Before connecting, operating or adjusting this product,

English

please read these instructions completely. Please keep this manual for future reference. Antes de conectar, utilizar o ajustar este producto,

Español

lea completamente este manual de instrucciones; y guárdelo para consultarlo en el futuro en caso de ser necesario.

TQB2AA0592

Page Summary Contents For Panasonic TH-42PH20U TH-50PH20U User Guide

Page 1 Model No. No. de Modelo TH-42PH20U TH-50PH20U Operating Instructions High Defi nition Plasma Display Contents Manual de instrucciones • Important Safety Instructions .................. Alta defi nició...
Page 2 CAUTION RISK OF ELECTRIC SHOCK DO NOT OPEN WARNING: To reduce the risk of electric shock, do not remove cover or back. No user-serviceable parts inside. Refer servicing to qualifi ed service personnel...
Page 3 Important Safety Instructions 1) Read these instructions. 2) Keep these instructions. 3) Heed all warnings. 4) Follow all instructions. 5) Do not use this apparatus near water. 6) Clean only with dry ...
Page 4 FCC STATEMENT This equipment has been tested and found to comply with the limits for a Class B digital device, pursuant to Part 15 of the FCC Rules. These limits are designed to provide reasonable pro...
Page 5 Safety Precautions CAUTION This Plasma Display is for use only with the following optional accessories. Use with any other type of optional accessories may cause instability which could result in the ...
Page 6 Safety Precautions WARNING Setup Do not use any power supply cord other than that provided with this unit. Do not place the Plasma Display on sloped or unstable • Doing so may cause fi re or electric ...
Page 7 Accessories Accessories Supplied Check that you have the Accessories and items shown Operating CD-ROM Remote Control Transmitter Batteries for the Instruction book (Operating N2QAYB000535 Remote Contr...
Page 8 Connections Speaker connection When connecting the speakers, be sure to use only the optional accessory speakers. Refer to the speaker’s Installation Manual for details on speaker installation. Speake...
Page 9 Connections Video equipment connection PC IN: PC Input Terminal SERIAL: Control the Connect to video terminal Plasma Display of PC or equipment with by connecting Y, PB(CB) and PR(CR) to PC. output. (...
Page 10 Connections HDMI connection [Pin assignments and signal names] Pin No. Signal Name Pin No. Signal Name T.M.D.S Clock T.M.D.S Data2+ Shield T.M.D.S Data2 T.M.D.S Clock- Shield T.M.D.S Data2- CEC T.M.D....
Page 11 Connections PC Input Terminals connection (Female) COMPUTER Stereo mini plug (M3)Audio Connect a cable which matches the audio output terminal on the computer. Conversion adapter (if necessary) Mini D...
Page 12 Connections SERIAL Terminals connection The SERIAL terminal is used when the Plasma Display is controlled by a computer. (Male) COMPUTER RS-232C Straight cable Pin layout for SERIAL Terminal (Female) ...
Page 13 Power ON / OFF Connecting the AC cord plug to the Plasma Display. Connecting the plug to the Wall Outlet. Note: When disconnecting the AC cord, be absolutely sure to INPUT MENU ENTER/+/VOL-/ disconnec...
Page 14 Power ON / OFF When fi rst switching on the unit Following screen will be displayed when the unit is turned on for the fi rst time. Select the items with the remote control. Unit buttons are invalid. ...
Page 15 Selecting the input signal Select the input signals to be connected by installing the optional Terminal Boards. Press to select the input signal to be played back from the equipment which has been con...
Page 16 Basic Controls Main Unit Remote control sensor Volume Adjustment Volume Up “+” Down “–” When the menu screen is displayed: “+” : press to move the cursor up “–” : press to move the cursor down (see pa...
Page 17 Basic Controls Remote Control Transmitter OFF TIMER button The Plasma Display can be preset to switch to stand- by after a fi xed period. The setting changes to 30 ACTION button minutes, 60 minutes, 9...
Page 18 On-Screen Menu Displays Remote Control Unit Display the menu screen. Press several times. MENU Press to select. Each time the MENU button is pressed, the (Example: PICTURE menu) menu screen will switc...
Page 19 On-Screen Menu Displays Overview Note: Menu that cannot be adjusted is grayout. Adjustable menu changes depending on signal, input and menu setting. POS. /SIZE SET UP 1/2 SIGNAL [ VIDEO ] NORMAL NORMA...
Page 20 Specifi cations TH-42PH20U TH-50PH20U Power Source 110 - 127 V AC, 50/60 Hz Power Consumption Rated Power Consumption On mode Average Power Consumption∗ Stand-by condition Save OFF 0.9 W, Save ON 0.4 ...
Page 21 (for the U.S.A and Puerto Rico) Panasonic Professional Display Company Unit of Panasonic Corporation of North America One Panasonic Way 1F-10 Secaucus, NJ 07094 Panasonic Professional Flat Panel Displ...
Page 22 (for Canada) Panasonic Canada Inc. 5770 Ambler Drive, Mississauga, Ontario L4W 2T3 LIMITED WARRANTY STATEMENT WARRANTY COVERAGE PERIOD EXCEPTIONSPanasonic Canada Inc. (also known as PCI) warrants this...
Page 24 Customer’s Record The model number and serial number of this product can be found on its back cover. You should note this serial number in the space provided below and retain this book, plus your purc...

Manual Details

Brand Panasonic
Pages 24
File Size 2.76 MB
Published June 21, 2026
6 views

Enter the captcha to get the download link:

captcha

Frequently Asked Questions

How must I clean this display unit?

Only use a dry cloth for cleaning. Always ensure that no ventilation openings are blocked.

What electrical precautions should I follow?

Use only the provided three-pin grounding plug, and never remove the protective cover or open the device's casing.

If I need to view detailed instructions, what do I require?

You must use a computer equipped with a CD-ROM drive and Adobe Reader version 7.0 or later.

Where can I find the product identification needed for warranty service?

The model number and serial number are located on the device's back cover.