Page 1
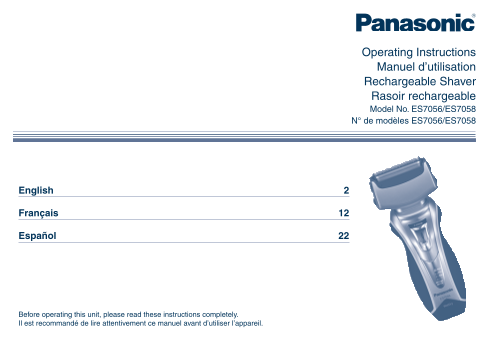
Operating Instructions Manuel d’utilisation Rechargeable Shaver Rasoir rechargeable Model No. ES7056/ES7058 N° de modèles ES7056/ES7058 English 2 Français 12 Español 22 Before operating this unit, ple...
Page 2
7. Do not use this appliance with damaged shaving blades IMPORTANT SAFETY INSTRUCTIONS and/or foil, as facial injury may occur. When using an electrical appliance, basic precautions should 8. Always a...
Page 3
prevent electric shock. Keep both the inner blades inserted. If Important only one of the inner blades is inserted, the shaver may be damaged. If you clean the shaver with water, do not use salt Befo...
Page 4
Adaptor Clean lamp Parts identification Power cord Dry lamp Self-cleaning recharger Charge lamp (Referred to as the Status lamp “Recharger”.) Select button Detergent cartridge Clea...
Page 5
ge Char Thoroughly wipe off any drops of water on or around the recharger so that it is dry before charging it. You can charge without the recharger. Page 6 Attach the detergent Pull up the arm until ...
Page 6
About the lamp Using the shaver Shav 10 minutes after After charging is While charging charging is completed completed Blinks red once Blinks red once every 2 seconds. Glows red. every second. • “high...
Page 7
Cleaning with the self-cleaning recharger Car Preparing the self-cleaning recharger Remove the shaver and the appliance plug from the self-cleaning recharger. Remove the water Pour tap water up to Pe...
Page 8
Cleaning the shaver Insert the appliance Pull up the arm. Press [select] to select the course. plug. Remove the protective • Each time you press [select], the course changes from “Clean/ Plug in the ...
Page 9
Cleaning with the self-cleaning recharger (continued) Do the following if the status lamp blinks or glows during the Cleaning the shaver without the self-cleaning “Clean/Dry/Charge” course or the “C...
Page 10
Replacing the system outer foil and the inner Cleaning the self-cleaning recharger blades. Beard trimmings may become attached to the cleaning tray of the self-cleaning recharger. Follow the steps bel...
Page 11
When the water does not drain from the cleaning 4. Slide the slide panels and remove them. 5. Remove the housing clips . 6. Remove the six housing screws . Beard trimmings may clog the 7. Remove...
Page 12
6. N’utilisez pas à l’extérieur, dans des endroits où des CONSIGNES DE SÉCURITÉ IMPORTANTES aérosols (pulvérisateurs) sont utilisés ou là où de l’oxygène Lors de l’utilisation d’un appareil électrique...
Page 13
Il convient de placer l’adaptateur à la verticale ou sur le Important plancher. Nettoyage du rasoir Avant usage Avant le nettoyage, débranchez le cordon d’alimentation du Ce rasoir peut être utilisé...
Page 14
Tondeuse Couvercle du réservoir d’eau Nomenclature Manette de la tondeuse Témoin de nettoyage (clean) Adaptateur Témoin de séchage (dry) Cordon d’alimentation Témoin de chargement Ch...
Page 15
ge Chargement à l’aide du chargeur auto-nettoyant Char Essuyez bien toutes gouttes d’eau sur le chargeur ou aux alentours pour le sécher avant le chargement. Le chargement peut se faire sans chargeur....
Page 16
À propos du voyant er Utilisation du rasoir Ras 10 minutes après la En cours de À la fin du fin du chargement chargement chargement Clignote en rouge une fois toutes les Clignote en rouge 2 secondes. ...
Page 17
tie Nettoyage à l’aide du chargeur auto-nettoyant Entre Préparation du chargeur auto-nettoyant Retirez le rasoir et la fiche de l’appareil du chargeur auto-nettoyant. Retirez le réservoir Versez de l...
Page 18
Nettoyage du rasoir Insérez la fiche de Levez le bras. Appuyez sur [select] pour sélectionner le régime. l’appareil. Enlevez le capuchon • Chaque pression de [select] fait commuter le régime entre Br...
Page 19
Nettoyage à l’aide du chargeur auto-nettoyant (suite) Procédez comme suit si le témoin d’état clignote ou s’illumine pendant le Nettoyage du rasoir sans chargeur auto- régime “Nettoyage/séchage/char...
Page 20
Remplacement de la grille extérieure du Nettoyage du chargeur auto-nettoyant système et des lames intérieures. Des brins de barbe peuvent se prendre dans la cavité de nettoyage du chargeur auto-nettoy...
Page 21
Quand l’eau ne s’évacue pas de la cavité de 2. Retirez la vis du couvercle du fond . 3. Enlevez le couvercle du fond . nettoyage 4. Faites glisser les panneaux latéraux de façon à les retirer. D...
Page 22
7. No utilice este dispositivo si las hojas de corte o las láminas INSTRUCCIONES DE SEGURIDAD IMPORTANTES están dañadas, ya que podrían causarse heridas en la cara. Al utilizar un dispositivo eléctric...
Page 23
alimentación resulta dañado. Importante El adaptador está preparado para orientarlo correctamente en una posición vertical o en el suelo. Antes de utilizarlo Limpieza de la afeitadora Esta afeitador...
Page 24
Lámpara de estado de carga Brazo Identificación de las partes Cortapatillas Tapa del depósito de agua Mango del cortapatillas Lámpara de limpieza Adaptador Lámpara de secado Cable de...
Page 25
ga Carga con el recargador de limpieza automática Car Frote cuidadosamente las gotas de agua que puedan quedar en o alrededor del recargador para que quede seco antes de cargarlo. La afeitadora puede ...
Page 26
Acerca de la lámpara do ta Utilización de la afeitadora 10 minutos después de Cuando la carga se Afei Durante la carga completarse la carga haya completado Parpadea en rojo una vez cada dos Parpadea e...
Page 27
ad Limpieza con el recargador de limpieza automática Cuid Preparación del recargador de limpieza automática Retire el enchufe de la afeitadora y el dispositivo del recargador de limpieza automática. ...
Page 28
Limpieza de la afeitadora Inserte el enchufe Tire del brazo. Pulse [select] para seleccionar el programa. del dispositivo. Retire la tapa protectora • Cada vez que pulse [select], el programa cambiar...
Page 29
Limpieza con el recargador de limpieza automática (continuación) Realice estas acciones si la lámpara de estado parpadea o se ilumina Limpieza de la afeitadora sin el recargador de durante el progra...
Page 30
Sustitución de la lámina exterior del sistema y Limpieza del recargador de limpieza automática las cuchillas interiores. Los recortes de la barba pueden quedarse adheridos a la bandeja de limpieza del...
Page 31
Cuando el agua no se vacía de la bandeja de 2. Retire el tornillo de la tapa inferior . 3. Retire la cubierta inferior . limpieza 4. Deslice los paneles laterales y retírelos. Los recortes de ba...
Page 32
IN USA CONTACT: Panasonic Consumer Electronics Company One Panasonic Way 2F-3 Secaucus, NJ 07094 IN PUERTO RICO CONTACT: Panasonic Sales Company Division of Panasonic Corporation of Puerto Rico, Inc. ...