Christie LU77 38- Viv403-01 User Manual
Summary
This comprehensive user manual provides essential instructions and advanced usage details for your high-performance projector. Designed for the owner, it guides you through optimizing features using varied port connections while prioritizing operational safety. The guide covers critical electrical precautions, proper placement, ventilation requirements, and troubleshooting steps to ensure longevity and accident prevention. Master smooth setup and maintenance guidelines crucial for safe, optimal use.
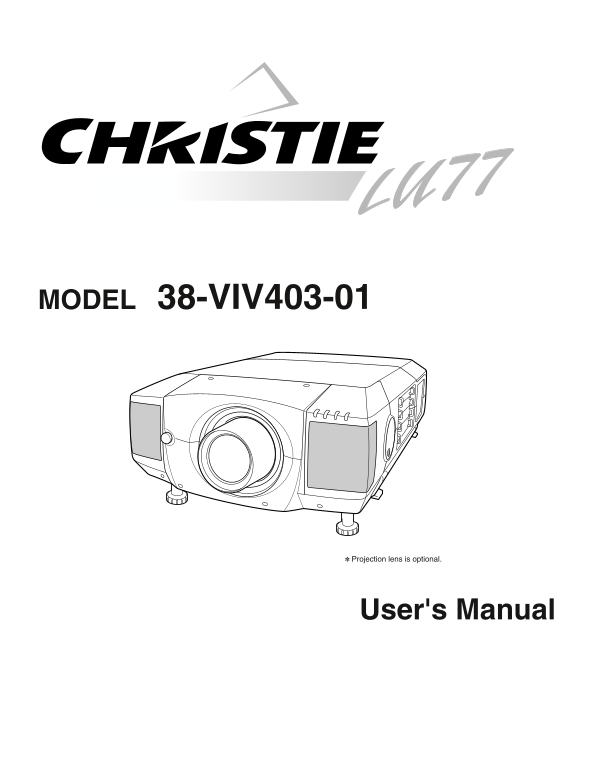
Page 1 Text Content
38-VIV403-01MODEL
✽ Projection lens is optional.
User's Manual
Page Summary Contents For Christie LU77 38- Viv403-01 User Manual
Page 1
38-VIV403-01MODEL ✽ Projection lens is optional. User's Manual
Page 2
TO THE OWNER Before operating this projector, read this manual thoroughly and operate the projector properly. This projector provides many convenient features and functions. Operating the projector pr...
Page 3
SAFETY INSTRUCTIONS All the safety and operating instructions should be read before This projector should be operated only from the type of power the product is operated. source indicated on the marki...
Page 4
COMPLIANCES Federal Communication Commission Notice This equipment has been tested and found to comply with the limits for a Class A digital device, pursuant to Part 15 of FCC Rules. These limits are ...
Page 5
TABLE OF CONTENTS FEATURES AND DESIGN COMPUTER MODE SELECTING INPUT SOURCE SELECTING COMPUTER SYSTEM PREPARATION COMPATIBLE COMPUTER SPECIFICATIONS PC ADJUSTMENT NAME OF EACH PART OF PROJECTOR AUTO PC...
Page 6
FEATURES AND DESIGN This Multimedia Projector is designed with most advanced technology for portability, durability, and ease of use. This projector utilizes built-in multimedia features, a palette of...
Page 7
PREPARATION NAME OF EACH PART OF PROJECTOR FRONT OF CABINET SPEAKERS INFRARED POWER CORD REMOTE RECEIVER CONNECTOR PROJECTION LENS MAIN ON / OFF LENS COVER SWITCH CAUTION CARRYING HANDLE Do not turn o...
Page 8
PREPARATION SETTING-UP PROJECTOR CONNECTING AC POWER CORD This projector uses nominal input voltages of 120 V or 200-240 V AC. This projector automatically selects correct input voltage. It is designe...
Page 9
PREPARATION LENS INSTALLATION Before setting up a projector, install Projection Lens on a Projector. 1. Before installation, check where a projector is used and prepare suitable lens. For specificatio...
Page 10
PREPARATION PICTURE LEVEL AND TILT ADJUSTMENT REAR ADJUSTABLE Picture tilt and projection angle can be adjusted with FEET. (Refer to P7). handles on both sides of a projector. Projection angle can be ...
Page 11
CONNECTING PROJECTOR TERMINALS OF PROJECTOR This projector applies various input/output terminals and 4 terminal slots for expansion to tune to diversity of signals from computers and video equipment....
Page 12
CONNECTING PROJECTOR INPUT/OUTPUT TERMINALS AND JACKS INPUT 2 INPUT 1 INPUT 1, 2, 3, 4 DVI INPUT TERMINAL AUDIO INPUT JACKS5 BNC INPUT JACKS Connect component video output (Cr, Y, Connect computer out...
Page 13
CONNECTING PROJECTOR SERIAL PORT USB PORT (Series B) IN TERMINAL This port is used to control a projector with computer. It is also used to If you control a projector by computer, control computer wit...
Page 14
CONNECTING PROJECTOR CONNECTING TO COMPUTER Cables used for connection (✽ = Cables are not supplied with this projector.) • VGA Cable (HDB 15 pin) • Control Cable for PS/2 port, Serial port, or ADB po...
Page 15
CONNECTING PROJECTOR CONNECTING TO VIDEO EQUIPMENT Cables used for connection NOTE • Video Cable (BNC x 1, BNC x 2 or BNC x 3) ✽ When connecting cable, power cords of both a • S-VIDEO Cable ✽ projecto...
Page 16
BEFORE OPERATION SIDE CONTROLS AND INDICATORS REAR INDICATORS SIDE CONTROLS INDICATORS SIDE CONTROLS ZOOM BUTTONS VOLUME BUTTONS POWER ON–OFF BUTTONFOCUS BUTTONS Used to adjust focus. (P23) Used to ad...
Page 17
BEFORE OPERATION INDICATORS FRONT INDICATORS READY WARNING LAMP TEMP. REPLACE WARNING TEMP. INDICATOR READY INDICATOR LAMP INDICATORLAMP REPLACE INDICATOR This LAMP REPLACE This indicator flashes red ...
Page 18
BEFORE OPERATION OPERATION OF REMOTE CONTROL Left Side LASER POINTER INDICATOR POWER ON-OFF BUTTON Lights red while laser beam Used to turn projector on or is emitted from Laser Light ON-OFF off. (P22...
Page 19
BEFORE OPERATION Operating Range ON-OFF ZOOM BUTTON Point Remote Control Unit toward projector (Receiver Window) Used to adjust zoom. whenever pressing any button. (P23) FOCUSZOOM VOLUME VOLUME BUTTON...
Page 20
BEFORE OPERATION OPERATING ON-SCREEN MENU HOW TO OPERATE ON-SCREEN MENU You can control and adjust this projector through ON-SCREEN WIRELESS REMOTE CONTROL MENU. Refer to following pages to operate ea...
Page 21
BEFORE OPERATION MENU BAR FOR PC SOURCE Press MENU BUTTON while connecting to PC input source. IMAGE SELECT MENU SCREEN MENU SETTING MENU Used to select Used to adjust size Used to change GUIDE WINDOW...
Page 22
BASIC OPERATION TURNING ON / OFF PROJECTOR TURNING ON PROJECTOR Complete peripheral connections (with Computer, VCR, etc.) before turning on projector. (Refer to "CONNECTING TO LAMP STATUS PROJEC...
Page 23
BASIC OPERATION ADJUSTING SCREEN ZOOM ADJUSTMENT Press ZOOM / button on Side Control or on Remote Control Unit. Message “Zoom” is displayed. Press ZOOM button to make image larger, and press ZOOM but...
Page 24
BASIC OPERATION PICTURE FREEZE FUNCTION Press FREEZE button on Remote Control Unit to freeze picture on-screen. To cancel FREEZE function, press FREEZE button again or press any other button except PO...
Page 25
BASIC OPERATION SOUND ADJUSTMENT Indicates roughly level of DIRECT OPERATION volume. Volume Press VOLUME (+/–) button(s) on Side Control or on Remote Control Unit to adjust volume. Volume dialog box a...
Page 26
COMPUTER INPUT SELECTING INPUT SOURCE INPUT 1/2 button INPUT 3/4 button DIRECT OPERATION INPUT 1 INPUT 3 Select INPUT source by pressing INPUT 1/2 and INPUT 3/4 buttons on Side Control or on Remote Co...
Page 27
COMPUTER INPUT AUTOMATIC MULTI-SCAN SYSTEM This projector automatically tunes to most different types of computers based on VGA, SVGA, XGA, SXGA or UXGA (refer to “COMPATIBLE COMPUTER SPECIFICATIONS” ...
Page 28
COMPUTER INPUT COMPATIBLE COMPUTER SPECIFICATIONS Basically this projector can accept a signal from all computers with V, H-Frequency mentioned below and less than 230 MHz of Dot Clock. ON-SCREEN H-Fr...
Page 29
COMPUTER INPUT PC ADJUSTMENT AUTO PC ADJUSTMENT Auto PC Adjustment function is provided to automatically adjust Fine sync, Total dots and Picture Position to conform to your computer. Auto PC Adjustme...
Page 30
COMPUTER INPUT MANUAL PC ADJUSTMENT This projector can automatically tune to display signals from most personal computers currently distributed. However, some computers employ special signal formats w...
Page 31
COMPUTER INPUT Display area Selects area displayed with this projector. Select resolution at Display area dialog box. Press SELECT button at Display area icon and Display Display area H area dialog bo...
Page 32
COMPUTER INPUT PICTURE IMAGE ADJUSTMENT IMAGE LEVEL SELECT (DIRECT) Select image level among Standard, Real, Image 1, Image 2, Image 3 IMAGE button and Image 4 by pressing IMAGE button on Side Control...
Page 33
COMPUTER INPUT IMAGE LEVEL ADJUSTMENT Press MENU button and ON-SCREEN MENU will appear. Press POINT LEFT/RIGHT buttons to move a red frame pointer to IMAGE ADJUST MENU IMAGE ADJUST Menu icon. Press PO...
Page 34
COMPUTER INPUT PICTURE SCREEN ADJUSTMENT This projector has a picture screen resize function, which enables you to display desirable image size. Press MENU button and ON-SCREEN MENU will appear. Press...
Page 35
VIDEO INPUT SELECTING INPUT SOURCE WHEN SELECT INPUT 2 (5 BNC SLOT ) When connect component video output (Cr, Y, Cb or Pr, Y, Pb) from INPUT MENU video equipment to R/Pr, G/Y and B/Pb jacks. Press MEN...
Page 36
VIDEO INPUT SELECTING VIDEO SYSTEM Press MENU button and ON-SCREEN MENU will appear. Press POINT LEFT/RIGHT buttons to move a red frame pointer to AV SYSTEM Menu icon. Press POINT DOWN button to move ...
Page 37
VIDEO INPUT PICTURE IMAGE ADJUSTMENT IMAGE LEVEL SELECT (DIRECT) Select image level among Standard, Cinema, Image 1, Image 2, IMAGE button Image 3 and Image 4 by pressing IMAGE button on Side Control ...
Page 38
VIDEO INPUT IMAGE LEVEL ADJUSTMENT Press MENU button and ON-SCREEN MENU will appear. Press IMAGE ADJUST MENU POINT LEFT/RIGHT button(s) to move a red frame pointer to IMAGE ADJUST Menu icon. Press POI...
Page 39
VIDEO INPUT Store To store adjustment data, move a red frame pointer to Store icon and press SELECT button. Image Level Menu will appear. Move a red frame pointer to Image Level 1 to 4 and then press ...
Page 40
SETTING SETTING MENU Press MENU button and ON-SCREEN MENU will appear. Press SETTING MENU POINT LEFT/RIGHT button(s) to move a red-frame pointer to SETTING icon. Press POINT DOWN button to move a red-...
Manual Details
| Brand | Christie |
|---|---|
| Pages | 56 |
| File Size | 1.07 MB |
| Published | May 17, 2026 |
239 views
Enter the captcha to get the download link:
