# A B C D E F G H I J K L M N O P Q R S T U V W X Y Z

SHARP HTDD5000 Operation Manual

Summary

Designed for new owners of the Model Home Theater System HT-DD5000, this comprehensive guide ensures safe and optimal operation. The manual details proper setup procedures, critical electrical safety warnings, and essential grounding techniques. It provides users with clear instructions on daily use, understanding system performance, and facilitating warranty claims or servicing requirements for peak home entertainment quality.
📄 Preview PAGE OF 28

Page 1 Text Content

SM <P=001>

MODEL

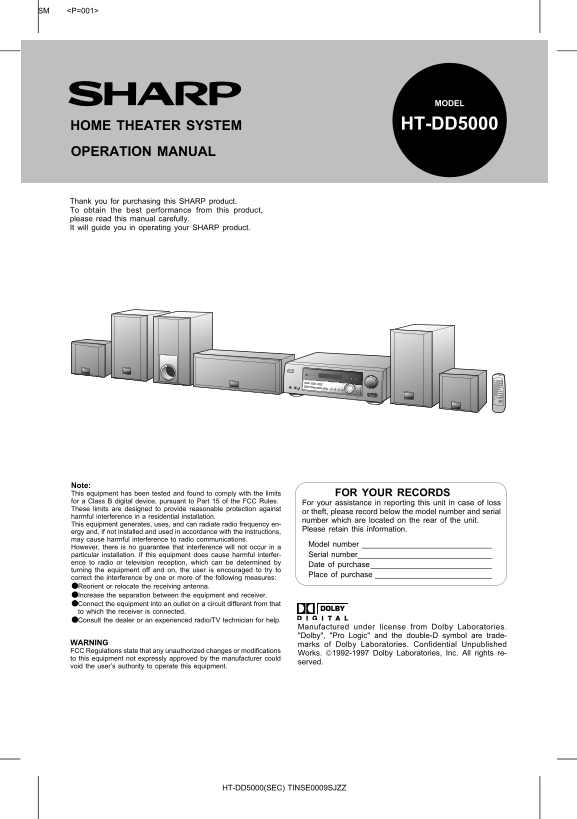
HOME THEATER SYSTEM HT-DD5000

OPERATION MANUAL

Thank you for purchasing this SHARP product. To obtain the best performance from this product, please read this manual carefully. It will guide you in operating your SHARP product.

Note: This equipment has been tested and found to comply with the limits FOR YOUR RECORDS for a Class B digital device, pursuant to Part 15 of the FCC Rules. For your assistance in reporting this unit in case of loss These limits are designed to provide reasonable protection against

or theft, please record below the model number and serial

harmful interference in a residential installation.

number which are located on the rear of the unit.

This equipment generates, uses, and can radiate radio frequency en-

Please retain this information.

ergy and, if not installed and used in accordance with the instructions, may cause harmful interference to radio communications.

Model number

However, there is no guarantee that interference will not occur in a particular installation. If this equipment does cause harmful interfer- Serial number_______________________________ ence to radio or television reception, which can be determined by

Date of purchase____________________________

turning the equipment off and on, the user is encouraged to try to

Place of purchase

correct the interference by one or more of the following measures: ●Reorient or relocate the receiving antenna. Increase the separation between the equipment and receiver. ●Connect the equipment into an outlet on a circuit different from that to which the receiver is connected. ●Consult the dealer or an experienced radio/TV technician for help.

Manufactured under license from Dolby Laboratories. "Dolby", "Pro Logic" and the double-D symbol are trade-

WARNING marks of Dolby Laboratories. Confidential Unpublished FCC Regulations state that any unauthorized changes or modifications

Works. 1992-1997 Dolby Laboratories, Inc. All rights re-

to this equipment not expressly approved by the manufacturer could

served.

void the user’s authority to operate this equipment.

HT-DD5000(SEC) TINSE0009SJZZ

Page Summary Contents For SHARP HTDD5000 Operation Manual

Page 1 SM &lt;P=001&gt; MODEL HOME THEATER SYSTEM HT-DD5000 OPERATION MANUAL Thank you for purchasing this SHARP product. To obtain the best performance from this product, please read this manual carefully. ...
Page 2 RISK OF ELECTRIC SHOCK DO NOT OPEN The lightning flash with arrowhead CAUTION: TO REDUCE THE The exclamation point within an equi- symbol, within an equilateral triangle, RISK OF ELECTRIC SHOCK, DO la...
Page 3 CONTENTS Page Page ACCESSORIES . . . . . . . . . . . . . . . . . . . . . . . . . . . . . . . . . .2 SET UP . . . . . . . . . . . . . . . . . . . . . . . . . . . . . . . . . . . . 16-20 PRECAUTIONS . ....
Page 4 PREPARATION FOR USE Unplug the AC power cord from the AC outlet before con- necting or disconnecting any component. Speaker connection Wires to be used with each speaker For the front, center and For ...
Page 5 (Continued) Sub woofer Connect the sub woofer wire to the SUB WOOFER terminals as shown. Black Use a speaker with an impedance of 8 ohms or more, as a lower impedance speaker can damage the unit. Conn...
Page 6 (Continued) Center Placing the speakers When you connect this unit to a DVD player playing a disc with the trademark, you can enjoy realistic, powerful Sub sound by playing the soundtrack through 6 ch...
Page 7 (Continued) Remote control When inserting or removing the batteries, push them to- ward the ë battery terminal. Installing the batteries incorrectly may cause the unit to malfunction. 2 &quot;AA&quot;...
Page 8 (Continued) Antenna connection Supplied FM antenna Connect the FM antenna wire to the FM 75 OHMS terminal and position the FM antenna wire in the direction where the strongest signal can be received. ...
Page 9 EXTERNAL UNIT CONNECTION Cords required to connect an external unit The following cords are available to connect an external unit. Cord included with this unit Optional cord Optical digital cable Coax...
Page 10 (Continued) When connecting the unit to a VCR or a camcorder To the audio output jacks To the audio input jacks To the video output jack To the video input jack To the video input jack Camcorder To th...
Page 11 (Continued) When connecting the unit to a stereo turntable or a CD player CD player To the audio output jacks Stereo turntable How to switch audio signals and video sig- nals When the function button ...
Page 12 (Continued) Front speaker selector SPEAKERS Select the front speakers you want to use. Before selecting the switches, be sure to set the VOL- UME control to 0. OFF ON To listen using the &quot;A&quot;...
Page 13 (Continued) Extra bass (X-BASS) (Main unit) (Remote control) (Main unit/remote control operation) X-BASS Press the X-BASS button to emphasize the bass region of X-BASS the frequency spectrum. To cance...
Page 14 DOLBY DIGITAL When you connect this unit to a DVD player which is playing a disc with the trademark, you can enjoy realistic, powerful sound by playing back the recorded signal through 6 speakers with...
Page 15 SURROUND EFFECT CONTROL This product allows you to enjoy 3 surround modes. Normal mode/Wide mode: Phantom mode: When you play a sound source that has the When you play a sound source that has the (5.1...
Page 16 (Continued) NORMAL: NORMAL/WIDE For a stereo 2 channel input or a Dolby digital 2/0 input, Center speaker sound will be output from the front left, front right, center and surround speakers. The same ...
Page 17 SET UP Speaker size setting Press the MENU button repeatedly to make &quot;SP SIZE&quot; appear. Within 10 seconds, press the ITEM button to make &quot;FRONT-SP&quot; appear. The front speaker indicat...
Page 18 (Continued) Speaker delay setting The best sound will be achieved by placing the front speak- ers, center speaker and surround speakers at the same dis- tance from the listener. When some of the speak...
Page 19 (Continued) Front speaker balance adjustment You can adjust the balance between the left and right chan- nels of the front speakers. Press the MENU button repeatedly to make &quot;SP LEVEL&quot; appea...
Page 20 (Continued) Test tone You can check (and adjust) the speaker level by listening to the sound output from each speaker individually, while stand- ing at the actual listening position in the room. The s...
Page 21 (Continued) Dynamic range setting DVD discs have a wider dynamic range (sound volume range) than existing VHS videotapes or CD discs. If they are played in home systems, there may be too much differen...
Page 22 RADIO OPERATION Tuning Set the POWER button on the main unit to ON. Press the TUNER (BAND) button. Press the TUNER (BAND) button again to select the de- sired frequency band. (FM ST, FM or AM) Press t...
Page 23 (Continued) Preset tuning You can store up to 40 stations in memory (40 stations con- sisting of any combination of FM and AM stations you like) and recall them at the push of a button. To enter stati...
Page 24 HOW TO USE THE BUILT-IN TIMER Timer playback Timer operation is only possible when the TUNER func- TIMER tion is selected. Set the POWER button on the main unit to ON. Press the TUNER (BAND) button. T...
Page 25 (Continued) Sleep operation The tuner and any components that are connected to the DVD, VCR-1, VCR-2, CD/AUX, MD/TAPE or PHONO jacks can be turned off automatically. Play back the desired sound source...
Page 26 DESCRIPTION OF TERMINOLOGY Dolby Pro Logic Surround: Dolby Digital: This refers to the Dolby Surround sound decoder system This is the new digital surround system that was created to which is used for...
Page 27 MAINTENANCE External care Periodically wipe the cabinet with a soft cloth and a di- luted soap solution, then wipe with a dry cloth. Do not use chemically treated cleaning cloths or other chemicals. S...
Page 28 CONSUMER LIMITED WARRANTY SHARP ELECTRONICS CORPORATION warrants to the first consumer purchaser that this Sharp brand product (the “Product”), when shipped in its original container, will be free fro...

Manual Details

Brand Sharp
Pages 28
File Size 784.62 KB
Published June 02, 2026
79 views

Enter the captcha to get the download link:

captcha

Frequently Asked Questions

What is the recommended warranty period for this unit?

The warranty covers one year for parts and labor starting from the date of purchase.

Where must I take the appliance if it requires service?

You must use a Sharp Authorized Servicer located in the United States. You can call 1-800-BE-SHARP for a location.

What precautions should I take regarding moisture and water exposure?

Do not expose this appliance to rain or moisture, and avoid using it near tubs, sinks, or wet basements.

Is proper grounding required if I connect an outside antenna?

Yes, the antenna system must be properly grounded to protect against voltage surges and static charges.