Nikon COOLPIX P6000 User Guide and Manual
Summary
Capture detailed microscopic images effortlessly using the Nikon CoolPix P6000 system. This comprehensive guide provides step-by-step instructions for installing the camera adapter across various microscopy types (including C-mounts, eyepieces, and specialized phototubes). Whether you are a lab professional or researcher, the manual walks you through advanced imaging techniques—from simple semi-auto modes to precise manual settings like ISO, aperture, and focus. Achieve high-quality documentation for scientific applications with ease of use and maximum technical control.
Page 1 Text Content
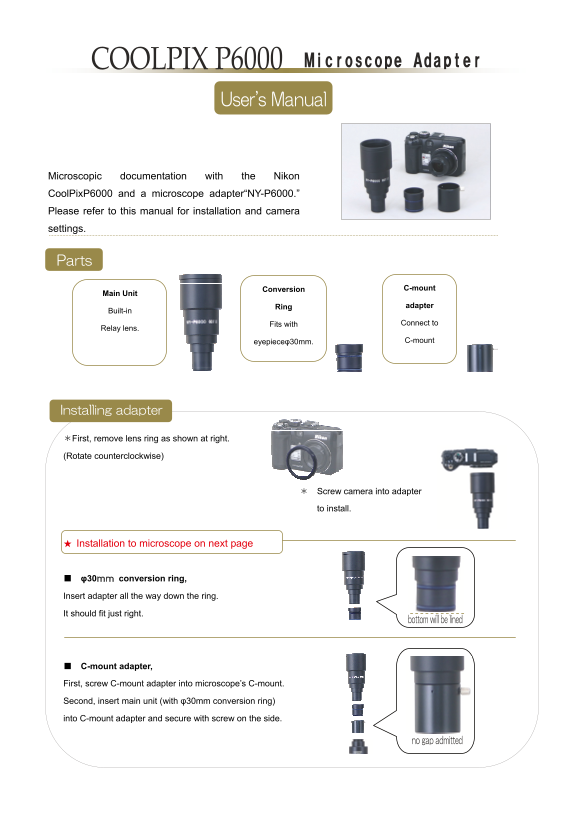
Microscopic documentation with the Nikon Cool Pix P6000 and a microscope adapter“NY-P6000.” Please refer to this manual for installation and camera settings.
Conversion C-mount
Main Unit
Ring adapter
Built-in
Fits with Connect to
Relay lens.
eyepieceφ30mm. C-mount
*First, remove lens ring as shown at right.
(Rotate counterclockwise)
* Screw camera into adapter to install.
★ Installation to microscope on next page
■ φ30mm conversion ring,
Insert adapter all the way down the ring.
It should fit just right.
■ C-mount adapter, First, screw C-mount adapter into microscope’s C-mount.
Second, insert main unit (with φ30mm conversion ring) into C-mount adapter and secure with screw on the side.
Page Summary Contents For Nikon COOLPIX P6000 User Guide and Manual
Manual Details
| Brand | Nikon |
|---|---|
| Pages | 5 |
| File Size | 2.24 MB |
| Published | June 01, 2026 |
Enter the captcha to get the download link:

Frequently Asked Questions
Which phototube standard should I use if my microscope is an older model?
Older models may use Optiphot, Biophot, or SMZ-2T trinocular standards. For JIS models (φ25mm), you need the NY-JIS sleeve.
How do I connect a CCD camera adapter using the C-mount?
First, install the C-mount adapter into your microscope's C-mount. Then, insert the main unit (with φ30mm conversion ring) and secure it with the side screw.
What steps are required for initial focusing of a captured image?
Monitor the LCD viewer and use the microscope’s focus handle to focus while watching the screen. There is a difference in focus level between the eyepiece and the digital camera viewpoint.
How can I perform a manual setting (M) capture instead of easy semi-auto mode?
Rotate the MODE DIAL to M, press FOCUS MODE and select [MF]. Then set ISO sensitivity and F/number (aperture) or SHUTTER SPEED manually.