Dell S320 Projector Quick Start Guide
Summary
Quick Start Guide for the Dell S320 projector from July 2012. Multi-language document covering remote control battery installation, power and signal cable connections, lens cap removal, power-on procedures, and image size/focus adjustment with Auto Adjust re-synchronization for Dell laptops. Includes projector control panel diagram showing Power, Menu, directional, Enter, and Source buttons plus lamp warning indicators.
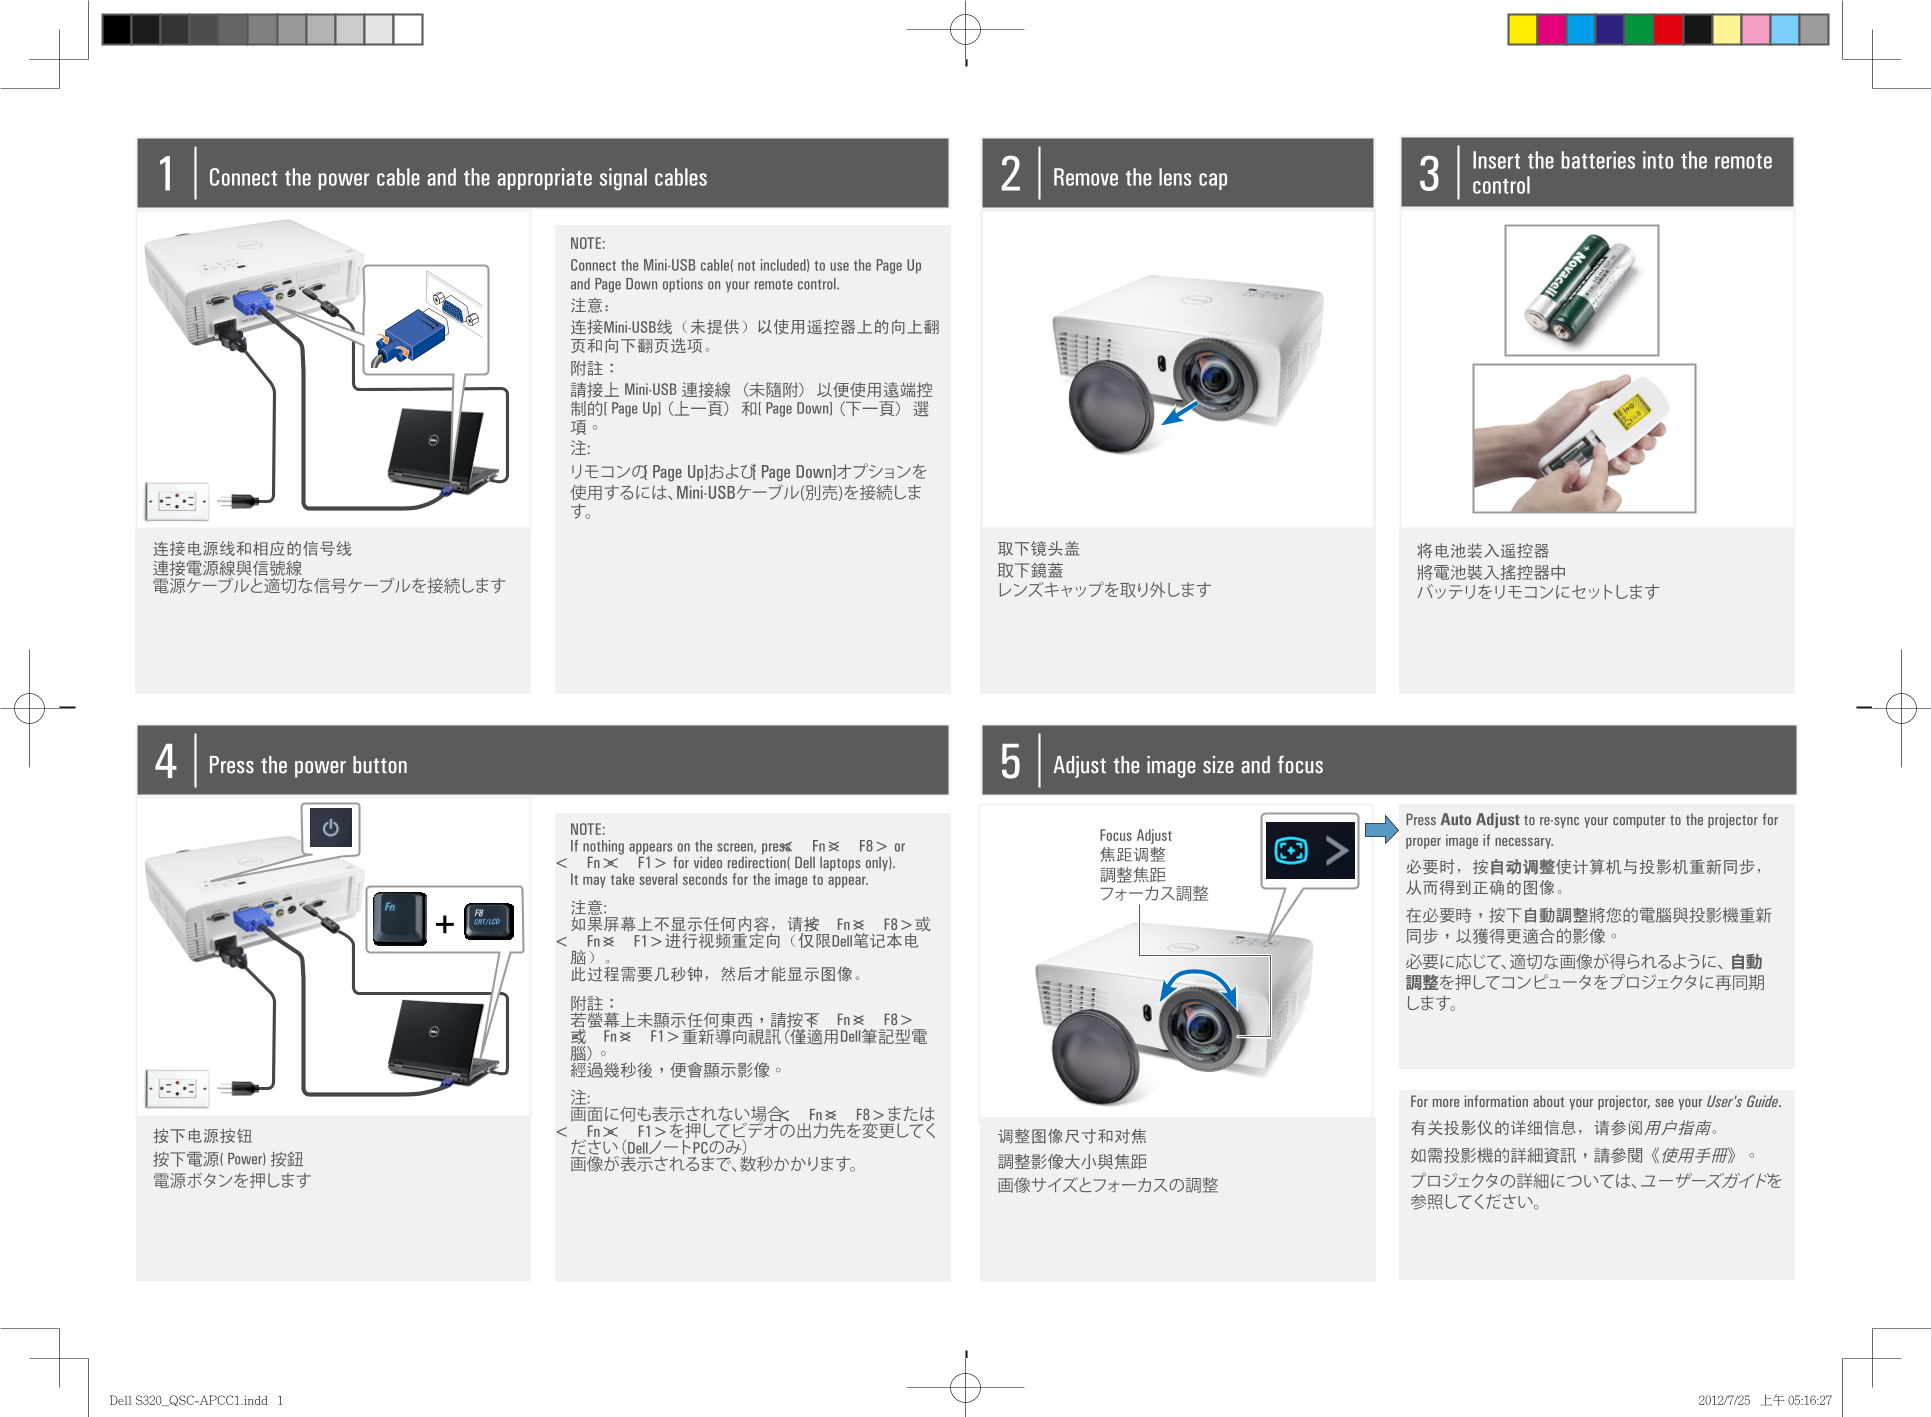
Page 1 Text Content
Insert the batteries into the remote
Connect the power cable and the appropriate signal cables Remove the lens cap
control
NOTE: Connect the Mini-USB cable (not included) to use the Page Up and Page Down options on your remote control. 注意: 连接Mini-USB线(未提供)以使用遥控器上的向上翻 页和向下翻页选项。 附註: 請接上 Mini-USB 連接線 (未隨附) 以便使用遠端控 制的 [Page Up] (上一頁) 和 [Page Down] (下一頁) 選 項。 注: リモコンの[Page Up]および[Page Down]オプションを 使用するには、Mini-USBケーブル(別売)を接続しま す。
Press the power button Adjust the image size and focus
Press Auto Adjust to re-sync your computer to the projector for
NOTE:
Focus Adjust
proper image if necessary.
If nothing appears on the screen, press <Fn><F8> or
<Fn> <F1> for video redirection (Dell laptops only).
It may take several seconds for the image to appear.
如果屏幕上不显示任何内容,请按<Fn><F8>或
<Fn><F1>进行视频重定向(仅限Dell笔记本电 脑)。
附註: します。 若螢幕上未顯示任何東西,請按下<Fn><F8> 或<Fn><F1>重新導向視訊(僅適用Dell筆記型電 腦)。 經過幾秒後,便會顯示影像。 注: For more information about your projector, see your User's Guide. 画面に何も表示されない場合、<Fn><F8>または
<Fn> <F1>を押してビデオの出力先を変更してく 有关投影仪的详细信息,请参阅用户指南。
ださい(DellノートPCのみ)
按下電源 (Power) 按鈕 如需投影機的詳細資訊,請參閱《使用手冊》。
Dell S320_QSC-APCC1.indd 1 2012/7/25 上午 05:16:27
Page Summary Contents For Dell S320 Projector Quick Start Guide
Manual Details
| Brand | Dell |
|---|---|
| Pages | 2 |
| File Size | 3.28 MB |
| Published | July 02, 2026 |
Enter the captcha to get the download link:

Frequently Asked Questions
I need to run a video connection on a Dell laptop. What specific key combination should I press?
If nothing is displayed, press <Fn><F8> or <Fn><F1> for video redirection (only applicable to Dell laptops).
Where can I find detailed information about my projector?
For more information about your projector, please refer to the User's Guide.
How do I prepare the remote control and cables before setup?
Ensure you insert batteries into the remote, connect the power cable, appropriate signal cables, leave lens cap off, and use the Mini-USB cable (not included) for page up/down options.
What should I do if the image doesn't appear immediately after powering on?
After pressing the Power button, the process may take several seconds before the image appears. To re-sync your computer to the projector, press Auto Adjust.