Dell Rackmount Installation Guide A20 Rails
Summary
Dell Rail Kit Installation Guide covers identifying 1U and 2U rail kit contents and installing optional supplied hardware to secure rails to square hole or unthreaded round hole racks. Includes safety warnings about lifting the system alone, conical washer requirements for square hole racks, and instructions to begin rail installation from the bottom of the rack enclosure. Supports rail-to-rack mounting for shipping or unstable environments with detailed multilingual instructions in English, Chi
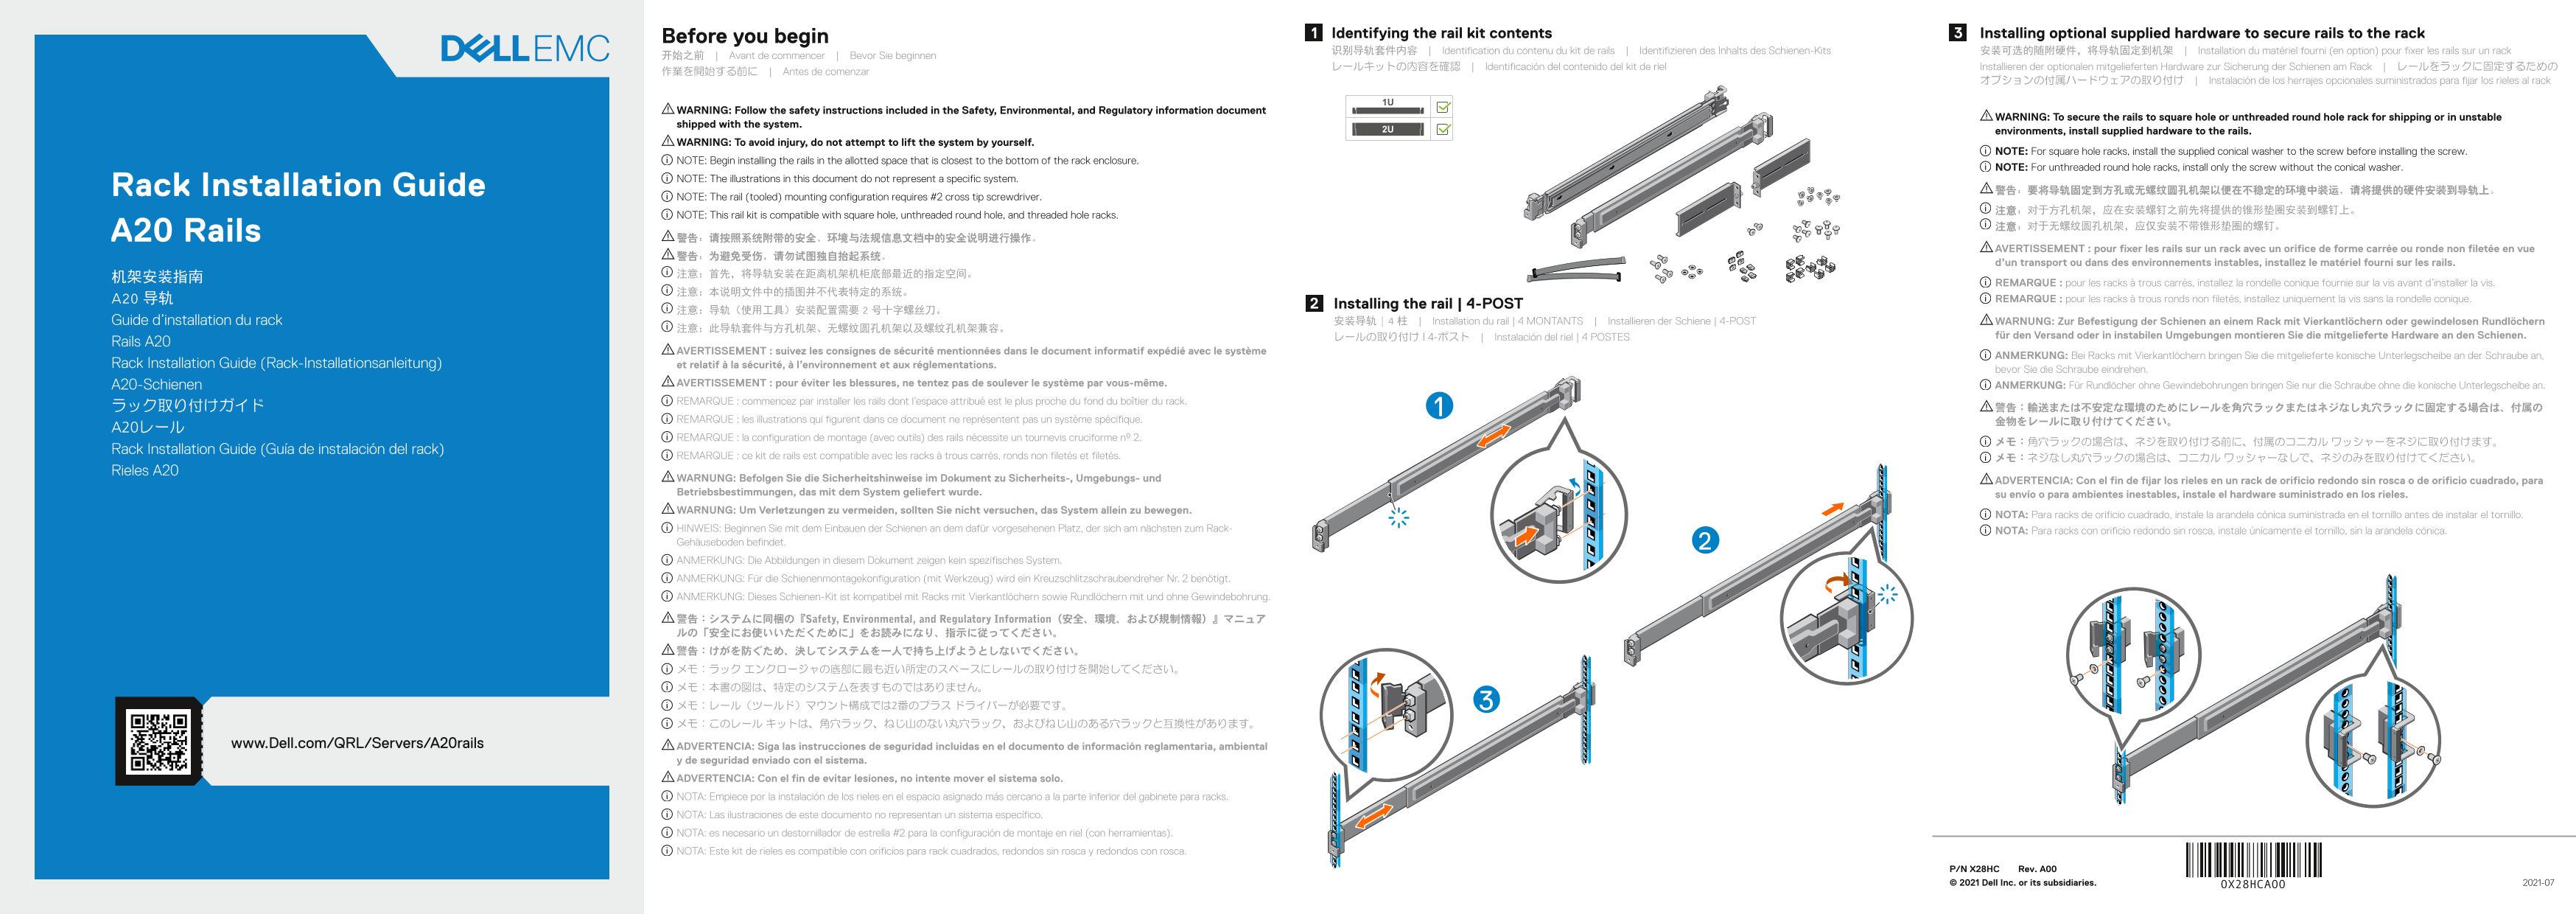
Page 1 Text Content
Before you begin Identifying the rail kit contents Installing optional supplied hardware to secure rails to the rack 识别导轨套件内容 | Identification du contenu du kit de rails | Identifizieren des Inhalts des Schienen-Kits 安装可选的随附硬件,将导轨固定到机架 | Installation du matériel fourni (en option) pour fixer les rails sur un rack
开始之前 | Avant de commencer | Bevor Sie beginnen
レールキットの内容を確認 | Identificación del contenido del kit de riel Installieren der optionalen mitgelieferten Hardware zur Sicherung der Schienen am Rack | レールをラックに固定するための
作業を開始する前に | Antes de comenzar
オプションの付属ハードウェアの取り付け | Instalación de los herrajes opcionales suministrados para fijar los rieles al rack
WARNING: Follow the safety instructions included in the Safety, Environmental, and Regulatory information document
WARNING: To secure the rails to square hole or unthreaded round hole rack for shipping or in unstable
shipped with the system.
2U environments, install supplied hardware to the rails.
WARNING: To avoid injury, do not attempt to lift the system by yourself.
NOTE: For square hole racks, install the supplied conical washer to the screw before installing the screw.
NOTE: Begin installing the rails in the allotted space that is closest to the bottom of the rack enclosure.
NOTE: For unthreaded round hole racks, install only the screw without the conical washer.
NOTE: The illustrations in this document do not represent a specific system.
Rack Installation Guide 警告:要将导轨固定到方孔或无螺纹圆孔机架以便在不稳定的环境中装运,请将提供的硬件安装到导轨上。
NOTE: The rail (tooled) mounting configuration requires #2 cross tip screwdriver.
NOTE: This rail kit is compatible with square hole, unthreaded round hole, and threaded hole racks.
A20 Rails 警告:请按照系统附带的安全、环境与法规信息文档中的安全说明进行操作。
AVERTISSEMENT : pour fixer les rails sur un rack avec un orifice de forme carrée ou ronde non filetée en vue
d’un transport ou dans des environnements instables, installez le matériel fourni sur les rails.
REMARQUE : pour les racks à trous carrés, installez la rondelle conique fournie sur la vis avant d’installer la vis.
A20 导轨 REMARQUE : pour les racks à trous ronds non filetés, installez uniquement la vis sans la rondelle conique.
Installing the rail | 4-POST
Guide d’installation du rack 安装导轨 | 4 柱 | Installation du rail | 4 MONTANTS | Installieren der Schiene | 4-POST WARNUNG: Zur Befestigung der Schienen an einem Rack mit Vierkantlöchern oder gewindelosen Rundlöchern
レールの取り付け | 4-ポスト | Instalación del riel | 4 POSTES für den Versand oder in instabilen Umgebungen montieren Sie die mitgelieferte Hardware an den Schienen.
Rails A20
AVERTISSEMENT : suivez les consignes de sécurité mentionnées dans le document informatif expédié avec le système
ANMERKUNG: Bei Racks mit Vierkantlöchern bringen Sie die mitgelieferte konische Unterlegscheibe an der Schraube an,
Rack Installation Guide (Rack-Installationsanleitung) et relatif à la sécurité, à l’environnement et aux réglementations.
bevor Sie die Schraube eindrehen.
A20-Schienen AVERTISSEMENT : pour éviter les blessures, ne tentez pas de soulever le système par vous-même. ANMERKUNG: Für Rundlöcher ohne Gewindebohrungen bringen Sie nur die Schraube ohne die konische Unterlegscheibe an. REMARQUE : commencez par installer les rails dont l’espace attribué est le plus proche du fond du boîtier du rack.
REMARQUE : les illustrations qui figurent dans ce document ne représentent pas un système spécifique. 金物をレールに取り付けてください。
REMARQUE : la configuration de montage (avec outils) des rails nécessite un tournevis cruciforme nº 2.
Rack Installation Guide (Guía de instalación del rack)
REMARQUE : ce kit de rails est compatible avec les racks à trous carrés, ronds non filetés et filetés. メモ:ネジなし丸穴ラックの場合は、コニカル ワッシャーなしで、ネジのみを取り付けてください。
Rieles A20
WARNUNG: Befolgen Sie die Sicherheitshinweise im Dokument zu Sicherheits-, Umgebungs- und ADVERTENCIA: Con el fin de fijar los rieles en un rack de orificio redondo sin rosca o de orificio cuadrado, para Betriebsbestimmungen, das mit dem System geliefert wurde. su envío o para ambientes inestables, instale el hardware suministrado en los rieles. WARNUNG: Um Verletzungen zu vermeiden, sollten Sie nicht versuchen, das System allein zu bewegen.
NOTA: Para racks de orificio cuadrado, instale la arandela cónica suministrada en el tornillo antes de instalar el tornillo.
HINWEIS: Beginnen Sie mit dem Einbauen der Schienen an dem dafür vorgesehenen Platz, der sich am nächsten zum Rack- NOTA: Para racks con orificio redondo sin rosca, instale únicamente el tornillo, sin la arandela cónica. Gehäuseboden befindet. ANMERKUNG: Die Abbildungen in diesem Dokument zeigen kein spezifisches System. ANMERKUNG: Für die Schienenmontagekonfiguration (mit Werkzeug) wird ein Kreuzschlitzschraubendreher Nr. 2 benötigt. ANMERKUNG: Dieses Schienen-Kit ist kompatibel mit Racks mit Vierkantlöchern sowie Rundlöchern mit und ohne Gewindebohrung.
警告:システムに同梱の『Safety, Environmental, and Regulatory Information(安全、環境、および規制情報)』マニュア ルの「安全にお使いいただくために」をお読みになり、指示に従ってください。 警告:けがを防ぐため、決してシステムを一人で持ち上げようとしないでください。 メモ:ラック エンクロージャの底部に最も近い所定のスペースにレールの取り付けを開始してください。 メモ:本書の図は、特定のシステムを表すものではありません。 メモ:レール(ツールド)マウント構成では2番のプラス ドライバーが必要です。 メモ:このレール キットは、角穴ラック、ねじ山のない丸穴ラック、およびねじ山のある穴ラックと互換性があります。
www.Dell.com/QRL/Servers/A20rails ADVERTENCIA: Siga las instrucciones de seguridad incluidas en el documento de información reglamentaria, ambiental
y de seguridad enviado con el sistema. ADVERTENCIA: Con el fin de evitar lesiones, no intente mover el sistema solo. NOTA: Empiece por la instalación de los rieles en el espacio asignado más cercano a la parte inferior del gabinete para racks. NOTA: Las ilustraciones de este documento no representan un sistema específico. NOTA: es necesario un destornillador de estrella #2 para la configuración de montaje en riel (con herramientas). NOTA: Este kit de rieles es compatible con orificios para rack cuadrados, redondos sin rosca y redondos con rosca.
P/N X28HC Rev. A00 © 2021 Dell Inc. or its subsidiaries. 2021-07
Page Summary Contents For Dell Rackmount Installation Guide A20 Rails
Manual Details
| Brand | Dell |
|---|---|
| Pages | 2 |
| File Size | 2.34 MB |
| Published | June 22, 2026 |
Enter the captcha to get the download link:

Frequently Asked Questions
What safety precautions should I follow when working with this system?
Warning: To avoid injury, do not attempt to lift the system by yourself. Always follow the safety instructions in the dedicated Safety, Environmental, and Regulatory information document.
How is hardware preparation different for square versus unthreaded round racks?
For square hole racks, install the supplied conical washer on the screw first. For unthreaded round hole racks, only install the screw without using the conical washer.
Where should I begin installing the rails in the rack?
Start by installing the rails in the allotted space that is closest to the bottom of the rack enclosure.
How can I safely remove the system from the installed rails?
You can remove the system by repeating the installation procedure but following it in reverse order.