Dell Instant 6.2.1.0-3.3.0.0 Quick Start Guide
Summary
The Dell Networking W-Series Instant Access Point Quick Start Guide provides step-by-step instructions for configuring Dell W-Series wireless access points using the Instant UI web interface. The guide covers connecting to the instant SSID, accessing the web interface, creating wireless networks with VLAN and security settings, and verifying network status. It includes information on PoE support for various models. Target users include network administrators and IT staff responsible for deploying and managing enterprise wireless networks using Dell W-Series IAP devices.
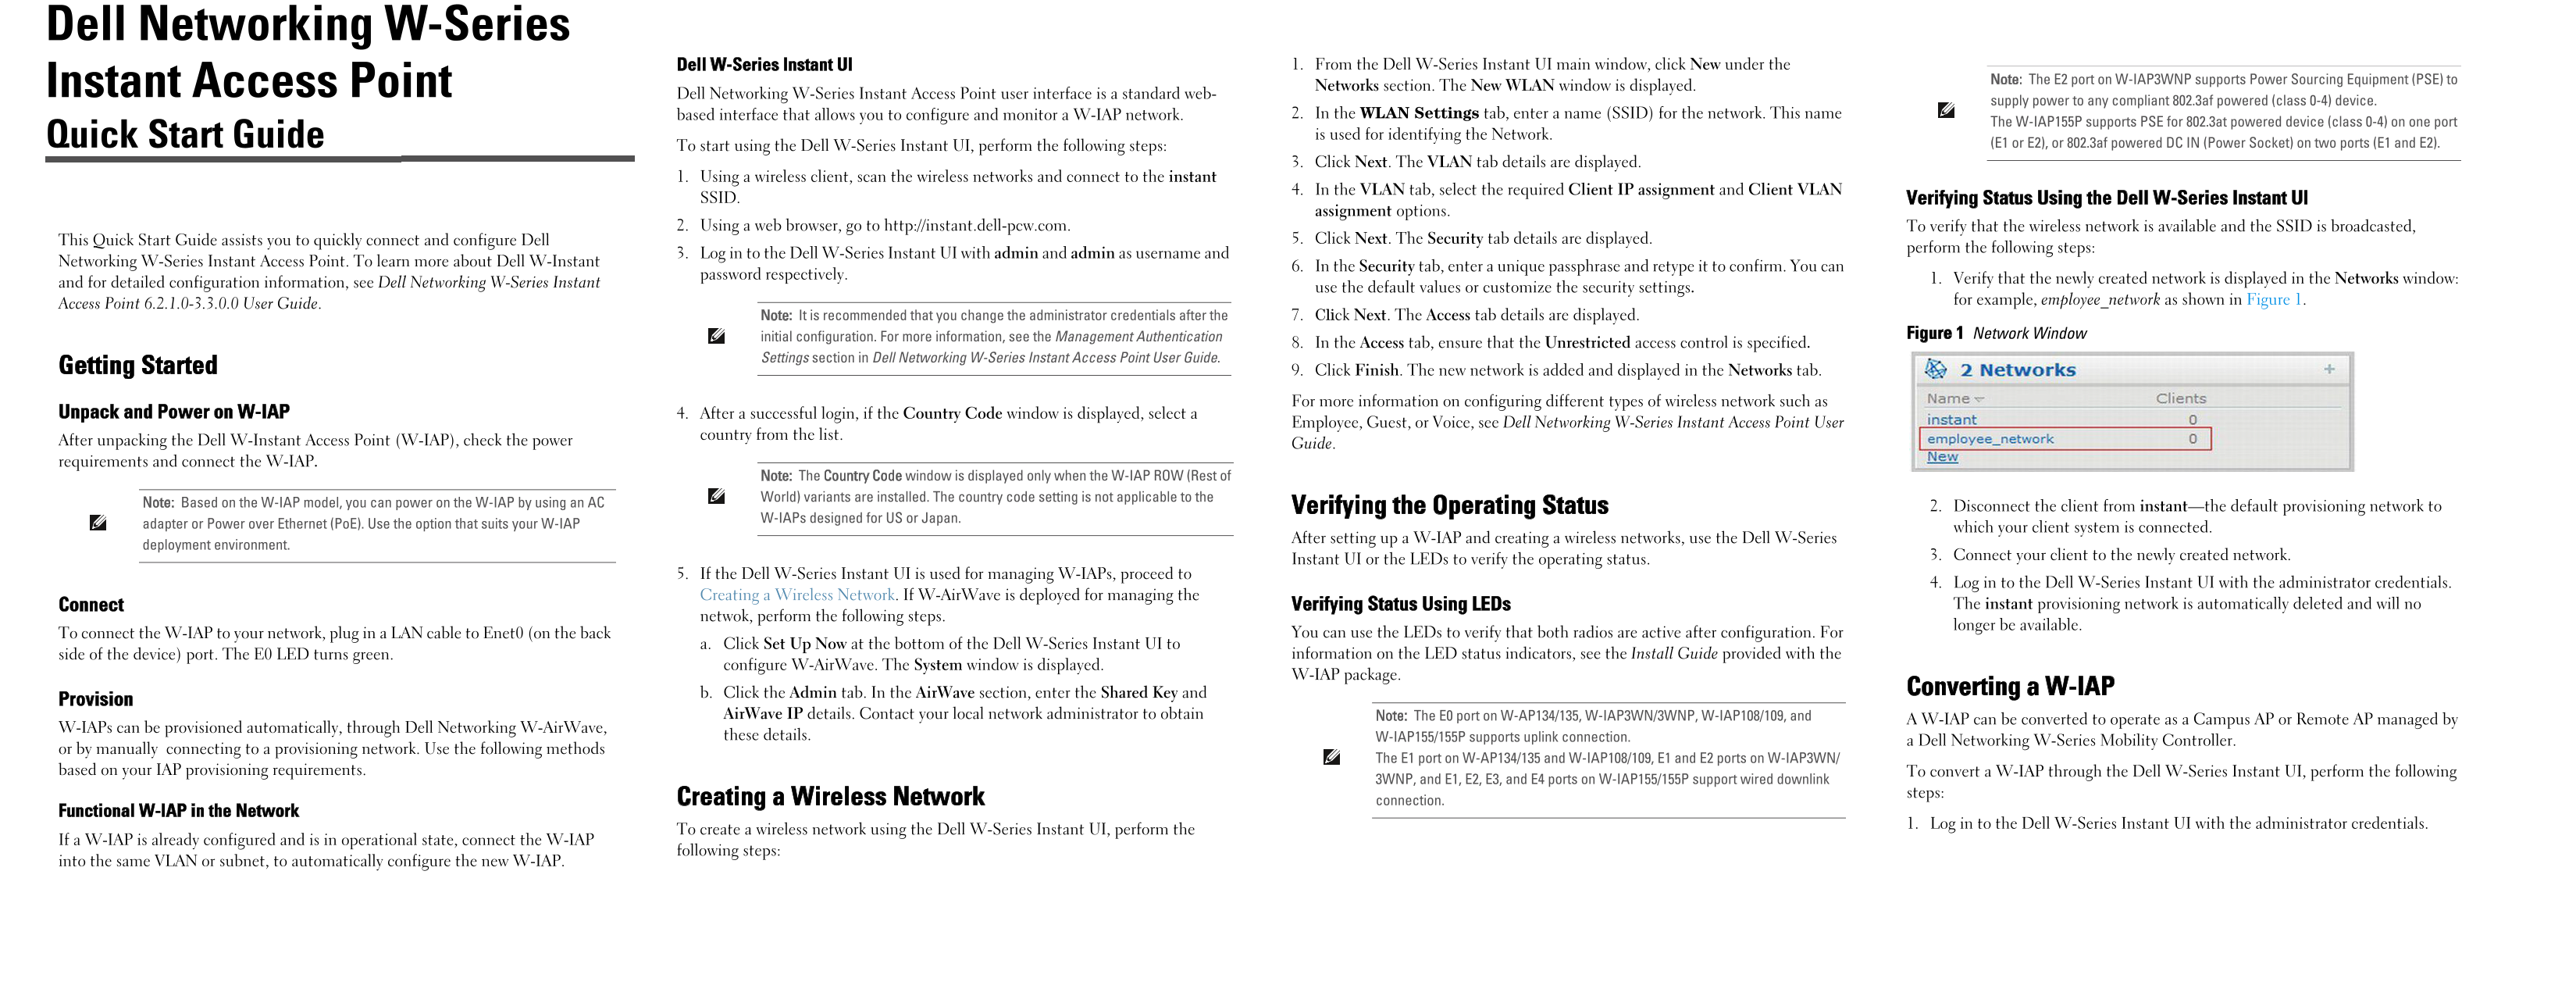
Page 1 Text Content
Dell Networking W-Series
Dell W-Series Instant UI 1. From the Dell W-Series Instant UI main window, click New under the
Note: The E2 port on W-IAP3WNP supports Power Sourcing Equipment (PSE) to
Instant Access Point Networks section. The New WLAN window is displayed.
Dell Networking W-Series Instant Access Point user interface is a standard web-
supply power to any compliant 802.3af powered (class 0-4) device.
based interface that allows you to configure and monitor a W-IAP network. 2. In the WLAN Settings tab, enter a name (SSID) for the network. This name
The W-IAP155P supports PSE for 802.3at powered device (class 0-4) on one port
Quick Start Guide is used for identifying the Network.
To start using the Dell W-Series Instant UI, perform the following steps: (E1 or E2), or 802.3af powered DC IN (Power Socket) on two ports (E1 and E2).
3. Click Next. The VLAN tab details are displayed.
1. Using a wireless client, scan the wireless networks and connect to the instant
4. In the VLAN tab, select the required Client IP assignment and Client VLAN
SSID. Verifying Status Using the Dell W-Series Instant UI
assignment options.
2. Using a web browser, go to http://instant.dell-pcw.com. To verify that the wireless network is available and the SSID is broadcasted,
This Quick Start Guide assists you to quickly connect and configure Dell 5. Click Next. The Security tab details are displayed.
perform the following steps:
3. Log in to the Dell W-Series Instant UI with admin and admin as username and
Networking W-Series Instant Access Point. To learn more about Dell W-Instant
6. In the Security tab, enter a unique passphrase and retype it to confirm. You can
password respectively.
1. Verify that the newly created network is displayed in the Networks window:
and for detailed configuration information, see Dell Networking W-Series Instant
use the default values or customize the security settings.
for example, employee_network as shown in Figure 1.
Access Point 6.2.1.0-3.3.0.0 User Guide.
Note: It is recommended that you change the administrator credentials after the 7. Click Next. The Access tab details are displayed.
initial configuration. For more information, see the Management Authentication Figure 1 Network Window
8. In the Access tab, ensure that the Unrestricted access control is specified.
Settings section in Dell Networking W-Series Instant Access Point User Guide.
Getting Started 9. Click Finish. The new network is added and displayed in the Networks tab.
For more information on configuring different types of wireless network such as
Unpack and Power on W-IAP 4. After a successful login, if the Country Code window is displayed, select a
Employee, Guest, or Voice, see Dell Networking W-Series Instant Access Point User
country from the list.
After unpacking the Dell W-Instant Access Point (W-IAP), check the power Guide. requirements and connect the W-IAP.
Note: The Country Code window is displayed only when the W-IAP ROW (Rest of World) variants are installed. The country code setting is not applicable to the
Note: Based on the W-IAP model, you can power on the W-IAP by using an AC
Verifying the Operating Status 2. Disconnect the client from instant—the default provisioning network to
W-IAPs designed for US or Japan.
adapter or Power over Ethernet (Po E). Use the option that suits your W-IAP
which your client system is connected.
After setting up a W-IAP and creating a wireless networks, use the Dell W-Series
deployment environment.
3. Connect your client to the newly created network.
Instant UI or the LEDs to verify the operating status.
5. If the Dell W-Series Instant UI is used for managing W-IAPs, proceed to
4. Log in to the Dell W-Series Instant UI with the administrator credentials.
Creating a Wireless Network. If W-Air Wave is deployed for managing the
Connect Verifying Status Using LEDs The instant provisioning network is automatically deleted and will no
netwok, perform the following steps.
longer be available.
To connect the W-IAP to your network, plug in a LAN cable to Enet0 (on the back You can use the LEDs to verify that both radios are active after configuration. For
a. Click Set Up Now at the bottom of the Dell W-Series Instant UI to
side of the device) port. The E0 LED turns green. information on the LED status indicators, see the Install Guide provided with the
configure W-Air Wave. The System window is displayed.
W-IAP package.
b. Click the Admin tab. In the Air Wave section, enter the Shared Key and Converting a W-IAP
Provision
Air Wave IP details. Contact your local network administrator to obtain Note: The E0 port on W-AP134/135, W-IAP3WN/3WNP, W-IAP108/109, and
A W-IAP can be converted to operate as a Campus AP or Remote AP managed by
W-IAPs can be provisioned automatically, through Dell Networking W-Air Wave,
these details. W-IAP155/155P supports uplink connection.
a Dell Networking W-Series Mobility Controller.
or by manually connecting to a provisioning network. Use the following methods
The E1 port on W-AP134/135 and W-IAP108/109, E1 and E2 ports on W-IAP3WN/
based on your IAP provisioning requirements. To convert a W-IAP through the Dell W-Series Instant UI, perform the following
3WNP, and E1, E2, E3, and E4 ports on W-IAP155/155P support wired downlink
steps:
Creating a Wireless Network connection.
Functional W-IAP in the Network
1. Log in to the Dell W-Series Instant UI with the administrator credentials.
To create a wireless network using the Dell W-Series Instant UI, perform the
If a W-IAP is already configured and is in operational state, connect the W-IAP
following steps:
into the same VLAN or subnet, to automatically configure the new W-IAP.
Page Summary Contents For Dell Instant 6.2.1.0-3.3.0.0 Quick Start Guide
Manual Details
| Brand | Dell |
|---|---|
| Pages | 2 |
| File Size | 256.55 KB |
| Published | June 29, 2026 |
Enter the captcha to get the download link:

Frequently Asked Questions
How do I start configuring the WIMAP?
Unpack, check power requirements, and connect the W-IAP to your network using a LAN cable into Enet0.
What information is needed for Wi-Fi setup?
In the WLAN Settings tab, you must enter an SSID (network name) and secure it with a unique passphrase.
How can I manage or monitor multiple W-IAPs?
Use the Dell W-Series Instant UI (http://instant.dell-pcw.com) or deploy W-AirWave for centralized management and configuration.
What is the PS/PoE power capability on the unit?
The E2 port supports Power Sourcing Equipment (PSE) for 802.3at powered devices, while E1 and E2 support basic power.**