Page 1
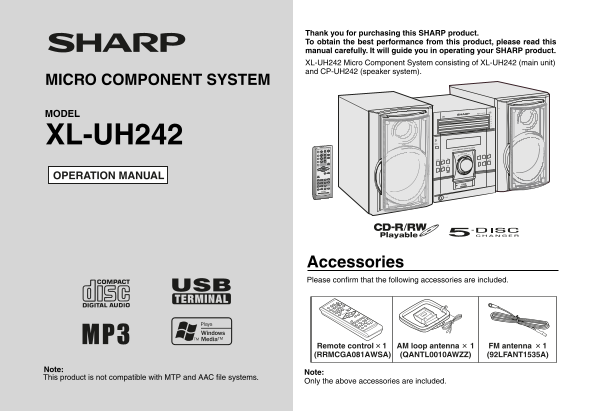
Thank you for purchasing this SHARP product. To obtain the best performance from this product, please read this manual carefully. It will guide you in operating your SHARP product. XL-UH242 Micro Comp...
Page 2
XL-UH242 SPECIAL NOTES Im rt an In st ru ct io DECLARATION OF CONFORMITY SHARP MICRO COMPONENT SYSTEM, MODEL XL-UH242 This device complies with Part 15 of the FCC Rules. Operation is subject to the fo...
Page 3
IMPORTANT SAFETY INSTRUCTIONS XL-UH242 Read Instructions - All the safety and operating instructions should Ventilation - Slots and openings in the cabinet are provided for venti- be read before the p...
Page 4
XL-UH242 IMPORTANT SAFETY INSTRUCTIONS (continued) Im rt an In st ru ct io Outdoor Antenna Grounding - If an outside antenna or cable system Object and Liquid Entry - Never push objects of any kind in...
Page 5
Contents XL-UH242 General Information ENERGY STAR® Program Information Precautions . . . . . . . . . . . . . . . . . . . . . . . . . . . . . . . . . . . . . . . . . 6 Controls and indicators . . . . ....
Page 6
XL-UH242 Precautions en er al In fo rm at io General Hold the AC power plug by the head when Please ensure that the equipment is positioned in a well-ventilated removing it from the AC outlet, as pull...
Page 7
Controls and indicators XL-UH242 Front panel Reference page 1. Disc Trays . . . . . . . . . . . . . . . . . . . . . . . . . . . . . . . . . . . . . . . 17 2. Timer Indicator . . . . . . . . . . . . . ...
Page 8
XL-UH242 Controls and indicators (continued) en er al In fo rm at io Display Reference page 1. Disc Number Indicators . . . . . . . . . . . . . . . . . . . . . . . . . . . . 21 2. MP3/WMA Folder Indic...
Page 9
XL-UH242 Remote control Reference page 1. Remote Control Transmitter . . . . . . . . . . . . . . . . . . . . . . . . 13 2. Disc Number Select Buttons . . . . . . . . . . . . . . . . . . . . . . . . 16...
Page 10
XL-UH242 System connections re ar at io se Make sure to unplug the AC power cord before any connections. Antenna connection (see page 11) AM loop antenna FM antenna Left speaker Right speaker ANTENNA ...
Page 11
XL-UH242 Antenna connection Speaker connection Supplied FM antenna: Connect the black wire to the minus (-) terminal, and the red wire to Connect the FM antenna wire to the FM 75 OHMS jack and positio...
Page 12
XL-UH242 System connections (continued) re ar at io se AC power connection Demonstration mode After checking all the connections have been made correctly, plug The first time the unit is plugged in, t...
Page 13
Remote control XL-UH242 Battery installation Notes concerning use: Replace the batteries if the operating distance is reduced or if the Use 2 "AA" size batteries (UM/SUM-3, R6, HP-7 or simil...
Page 14
XL-UH242 General control as ic er at io Volume control Main unit operation: POWER ON/STANDBY When the VOLUME control is turned clockwise, the volume will increase. When it is turned counterclockwise, ...
Page 15
Setting the clock (Remote Control only) XL-UH242 Press the or button to adjust the hour and then press the MEMORY button. Press the or button once to advance the time by 1 hour. Hold it down to advanc...
Page 16
XL-UH242 Listening to a CD or MP3/WMA disc 3/ is la yb ac This system can play back a standard CD, CD-R/RW in the CD format and CD-R/RW with MP3 or WMA files, but cannot record on them. Some audio CD-...
Page 17
XL-UH242 Playback will begin from track 1 on DISC 1. After that disc Press the ON/STAND-BY button to turn the power on. finishes playing, the next disc will automatically play. After the last track on...
Page 18
XL-UH242 Listening to a CD or MP3/WMA disc (continued) 3/ is la yb ac Various disc functions Notes for CD or MP3/WMA disc: Track up/track down is possible only within individual discs. Function Main u...
Page 19
Advanced CD or MP3/WMA disc playback XL-UH242 Direct track search Notes: By using the direct search buttons, the desired tracks on the current A track number higher than the number of tracks on the di...
Page 20
XL-UH242 Advanced CD or MP3/WMA disc playback (continued) 3/ is la yb ac Repeat play Random play Repeat play can play one disc, all 5 discs or a programmed The tracks on the disc(s) can be played in r...
Page 21
Advanced CD playback XL-UH242 Programmed play To clear the programmed selections: You can choose up to 32 selections for playback in the order you like. Press the CLEAR/DIMMER button on the remote con...
Page 22
XL-UH242 MP3/WMA folder mode (only for MP3/WMA files) 3/ is la yb ac To playback MP3/WMA (Windows Media Audio) file There are many music sites on the internet that you can download MP3/WMA (Windows Me...
Page 23
XL-UH242 Procedure to playback MP3/WMA disc Select desired file to be played back by pressing the To playback CD-R/RW. or button. (Folder mode off) Press the CD button, and load a MP3/WMA disc. After ...
Page 24
XL-UH242 Listening to USB mass storage device / MP3 Player em ry la yb ac Press the VIDEO/AUX/USB (USB/AUX) button, and push up the USB door. Connect the USB Memory device that has MP3/WMA format file...
Page 25
To remove USB memory device XL-UH242 Press the USB button on remote control. Wait until Select desired file to be played back by pressing the "UNPLUG OK" appears on FL display. or button. Pr...
Page 26
XL-UH242 Advanced USB playback em ry la yb ac Repeat play Note: Repeat play can play all tracks sequence continuously. ) When folder mode is on, the selected playmode can be used for the files in the ...
Page 27
Listening to the radio XL-UH242 Tuning Press the ON/STAND-BY button to turn the power on. POWER Press the TUNER (BAND) button repeatedly to select the ON/STANDBY desired frequency band (FM or AM). Pre...
Page 28
XL-UH242 Listening to the radio (continued) ad io Memorizing a station To recall a memorized station You can store 40 AM and FM stations in memory and recall them at or ) button for less than 0.5 seco...
Page 29
Timer and sleep operation (Remote Control only) XL-UH242 Timer playback: The unit turns on and plays the desired source (CD, TUNER, USB, AUX) at a preset time. This unit has 2 types of timer: ONCE TIM...
Page 30
XL-UH242 Timer and sleep operation (Remote Control only) (continued) va ce ea tu re Within 10 seconds, press the or button to Switch input with the or button, and then select "ONCE SET" or &...
Page 31
XL-UH242 Checking the timer setting in the timer stand-by mode: When the preset time is reached, playback will start. Press the CLOCK/TIMER button. The volume will increase gradually until it reaches ...
Page 32
XL-UH242 Timer and sleep operation (Remote Control only) (continued) va ce ea tu re Sleep operation To cancel the sleep operation: Press the ON/STAND-BY button while "SLEEP" is indicated. Th...
Page 33
Enhancing your system XL-UH242 The connection cord is not included. Purchase a commercially Listening to the playback sounds from VCR, available cord as shown below. DVD, etc. Use a connection cord to...
Page 34
XL-UH242 Enhancing your system (continued) Troubleshooting chart va ce ea tu re Many potential problems can be resolved by the owner without call- Subwoofer connection ing a service technician. When a...
Page 35
XL-UH242 Remote control If trouble occurs When this product is subjected to strong external interference Symptom Possible cause (mechanical shock, excessive static electricity, abnormal supply The rem...
Page 36
XL-UH242 Troubleshooting chart (continued) Maintenance ef er en ce Before transporting the unit Cleaning the CD pickup lens In order to ensure proper operation of the CD player, preventative Remove al...
Page 37
Specifications XL-UH242 As part of our policy of continuous improvement, SHARP reserves CD player the right to make design and specification changes for product improvement without prior notice. The p...
Page 38
MEMO 11/16/05, 4:41 PM1
Page 39
MEMO 11/16/05, 4:41 PM2
Page 40
CONSUMER LIMITED WARRANTY SHARP ELECTRONICS CORPORATION warrants to the first consumer purchaser that this Sharp brand product (the "Product"), when shipped in its original con- tainer, will...