# A B C D E F G H I J K L M N O P Q R S T U V W X Y Z

Roland TD-12S V-Stage SeriesOwner's Manual

Summary

This comprehensive Owner's Manual provides essential guidance for users of the Roland TD-12K electronic drum system. It covers critical operational procedures, detailed safety warnings (including guidelines on safe placement and environmental precautions), and best practices to ensure proper setup and long-term care. Designed for all new owners, this manual serves as a complete reference to help you utilize every feature of your unit safely and effectively.
📄 Preview 📖 Table of Contents Contents PAGE OF 16

Page 1 Text Content

TD-12K_e 1ページ 2007年1月5日 金曜日 午後1時27分

Owner’s Manual Thank you, and congratulations on your choice of the TD-12K Roland Drum System. Before using this unit, carefully read the sections entitled: “USING THE UNIT SAFELY” (p. 2) and “IMPORTANT NOTES” (p. 4). These sections provide important information concerning the proper operation of the unit. Additionally, in order to feel assured that you have gained a good grasp of every feature provided by your new unit, Owner’s manual should be read in its entirety. The manual should be saved and kept on hand as a convenient reference.

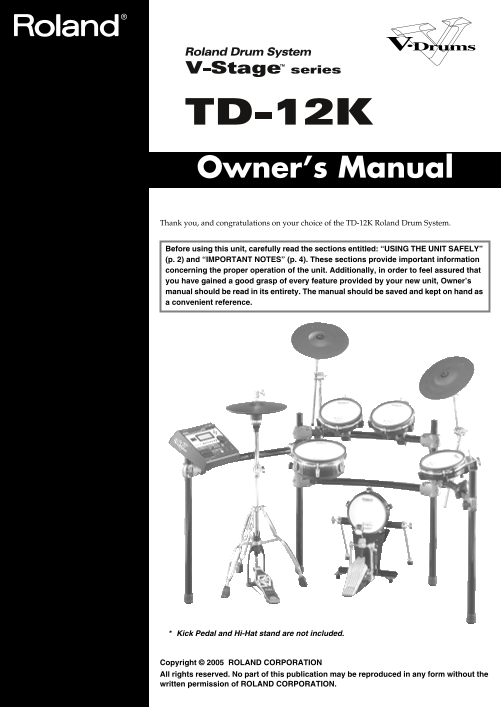
Kick Pedal and Hi-Hat stand are not included.

Copyright © 2005 ROLAND CORPORATION All rights reserved. No part of this publication may be reproduced in any form without the written permission of ROLAND CORPORATION.

Page Summary Contents For Roland TD-12S V-Stage SeriesOwner's Manual

Page 1 TD-12K_e 1ページ 2007年1月5日 金曜日 午後1時27分 Owner’s Manual Thank you, and congratulations on your choice of the TD-12K Roland Drum System. Before using this unit, carefully read the sections entitled: “USING ...
Page 2 2ページ 2007年1月5日 金曜日 午後1時27分 TD-12K_e USING THE UNIT SAFELY Used for instructions intended to alert The symbol alerts the user to important instructions the user to the risk of death or severe or warnin...
Page 3 3ページ 2007年1月5日 金曜日 午後1時27分 TD-12K_e (Add) Try to prevent cords and cables from becoming Do not apply excessive force to the sensor (and on entangled. Also, all cords and cables should be the KD-85, th...
Page 4 4ページ 2007年1月5日 金曜日 午後1時27分 TD-12K_e IMPORTANT NOTES 291a In addition to the items listed under “USING THE UNIT SAFELY” on pages 2–3, please read and observe the following: Placement Additional Precaut...
Page 5 5ページ 2007年1月5日 金曜日 午後1時27分 TD-12K_e IMPORTANT NOTES Check the Contents of the TD-12 (Percussion Sound Module) Box Attach the stand holder (included with the drum stand MDS- 12) to the TD-12. TD-12 (Pe...
Page 6 6ページ 2007年1月5日 金曜日 午後1時27分 TD-12K_e IMPORTANT NOTES KD-85 (V-Kick Trigger Pad) On the KD-85, adjusting the head tension affects only the head response, and does not change the pitch of the sound as it...
Page 7 7ページ 2007年1月5日 金曜日 午後1時27分 TD-12K_e 6. Tighten the nut and rubber foot to secure the IMPORTANT NOTES Assembling the KD-85 rubber foot in place and keep it from loosening. The nut and rubber foot must ...
Page 8 8ページ 2007年1月5日 金曜日 午後1時27分 TD-12K_e IMPORTANT NOTES Replacing the Head To Obtain More Stability If you are using a kick pedal with an under plate When the Head Should Be Replaced Adjust the length of ...
Page 9 9ページ 2007年1月5日 金曜日 午後1時27分 TD-12K_e 1. Loosen the tuning bolts until a slight gap is IMPORTANT NOTES produced. PD-105 (V-Pad) 2. Tighten all tuning bolts by fingers, as tightly as Hoop (Rim) you can. ...
Page 10 10ページ 2007年1月5日 金曜日 午後1時27分 TD-12K_e IMPORTANT NOTES PD-85 (V-Pad) On the PD-85, adjusting the head tension affects only the head response, and does not change the pitch of the Hoop (Rim) sound, as it...
Page 11 11ページ 2007年1月5日 金曜日 午後1時27分 TD-12K_e 1. Remove all tuning bolts and washers. IMPORTANT NOTES Attaching the Pad to a Stand Press the lock bushing (in figure below) in place with your finger as you remo...
Page 12 12ページ 2007年1月5日 金曜日 午後1時27分 TD-12K_e IMPORTANT NOTES CY-12R/C (V-Cymbal Ride/Crash) Attaching the V-Cymbal to the Cymbal Mount Bell 1. Remove the wing nut, felt, collar, and washer included with the c...
Page 13 13ページ 2007年1月5日 金曜日 午後1時27分 TD-12K_e IMPORTANT NOTES Assemble the “TD-12K” Using the built-in connection cables of the MDS-12, connect the pads, cymbals, hi-hat, and kick trigger pad. To prevent malfu...
Page 14 14ページ 2007年1月5日 金曜日 午後1時27分 TD-12K_e IMPORTANT NOTES Playing the PD-105/PD-85 Playing the CY-12R/C Bow Shot Head Shot Rim Shot This is the most common playing method, playing the pad face of the cymba...
Page 15 15ページ 2007年1月5日 金曜日 午後1時27分 TD-12K_e IMPORTANT NOTES Specifications Choking Choking (pinching) the cymbal’s edge with the hand KD-85 (V-Kick Trigger Pad) immediately after hitting the cymbal makes the...
Page 16 TD-12K_e 16ページ 2007年1月5日 金曜日 午後1時27分 Information When you need repair service, call your nearest Roland Service Center or authorized Roland distributor in your country as shown below. AFRICA PHILIPPIN...

Manual Details

Brand Roland
Pages 16
File Size 1016.58 KB
Published June 06, 2026
44 views

Enter the captcha to get the download link:

captcha

Frequently Asked Questions

What parts are not included with the TD-12K Roland Drum System?

The kick pedal and hi-hat stand are not included.

Where should I place the unit for safe operation?

Place it on a location that is level and sure to remain stable. Never use inclined surfaces.

What safety precaution must be taken when using racks or stands?

Ensure the rack or stand is carefully placed so it is level and stable, following specific instructions.

What environments should I avoid storing or operating the unit in?

Avoid damp, dusty, temperature extremes, rain, strong impact, high vibration, or proximity to heat-generating equipment.