Page 1
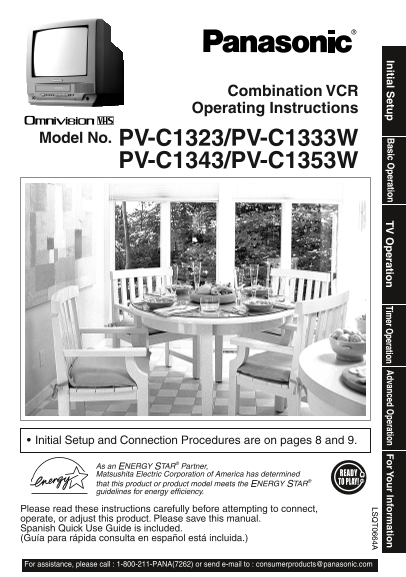
In itial S etu asic O peration eratio Tim er O peration Advanced O peration r Yo r In fo rm atio LS 0664A Combination VCR Operating Instructions Model No. PV-C1323/PV-C1333W PV-C1343/PV-C1353W Initial...
Page 2
Important Safeguards and Pre cau tions OUTDOOR ANTENNA INSTALLATION READ AND RETAIN ALL SAFETY AND OPERATING INSTRUCTIONS. HEED ALL 1 SAFE ANTENNA AND CABLE CONNECTION WARNINGS IN THE MANUAL AND ON UN...
Page 3
Safety Precautions/Mesures de sécurité Warning : To prevent fi re or shock hazard, do not expose this equipment to rain or moisture. Caution : To prevent electric shock, match wide blade of plug to wi...
Page 4
Unit Information Head Cleaning Specifi cations Playing older or damaged tapes may eventually Display cause video heads to become clogged. 13 inch measured diagonal 90° Picture Tube defl ection Picture...
Page 5
In itial S etu asic O peration eratio Tim er O peration dvanced O peration r Yo r In fo rm atio Table of Contents Important Safeguards and Precautions Safety Precautions/Mesures de sécurité..............
Page 6
Location of Controls Remote Control Buttons EJECT NIGHT Color and picture intensity level Ejects tape. are adjusted during night time use. POWER Turns on or off the unit. SLEEP Turns off the unit auto...
Page 7
In itial S etu Front View of the Unit and Indicators POWER VOL CH STOP/EJECT REW/ PLAY/REPEAT FF/ REC TIMER/FM REC ON TIMER PROG TIMER ACTION VIDEO IN AUDIO IN Built-In Speaker AUDIO VIDEO IN Jack REW...
Page 8
Connections/Initial Setup (Ready to Play) Please make all cable or antenna connections before power on. Connecting UNIT (rear view) For ANT./Cable Connect the cable from Antenna/Cable to the VHF/UHF t...
Page 9
In itial S etu Manual Clock Set Reset all unit Memory Functions If AUTO CLOCK SET was incomplete, manually When moving unit to a new location, or if a mistake set the clock as follows. was made in the...
Page 10
Reset Language, Channels, Clock, M A I N MENU Press ACTION to display MAIN MENU. LOCKT V LANGUAGE EX I TCLOCKC H SELECT : SET : ACT I ON Language Channels Clock 1) Press to 1) Press to 1) Press to sel...
Page 11
asic O peration Time Zone Adjust POWER NUMBER Keys ADD/DLT Time Zone Adjust SELECT/SET (Only when Auto Clock is set.) :CH UP 1) Press to :CH DOWN select “CLOCK.” ACTION :VOL UP :VOL DOWN M A I N MENU ...
Page 12
Record On a Tape Playback a Tape Insert a cassette with record tab Ready Check List • The unit power comes on automatically. All connections are made. Your unit is plugged in. Press CH or number keys ...
Page 13
asic O peration Copy Your Tapes (Dubbing) Connections you’ll need to make. Recording (Editing) unit Playing (Source) VCR AUDIO VID EO IN FROM ANT. AUDIO INVIDEO IN OUT TO TV Playback (Source) Recordin...
Page 14
TV Operation Ready Check List Press POWER on the remote or unit. All connections are made. Your unit is plugged in. Use CH CH 08 or number keys to select a channel. Press VOL + or VOL - to adjust volu...
Page 15
eratio Picture Adjustment Press ACTION to display MAIN MENU. M A I N MENU 1) Press to select “TV.” LOCKT V LANGUAGE 2) Press ACTION NIGHT to display SET EX I TCLOCKC H NUMBER UP TV screen. POWER SELEC...
Page 16
TV Timer Features ON-TIMER with Alarm Ready Check List This unit can be set to automatically power on in one of 3 The clock is set to the correct time. modes (TV, Playback, or FM radio). You can also ...
Page 17
eratio Sleep Timer This unit can be set for auto power off. Press SLEEP repeatedly SLEEP to set SLEEP TIMER. • Pressing DISPLAY with sleep timer SLEEP TIMER 30 DISPLAY set displays remaining time. Pre...
Page 18
Closed Caption System Closed Caption is ... This multi-use system not only allows the hearing impaired to enjoy selected programs, but also makes useful information from TV stations available to every...
Page 19
eratio Caption On Mute Feature Closed Caption narration, if available, is displayed when MUTE button is pressed for silence. Press ACTION to display MAIN MENU. 1) Press to M A I N MENU select “TV.” 2)...
Page 20
FM Radio FM Radio is ... This unit has an FM radio with built-in antenna, 9 station preset, and a band range of 87.5 ~ 108.1 MHz. You can even set the On-Timer (page 16) to wake up to your favorite ra...
Page 21
eratio How to use the FM radio Press FM/TV on the remote or press TIMER/FM twice on the unit to display FM radio mode. 1 2 : 0 0PM Press a Number key (1~9) to select a preset FM FM 1 87. 5MHz number (...
Page 22
Timer Recording You can set up to 8 programs to be recorded while you are Ready Check List away. All connections are made. Press PROG to display SET PROGRAM screen. Your unit is plugged in. The clock ...
Page 23
Tim er O peration Cancel a Timer Recording: Review, Replace or Clear Program (Recording is in progress) Contents : (Recording is not in progress) Hold down STOP for a few Repeat steps 1 and 2 on page ...
Page 24
Tape Operation Search System is ... Each time a recording is made, an invisible index mark is placed on the tape. When timer recordings are made, program index and information are also included. These...
Page 25
dvanced O peration Auto Operation Functions ■ Auto Shut Off No broadcast signal in TV (Only when Weak Signal Display is set to OFF), blank tape is Played for 5 minutes ➞ Power turns off • This feature...
Page 26
Tape Operation (continued) Zero Search Commercial Skip To quickly return to a specifi c tape counter location. By pressing the CM/ZERO button in Playback mode you can skip over 1 to 3 minutes of recor...
Page 27
dvanced O peration Repeat Play Set to see a recording over and over. PLAY In PLAY mode, REPEAT ON press PLAY/REPEAT on the unit to turn “ON.” POWER VOL CH STOP/EJECT REW/ PLAY/REPEAT FF/ REC TIMER/FM ...
Page 28
Special VCR Features Weak Signal Display ON/OFF When “ON” is selected, the picture is displayed even when a broadcast signal is weak or non-existent. Press ACTION to display MAIN MENU. 1) Press to M A...
Page 29
dvanced O peration V-Chip Control Feature Process of V-Chip Control Feature V-Chip Control Feature is... Setup Blocking Enter Code This unit has a built-in V-Chip Control which allows you to block unw...
Page 30
V-Chip Control Feature (continued) If LOCK menu is not displayed, do “Enter Secret Process of V-Chip Control Feature Code” steps on page 29. Enter Code Setup Blocking Setup US MOVIES Ratings Setup US ...
Page 31
dvanced O peration Process of V-Chip Control Feature Enter Code Setup Blocking Blocking Message US MOVIES RATINGS <When V-Chip Control is activated> GENERAL AUDIENCE: All ages admitted. CH08 • I...
Page 32
On-Screen Display (OSD) VCR Status & Clock Display Blue Screen Display Whenever a blank section of a tape comes up in Press DISPLAY to display or remove Play mode, or when the selected channel has...
Page 33
r Yo r In fo rm atio Before Requesting Service Check the following points once again if you are having trouble with your unit. Power CORRECTION • Completely insert Power Plug into an AC outlet. No pow...
Page 34
Limited Warranty PANASONIC CONSUMER ELECTRONICS PANASONIC SALES COMPANY, DIVISION OF COMPANY, DIVISION OF MATSUSHITA ELECTRIC MATSUSHITA ELECTRIC OF PUERTO RICO, INC., CORPORATION OF AMERICA AVE. 65 d...
Page 35
r Yo r In fo rm atio Limited Warranty Limits And Exclusions This warranty ONLY COVERS failures due to defects in materials or workmanship, and DOES NOT COVER normal wear and tear or cosmetic damage, n...
Page 36
Spanish Quick Use Guide/Guía para rápida consulta Connexiones/Confi guracion Inicial Ajuste Manual del Reloj Si el ajuste automático del reloj no se ha Conecte por favor todas las conexiones del compl...
Page 37
r Yo r In fo rm atio Operaciones básicas para la Grabación con temporizador reproducción Exhiba FIJAR PROGRAMACION. Inserte un casete. Presione PROG. El videograbador combinado se enciende automáticam...
Page 38
NOTES For assistance, please call : 1-800-211-PANA(7262) or send e-mail to : [email protected]
Page 39
NOTES
Page 40
LS Index Accessories ............................................................. 3 Phones .................................................................. 14 Audio Mute ..............................