INVACARE Walkers Installation and User Guide
Summary
This comprehensive guide provides detailed assembly, installation, and operation instructions for the wheeled walker, ensuring maximum safety and stability during mobility assistance. It covers critical guidelines, including proper height adjustment, weight limits, maintenance tips, and precautions necessary for safe use in any environment. Essential reading for users and caregivers advised by a medical professional to guarantee correct setup and reliable support.
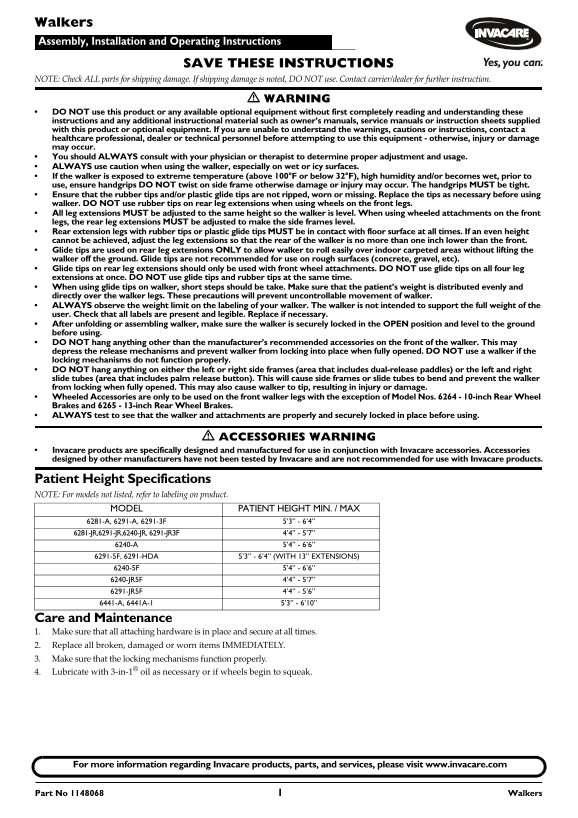
Page 1 Text Content
Walkers Assembly, Installation and Operating Instructions
SAVE THESE INSTRUCTIONS
NOTE: Check ALL parts for shipping damage. If shipping damage is noted, DO NOT use. Contact carrier/dealer for further instruction.
WARNING
DO NOT use this product or any available optional equipment without first completely reading and understanding these instructions and any additional instructional material such as owner’s manuals, service manuals or instruction sheets supplied with this product or optional equipment. If you are unable to understand the warnings, cautions or instructions, contact a healthcare professional, dealer or technical personnel before attempting to use this equipment - otherwise, injury or damage may occur. You should ALWAYS consult with your physician or therapist to determine proper adjustment and usage. ALWAYS use caution when using the walker, especially on wet or icy surfaces. If the walker is exposed to extreme temperature (above 100°F or below 32°F), high humidity and/or becomes wet, prior to use, ensure handgrips DO NOT twist on side frame otherwise damage or injury may occur. The handgrips MUST be tight. Ensure that the rubber tips and/or plastic glide tips are not ripped, worn or missing. Replace the tips as necessary before using walker. DO NOT use rubber tips on rear leg extensions when using wheels on the front legs. All leg extensions MUST be adjusted to the same height so the walker is level. When using wheeled attachments on the front legs, the rear leg extensions MUST be adjusted to make the side frames level. Rear extension legs with rubber tips or plastic glide tips MUST be in contact with floor surface at all times. If an even height cannot be achieved, adjust the leg extensions so that the rear of the walker is no more than one inch lower than the front. Glide tips are used on rear leg extensions ONLY to allow walker to roll easily over indoor carpeted areas without lifting the walker off the ground. Glide tips are not recommended for use on rough surfaces (concrete, gravel, etc). Glide tips on rear leg extensions should only be used with front wheel attachments. DO NOT use glide tips on all four leg extensions at once. DO NOT use glide tips and rubber tips at the same time. When using glide tips on walker, short steps should be take. Make sure that the patient’s weight is distributed evenly and directly over the walker legs. These precautions will prevent uncontrollable movement of walker. ALWAYS observe the weight limit on the labeling of your walker. The walker is not intended to support the full weight of the user. Check that all labels are present and legible. Replace if necessary. After unfolding or assembling walker, make sure the walker is securely locked in the OPEN position and level to the ground before using. DO NOT hang anything other than the manufacturer’s recommended accessories on the front of the walker. This may depress the release mechanisms and prevent walker from locking into place when fully opened. DO NOT use a walker if the locking mechanisms do not function properly. DO NOT hang anything on either the left or right side frames (area that includes dual-release paddles) or the left and right slide tubes (area that includes palm release button). This will cause side frames or slide tubes to bend and prevent the walker from locking when fully opened. This may also cause walker to tip, resulting in injury or damage. Wheeled Accessories are only to be used on the front walker legs with the exception of Model Nos. 6264 - 10-inch Rear Wheel Brakes and 6265 - 13-inch Rear Wheel Brakes. ALWAYS test to see that the walker and attachments are properly and securely locked in place before using.
ACCESSORIES WARNING
Invacare products are specifically designed and manufactured for use in conjunction with Invacare accessories. Accessories designed by other manufacturers have not been tested by Invacare and are not recommended for use with Invacare products.
Patient Height Specifications NOTE: For models not listed, refer to labeling on product.
MODEL PATIENT HEIGHT MIN. / MAX 6281-A, 6291-A, 6291-3F 5’3” - 6’4”
6281-JR,6291-JR,6240-JR, 6291-JR3F 4’4” - 5’7”
6240-A 5’4” - 6’6” 6291-5F, 6291-HDA 5’3” - 6’4” (WITH 13” EXTENSIONS) 6240-5F 5’4” - 6’6” 6240-JR5F 4’4” - 5’7” 6291-JR5F 4’4” - 5’6” 6441-A, 6441A-1 5’3” - 6’10”
Care and Maintenance 1. Make sure that all attaching hardware is in place and secure at all times. 2. Replace all broken, damaged or worn items IMMEDIATELY. 3. Make sure that the locking mechanisms function properly. 4. Lubricate with 3‐in‐1® oil as necessary or if wheels begin to squeak.
For more information regarding Invacare products, parts, and services, please visit www.invacare.com
Part No 1148068 Walkers
Page Summary Contents For INVACARE Walkers Installation and User Guide
Manual Details
| Brand | Invacare |
|---|---|
| Pages | 4 |
| File Size | 395.75 KB |
| Published | May 24, 2026 |
Enter the captcha to get the download link:

Frequently Asked Questions
What should I do if the walker cannot be leveled perfectly?
Adjust the leg extensions so that the rear of the walker is no more than one inch lower than the front.
Are there rules about using different types of tips?
Do not use glide and rubber tips simultaneously, or use them on all four leg extensions.
What safety checks must be done before I start walking with it?
Always test to see that the walker and attachments are properly and securely locked in place. Also check that all hardware is secure.
Can I attach accessories made by other brands?
No, only manufacturer-designed Invacare accessories are recommended because others have not been tested.