EMERSON Manuals Figure 969 Hopper Knife Gate Valves Gland Packing Instr, Clarkson-EN
Summary
Essential guide for servicing the Figure 969 Hopper Knife Gate Valve in industrial pipeline systems. This manual provides comprehensive, step-by-step instructions covering full installation, detailed strip-down procedures, critical gland packing replacement, and reassembly. It is designed for maintenance technicians and engineers who need to ensure perfect, leak-free operation of heavy valves by adhering to correct service protocols.
Page 1 Text Content
CLARKSON FIGURE 969 HOPPER KNIFE GATE VALVES INSTALLATION AND OPERATING MANUAL
Gland packing replacement instructions for F969 hopper valves
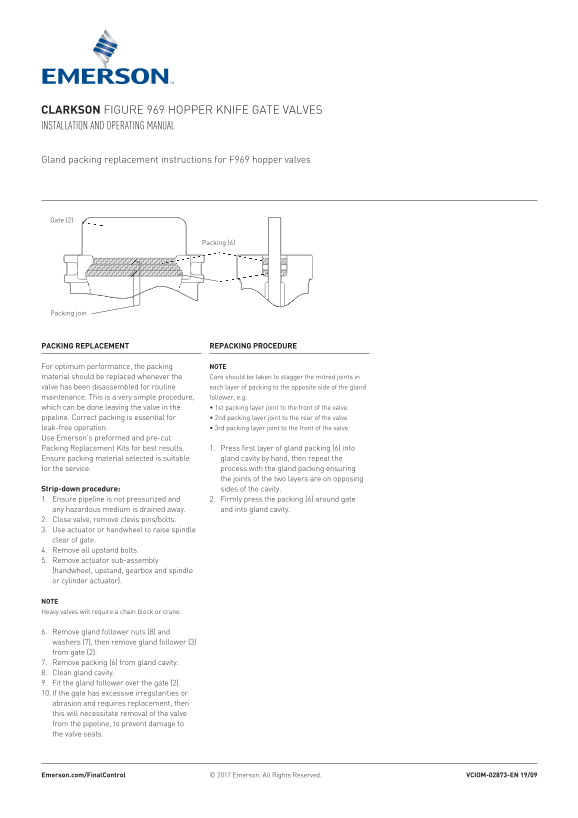
Gate (2)
Packing (6)
Packing join
PACKING REPLACEMENT REPACKING PROCEDURE
For optimum performance, the packing NOTE material should be replaced whenever the Care should be taken to stagger the mitred joints in valve has been disassembled for routine each layer of packing to the opposite side of the gland maintenance. This is a very simple procedure, follower, e.g: which can be done leaving the valve in the • 1st packing layer joint to the front of the valve. pipeline. Correct packing is essential for • 2nd packing layer joint to the rear of the valve. leak-free operation. • 3rd packing layer joint to the front of the valve. Use Emerson’s preformed and pre-cut Packing Replacement Kits for best results. 1. Press first layer of gland packing (6) into Ensure packing material selected is suitable gland cavity by hand, then repeat the for the service. process with the gland packing ensuring
the joints of the two layers are on opposing
Strip-down procedure: sides of the cavity. 1. Ensure pipeline is not pressurized and 2. Firmly press the packing (6) around gate any hazardous medium is drained away. and into gland cavity. 2. Close valve, remove clevis pins/bolts. 3. Use actuator or handwheel to raise spindle clear of gate. 4. Remove all upstand bolts. 5. Remove actuator sub-assembly (handwheel, upstand, gearbox and spindle or cylinder actuator).
NOTE Heavy valves will require a chain block or crane.
6. Remove gland follower nuts (8) and washers (7), then remove gland follower (3) from gate (2). 7. Remove packing (6) from gland cavity. 8. Clean gland cavity. 9. Fit the gland follower over the gate (2). 10. If the gate has excessive irregularities or abrasion and requires replacement, then this will necessitate removal of the valve from the pipeline, to prevent damage to the valve seats.
© 2017 Emerson. All Rights Reserved.Emerson.com/Final Control VCIOM-02873-EN 19/09
Page Summary Contents For EMERSON Manuals Figure 969 Hopper Knife Gate Valves Gland Packing Instr, Clarkson-EN
Manual Details
| Brand | Emerson |
|---|---|
| Pages | 2 |
| File Size | 548.74 KB |
| Published | June 05, 2026 |
Enter the captcha to get the download link:

Frequently Asked Questions
What is the first step before performing valve maintenance?
Ensure the pipeline is not pressurized, and drain any hazardous medium away.
How should I replace the gland packing to prevent leaks?
Stagger the mitred joints in each layer by having them face opposite sides of the gland cavity (e.g., 1st front, 2nd rear, 3rd front).
What should I do if the gate has excessive damage or abrasion?
If replacement is necessary due to excessive irregularities, you must remove the valve from the pipeline to prevent damaging the valve seats.
What warning applies when tightening gland packing during reassembly?
Caution: Do NOT over tighten the gland packing, as this will cause excessive resistance to gate movement.