Dell U2520DR Monitor Teardown Instructions
Summary
Disassembly procedures manual for Dell U2520DRB monitor. Illustrated step-by-step instructions for removing stand, rear cover, USB board, sensor board, control board, LVDS cable, backlight wires, and panel components. Specifies screw types and torque values. Targets certified repair technicians and service engineers performing monitor repairs or component replacements.
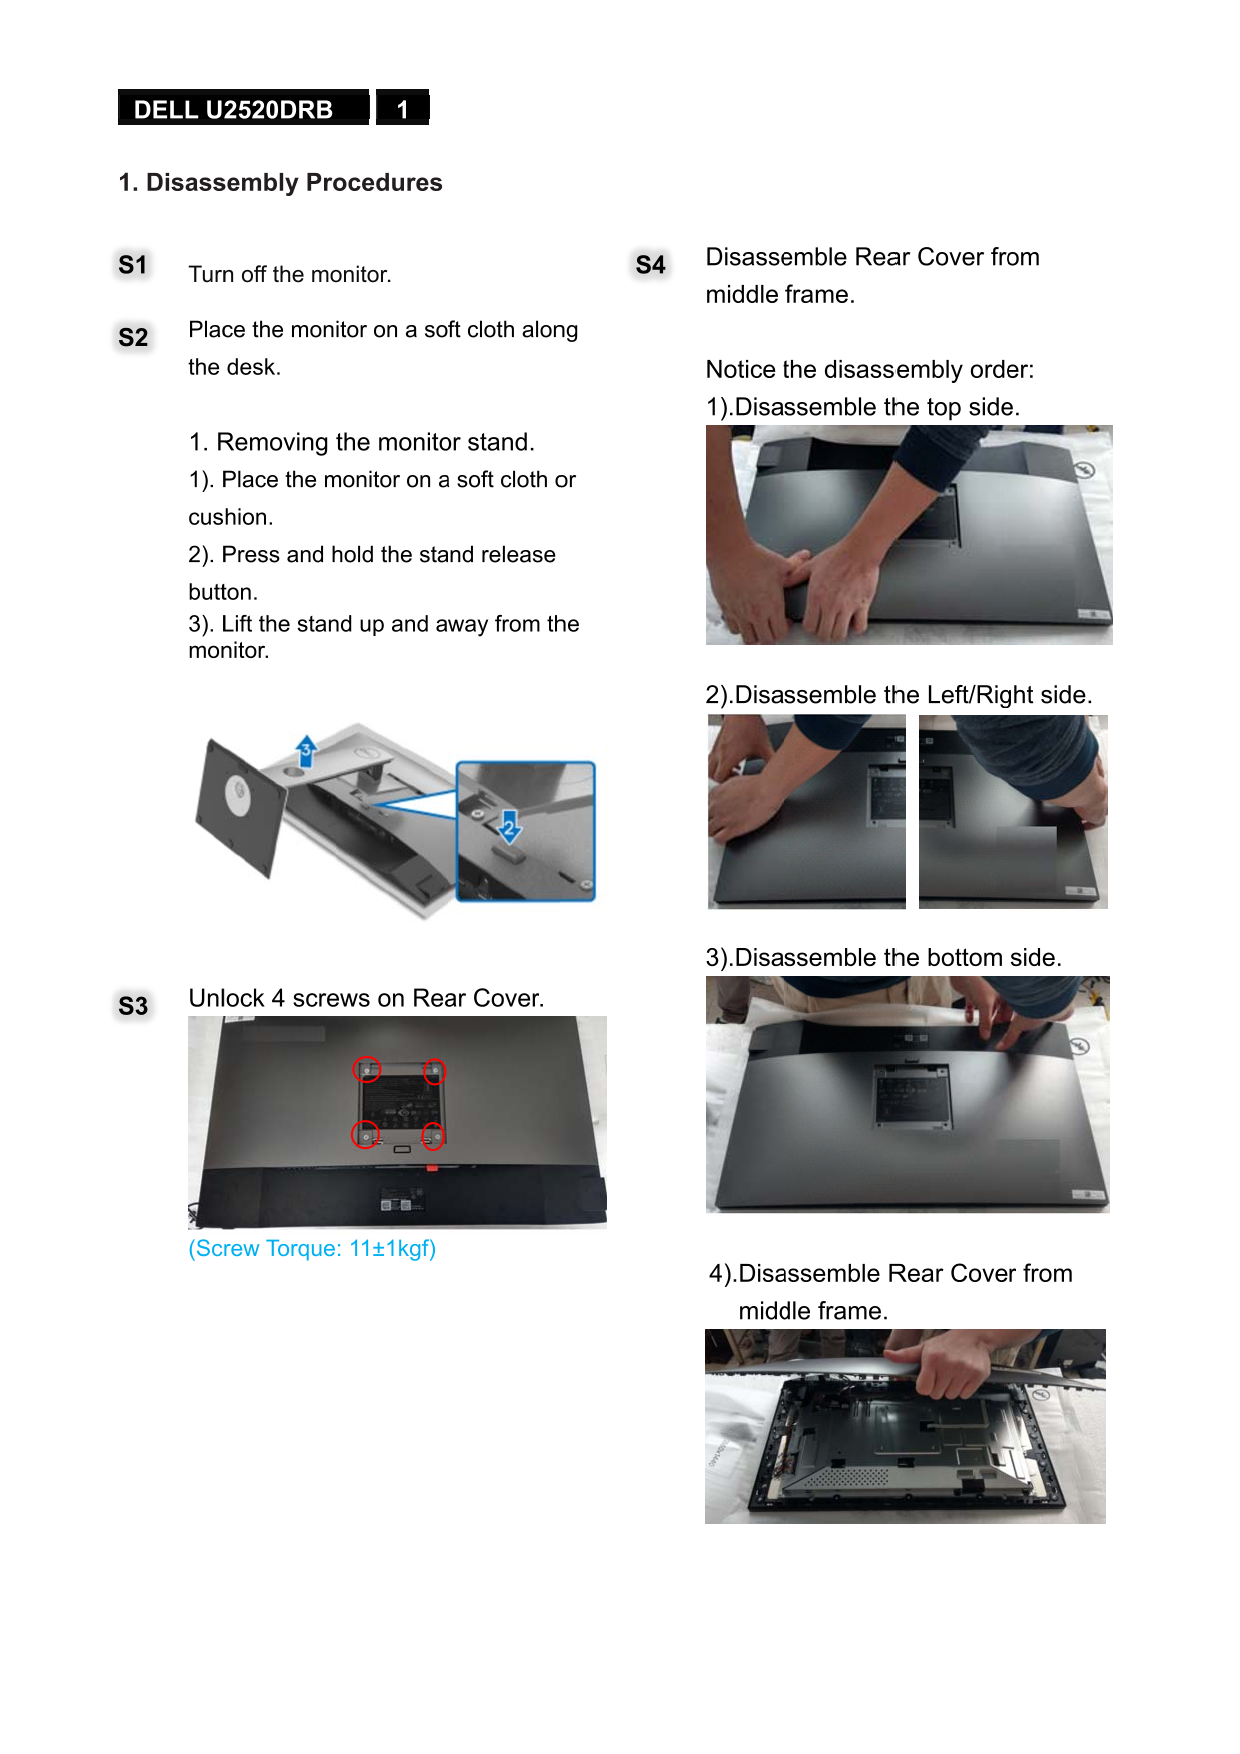
Page 1 Text Content
DELL U2 520DRB
1. Disass embly Pro cedures
Disasse mble Rea r Cover fro
S1 Turn S4
off the mo nitor.
middle frame.
e the mon itor on a so ft cloth alon
S2 Plac
the desk. Notice t he disasse mbly orde r:
1).Disa ssemble th e top side
1. R emoving the monito r stand. 1). P lace the m onitor on a soft cloth o cus hion. 2). P ress and h old the sta nd release butt on. 3). L ift the stan d up and a way from th mon itor.
2).Disa ssemble th e Left/Rig ht side.
3).Disa ssemble th e bottom side.
ock 4 scre ws on Rea r Cover.
S3 Unl
(Sc rew Torque : 11±1kgf)
4).Disa ssemble R ear Cove r from midd le frame.
Page Summary Contents For Dell U2520DR Monitor Teardown Instructions
Manual Details
| Brand | Dell |
|---|---|
| Pages | 7 |
| File Size | 860.61 KB |
| Published | June 24, 2026 |
Enter the captcha to get the download link:

Frequently Asked Questions
How do I remove the monitor stand?
Place the monitor on a soft cloth, press and hold the stand release button, and lift the stand up and away.
What tools are needed for disassembly?
You need a screwdriver, scraper bar, penknife, and a soldering iron with an absorber.
What hazardous materials must be handled separately?
Mercury containing components, batteries, and electrolyte capacitors must be disposed of separately.
How do I remove the rear cover?
Turn off the monitor, unlock 4 screws on the rear cover (11±1kgf torque), and remove it from the middle frame.
What are the specific screw torque requirements?
Rear cover screws require 11±1kgf, while middle frame screws require 3.55~4.0kgf.