Dell SE2222H Monitor Teardown Instructions
Summary
This comprehensive technical manual provides expert disassembly procedures for the DELL SE2222H monitor display unit. Designed for professional technicians and electronics recyclers, it details step-by-step guides on safely accessing internal components, including PCBs, power boards, and various electrical modules. The guide ensures proper component handling and adherence to international WEEE recycling standards, making it an essential resource for repairs, maintenance, or end-of-life disposal management.
Page 1 Text Content
DELL SE2222H
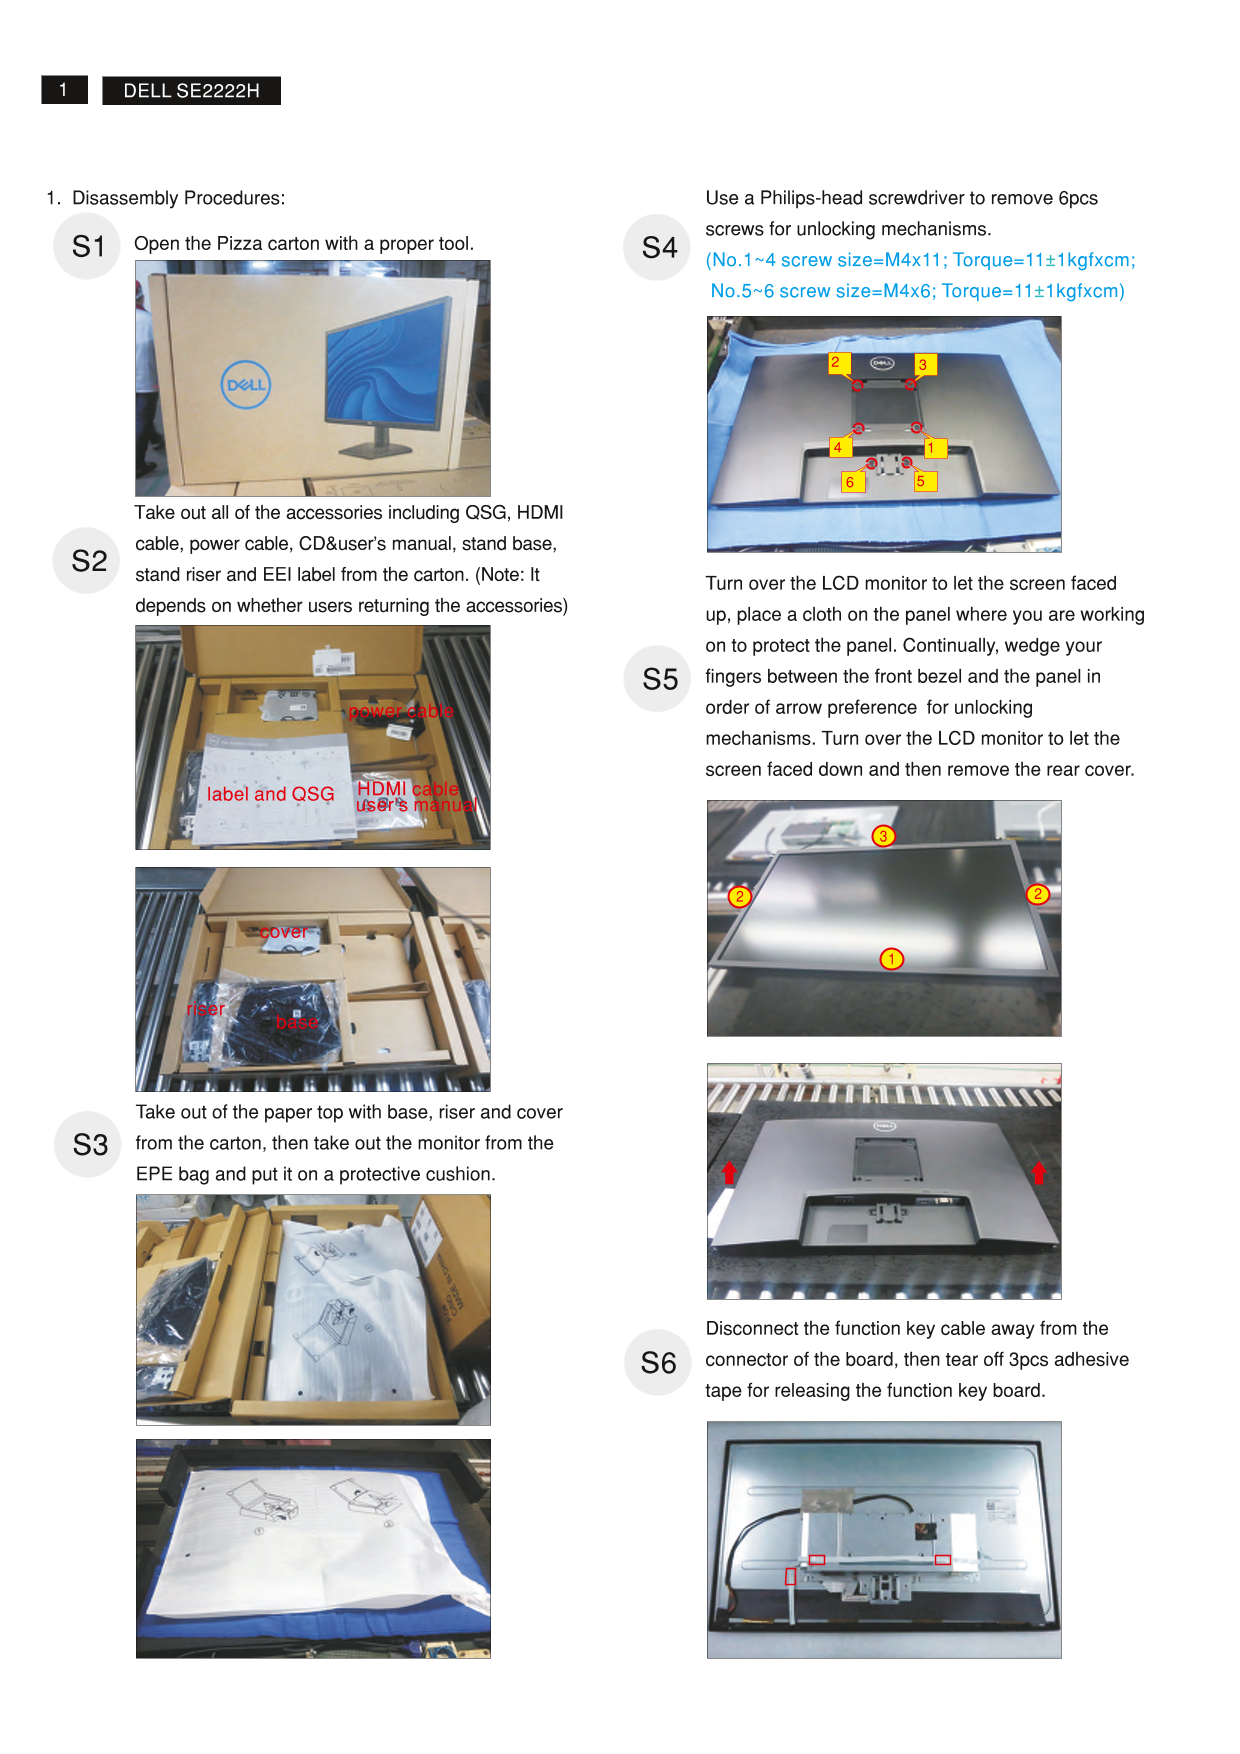
1. Disassembly Procedures: Use a Philips-head screwdriver to remove 6pcs screws for unlocking mechanisms.
Open the Pizza carton with a proper tool.
S4S1 (No.1~4 screw size=M4x11; Torque=11 1kgfxcm; No.5~6 screw size=M4x6; Torque=11 1kgfxcm)
Take out all of the QSG,accessories including HDMI
cable, power cable, CD&user’s manual, stand base, S2 stand riser and EEI label from the carton. (Note: It
Turn over the LCD monitor to let the screen faced
depends on whether users returning the accessories)
up, place a cloth on the panel where you are working on to protect the panel. Continually, wedge your S5 fingers between the front bezel and the panel in power cable order of arrow preference for unlocking mechanisms. Turn over the LCD monitor to let the screen faced down and then remove the rear cover.
HDMI cable
label and QSG
user’s manual
cover
riser
Take out of the paper top with base, riser and cover S3 from the carton, then take out the monitor from the EPE bag and put it on a protective cushion.
Disconnect the function key cable away from the S6 connector of the board, then tear off 3pcs adhesive tape for releasing the function key board.
Page Summary Contents For Dell SE2222H Monitor Teardown Instructions
Manual Details
| Brand | Dell |
|---|---|
| Pages | 5 |
| File Size | 1.26 MB |
| Published | June 23, 2026 |
Enter the captcha to get the download link:

Frequently Asked Questions
What tools are required for basic disassembly?
A Philips-head screwdriver, penknife, and a soldering iron with an absorber are listed as necessary tools.
How should I handle the screen panels during repair?
Protect the panel by placing a cloth on the working surface. When removing covers, turn the LCD monitor to keep the screen facing down.
Do I need special care when disconnecting cables or components?
When removing bulk capacitors, cut glue carefully without touching the PCB or capacitor. Always disconnect function key and panel lamp cables away from their connectors according to procedure.