Dell S2721Q Monitor Teardown Instructions
Summary
The Dell S2721QB is a consumer monitor with detailed disassembly procedures. This service document covers step-by-step disassembly including stand removal, rear cover removal, speaker disassembly, middle frame separation, main shield removal, control board disassembly, interface board removal, and electrolytic capacitor removal with specific torque specifications for each screw type. Target users include certified Dell service technicians and repair professionals performing monitor repair or component replacement.
Page 1 Text Content
1 DELL S2721QB
1. Disassembly Procedures
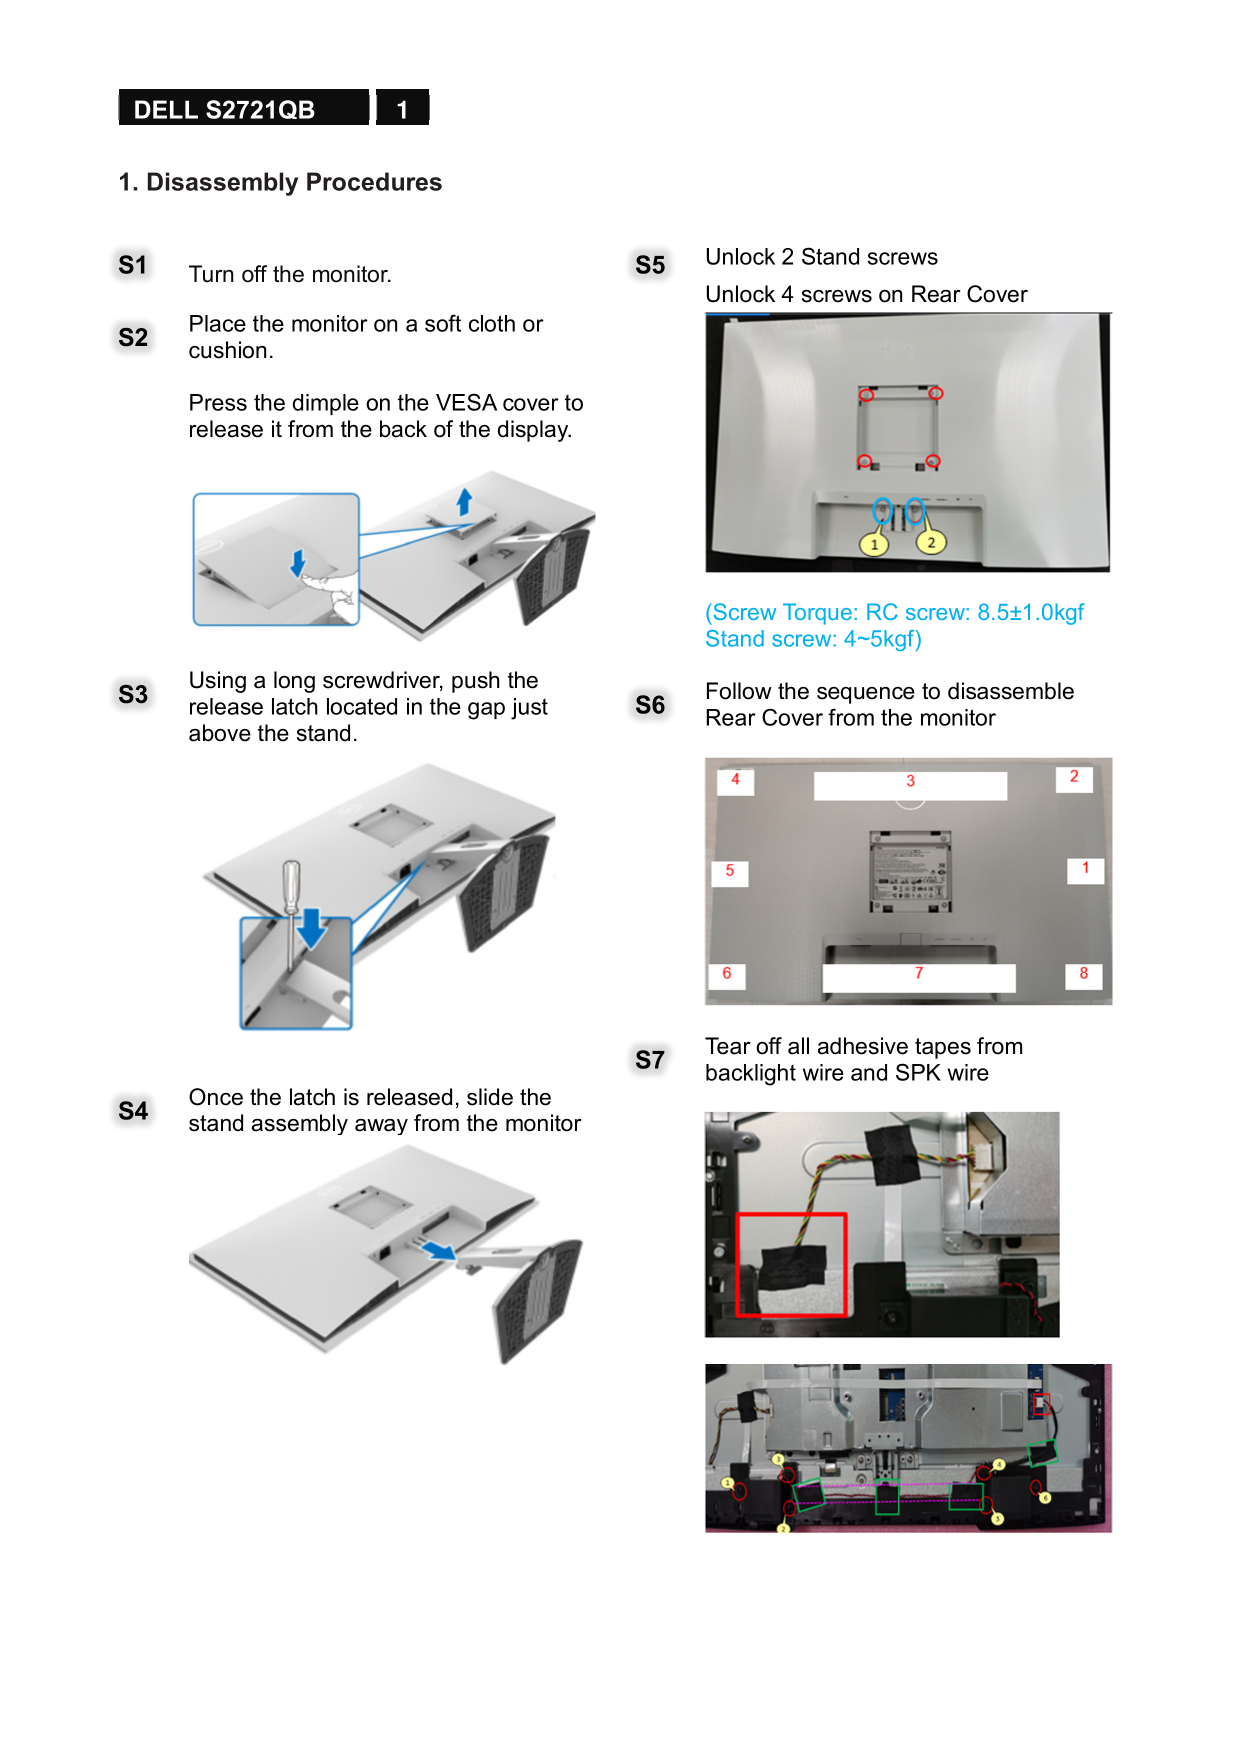
S1 Turn off the monitor. S5 Unlock 2 Stand screws
Unlock 4 screws on Rear Cover
Place the monitor on a soft cloth or S2 cushion.
Press the dimple on the VESA cover to release it from the back of the display.
(Screw Torque: RC screw: 8.5±1.0kgf Stand screw: 4~5kgf)
Using a long screwdriver, push the
S3 Follow the sequence to disassemble release latch located in the gap just S6 Rear Cover from the monitor
above the stand.
Tear off all adhesive tapes from S7 backlight wire and SPK wire
Once the latch is released, slide the S4 stand assembly away from the monitor
Page Summary Contents For Dell S2721Q Monitor Teardown Instructions
Manual Details
| Brand | Dell |
|---|---|
| Pages | 6 |
| File Size | 3.11 MB |
| Published | June 24, 2026 |
Enter the captcha to get the download link:

Frequently Asked Questions
What tools are required to disassemble the monitor?
Use a screwdriver, scraper bar, penknife, and a soldering iron with absorber.
How do you disassemble the rear cover and stand?
Turn off the monitor, unlock the rear cover and stand screws, press the VESA cover dimple, and slide the stand away.
What screw torque is specified for the stand assembly?
The RC screw torque should be 8.5±1.0kgf and the stand screw torque should be 4~5kgf.
What hazardous components must be disposed of separately?
Electrolyte capacitors (height >25mm, diameter >25mm), PCBs, mercury components, and batteries.