Dell S2421HS Monitor Teardown Instructions
Summary
Disassembly procedures manual for Dell S2421HS/HSX monitor. Step-by-step instructions with diagrams for removing rear cover, middle bezel, panel module, bracket chassis, function key board, and main board. Specifies screw sizes and torque values. Targets certified repair technicians and service center personnel performing monitor repairs or component replacement.
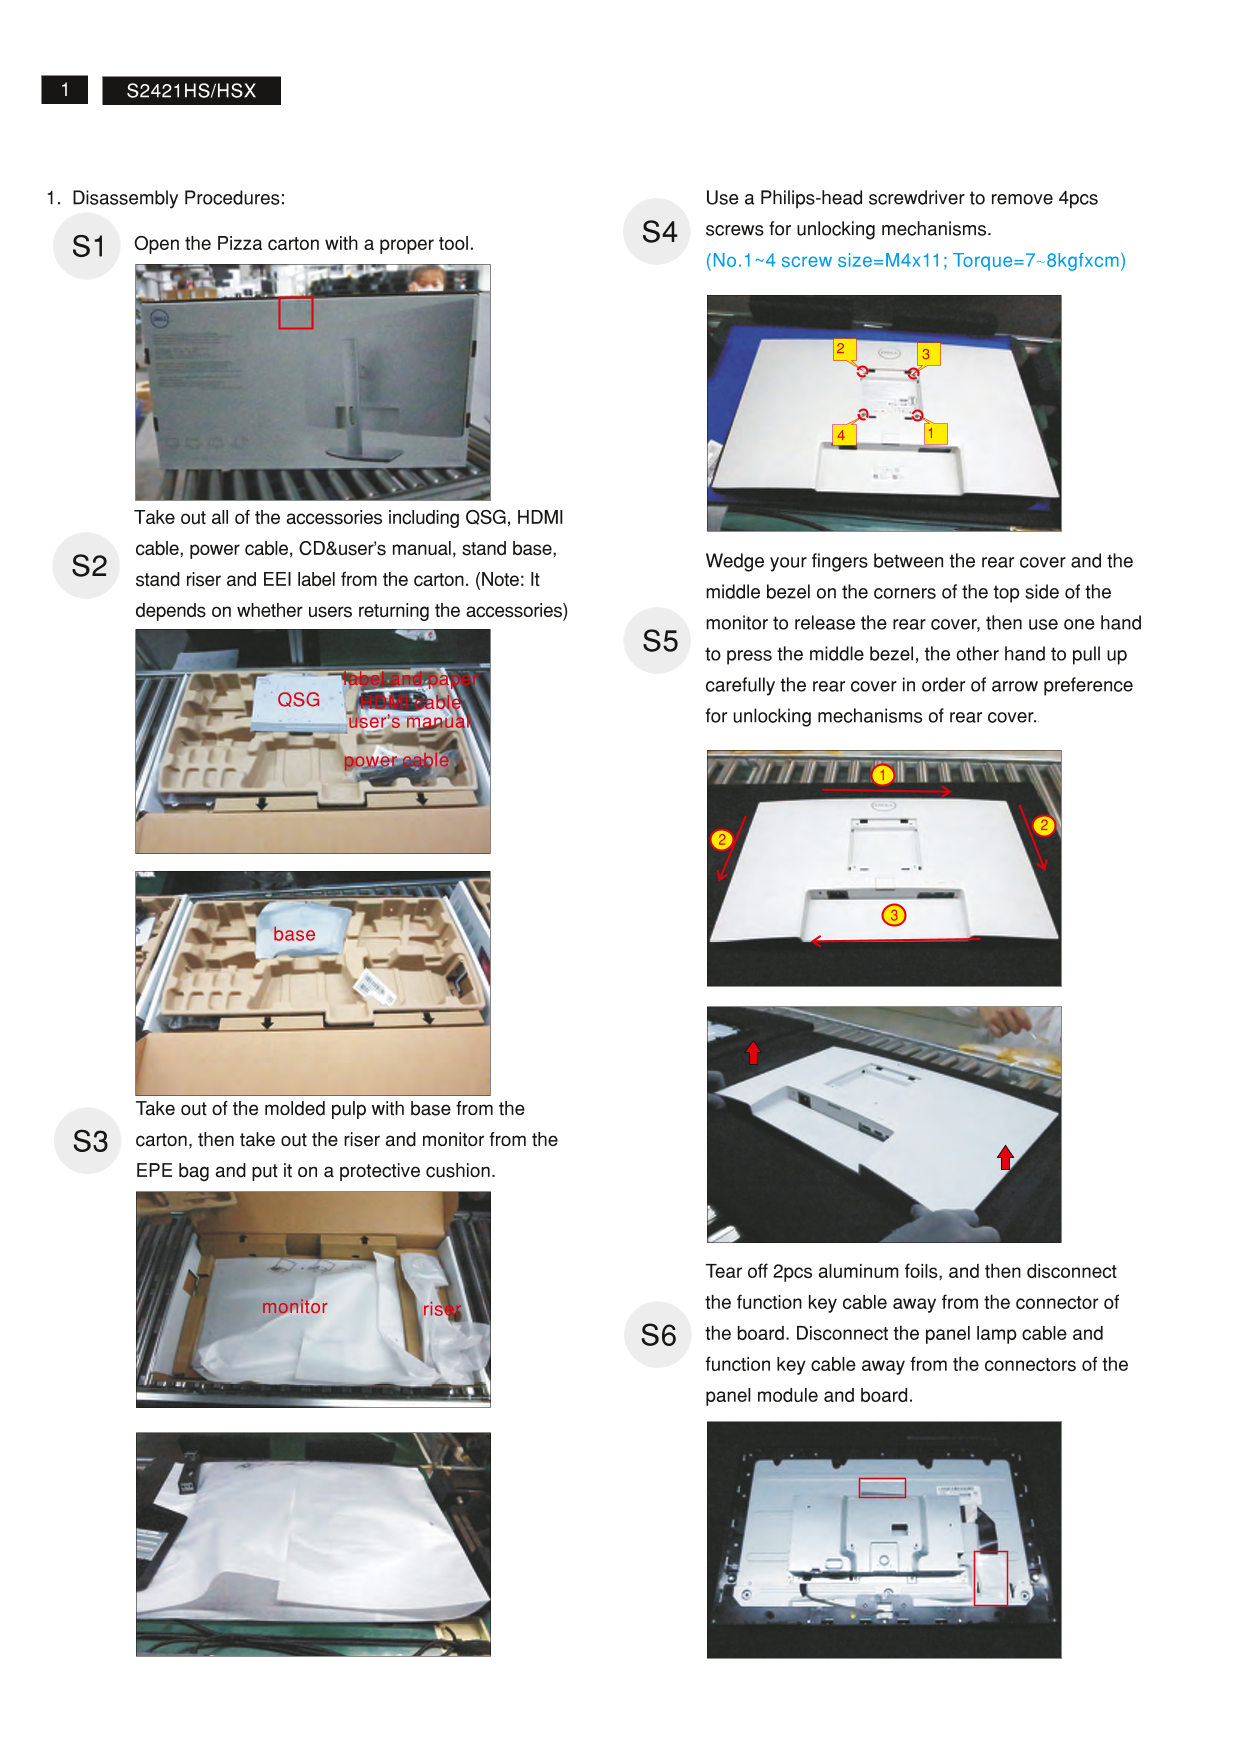
Page 1 Text Content
S2421HS/HSX
1. Disassembly Procedures: Use a Philips-head screwdriver to remove 4pcs S4S1 screws for unlocking mechanisms.
Open the Pizza carton with a proper tool.
(No.1~4 screw size=M4x11; Torque=7 8kgfxcm)~
Take out all of the QSG,accessories including HDMI
cable, power cable, CD&user’s manual, stand base,
Wedge your fingers between the rear cover and the
S2 stand riser and EEI label from the carton. (Note: It
middle bezel on the corners of the top side of the
depends on whether users returning the accessories)
monitor to release the rear cover, then use one hand S5 to press the middle bezel, the other hand to pull up
label and paper
carefully the rear cover in order of arrow preference
QSG HDMI cable
for unlocking mechanisms of rear cover..
user’s manual
power cable
Take out of the from the molded pulp with base
S3 carton, then take out the riser and monitor from the EPE bag and put it on a protective cushion.
Tear off 2pcs aluminum foils, and then disconnect monitor the function key cable away from the connector of
riser
S6 the board. Disconnect the panel lamp cable and function key cable away from the connectors of the panel module and board.
Page Summary Contents For Dell S2421HS Monitor Teardown Instructions
Manual Details
| Brand | Dell |
|---|---|
| Pages | 5 |
| File Size | 1.40 MB |
| Published | June 24, 2026 |
Enter the captcha to get the download link:

Frequently Asked Questions
What tools are required for disassembly?
A Phillips-head screwdriver (#1 and #2), a penknife, and a soldering iron with an absorber.
How do I remove the rear cover?
Use a Phillips-head screwdriver to unlock mechanisms, then wedge fingers between the rear cover and middle bezel to pull it up.
What are the torque specifications for the screws?
Rear cover screws require 7-8 kgfxcm; middle bezel screws require 3-4 kgfxcm (M3x4) and 1±0.2 kgfxcm (M2x3.3).
Which components need separate disposal?
Electrolyte capacitors (height > 25mm, diameter > 25mm) and printed circuit boards (surface > 10 square cm).