Dell P2418D Monitor Teardown Instructions
Summary
Mechanical disassembly instructions for a Dell monitor with precise tool specifications and torque settings. Step-by-step procedures for removing hinge, base, rear cover, FFC/LVDS cables, mainboard, power board, capacitors, and USB board. Includes WEEE compliance material disposal information for PCBs, capacitors, and batteries. Targets manufacturing technicians and recycling operators for monitor disassembly.
Page 1 Text Content
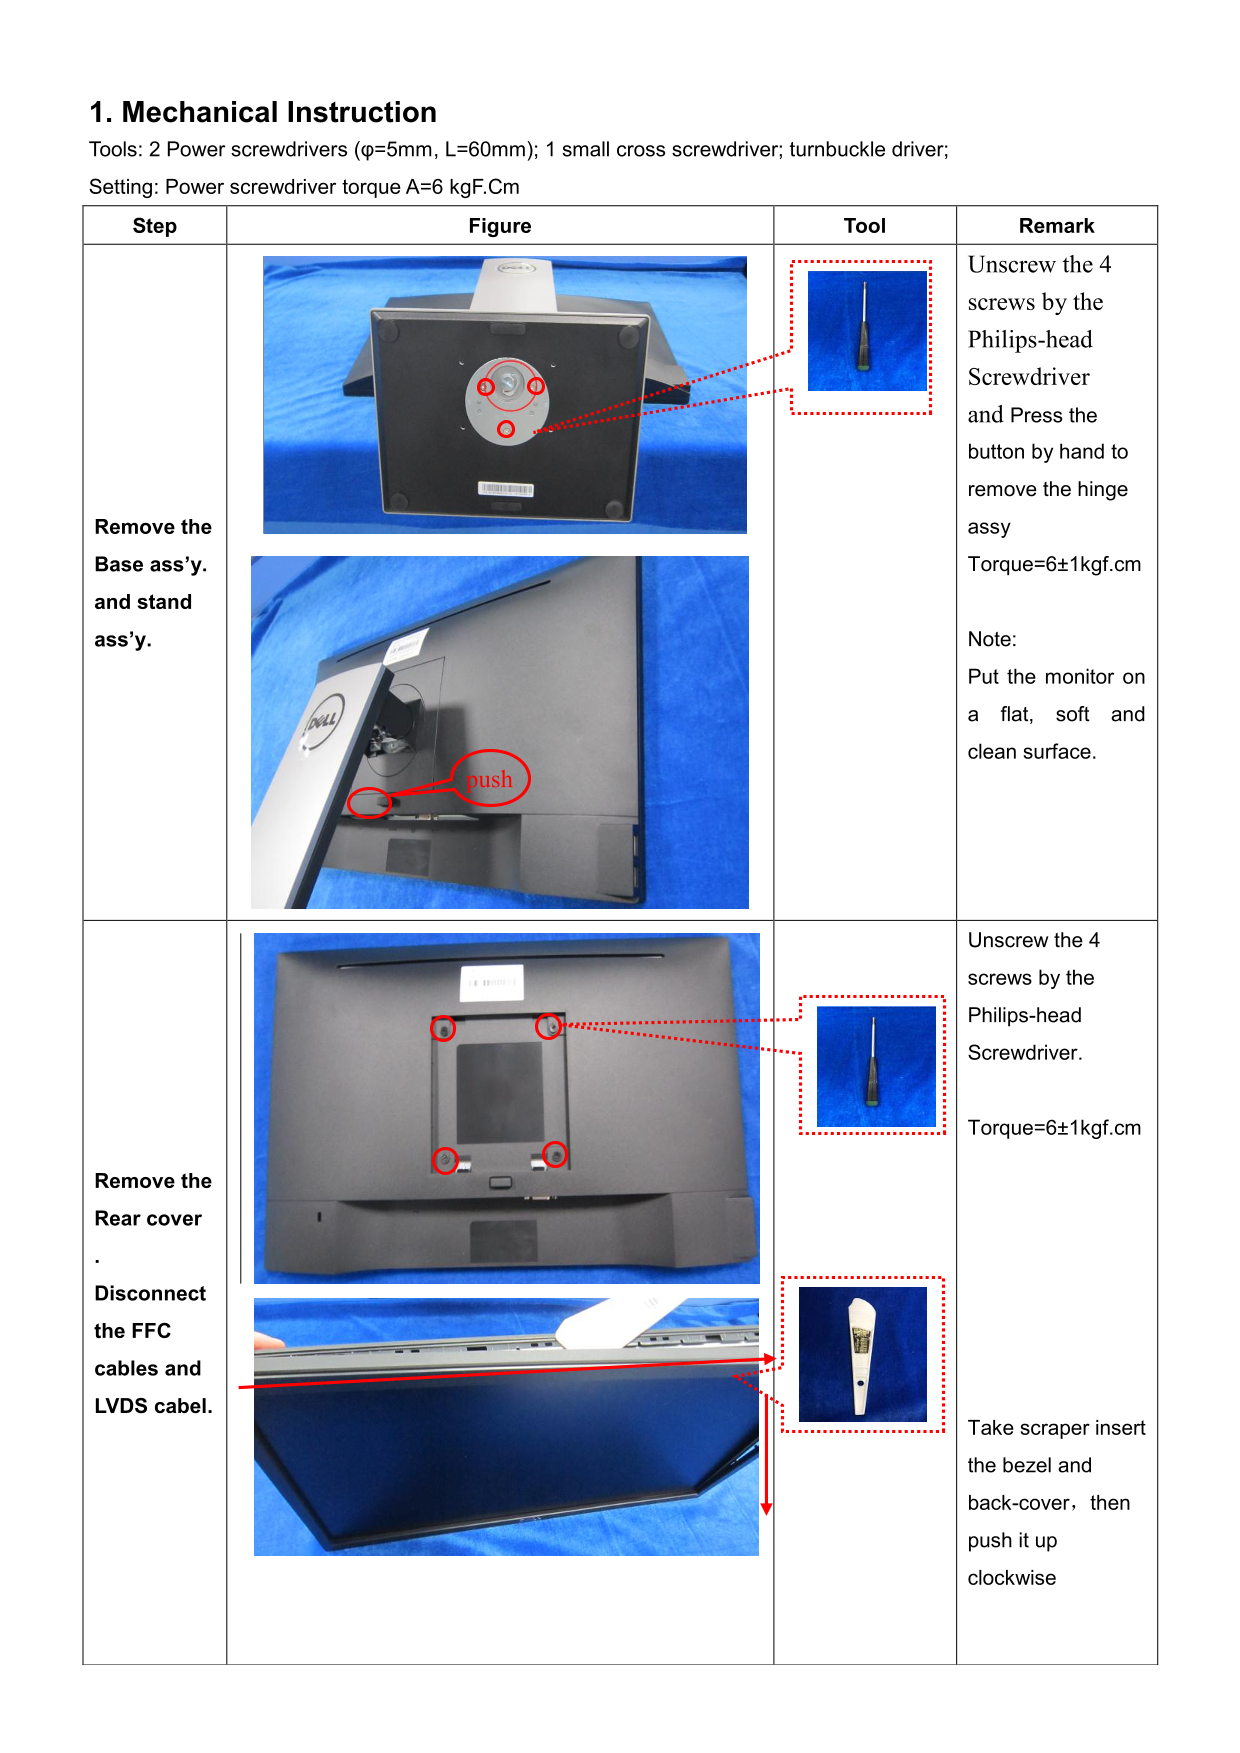
1. Mechanical Instruction Tools: 2 Power screwdrivers (φ=5mm, L=60mm); 1 small cross screwdriver; turnbuckle driver; Setting: Power screwdriver torque A=6 kg F.Cm Step Figure Tool Remark
Unscrew the 4
screws by the Philips-head Screwdriver and Press the button by hand to remove the hinge Remove the assy Base ass’y. Torque=6±1kgf.cm
and stand
ass’y. Note:
Put the monitor on
a flat, soft and
clean surface.
Unscrew the 4
screws by the
Philips-head
Screwdriver.
Torque=6±1kgf.cm
Remove the
Rear cover
Disconnect
the FFC
cables and
LVDS cabel.
Take scraper insert
the bezel and
back-cover,then push it up
clockwise
Page Summary Contents For Dell P2418D Monitor Teardown Instructions
Manual Details
| Brand | Dell |
|---|---|
| Pages | 6 |
| File Size | 946.87 KB |
| Published | June 24, 2026 |
Enter the captcha to get the download link:

Frequently Asked Questions
What tools are needed for disassembly?
Use a Phillips-head screwdriver, hexagonal screwdriver, penknife, soldering iron, and absorber.
What is the recommended torque for screws?
Set the power screwdriver torque to 6 kgF.Cm with a tolerance of ±1 kgF.Cm.
How should the monitor be handled during setup?
Place the monitor on a flat, soft, and clean surface.
What hazardous components require separate disposal?
Electrolyte capacitors, PCBs, and mercury-containing parts must be disposed of separately.