Dell Monitor C6522QT Teardown Instructions
Summary
This disassembly guide provides teardown procedures for the Dell C6522QT 65-inch interactive touch monitor. It covers complete disassembly from unpacking through component removal, including handles, rear cover, PC box, main board, speakers, front bezels, LCD panel, power board, driver board, touch board, and T-Con board. Each step specifies screw quantities and torque requirements. Intended for qualified service technicians repairing the C6522QT interactive display.
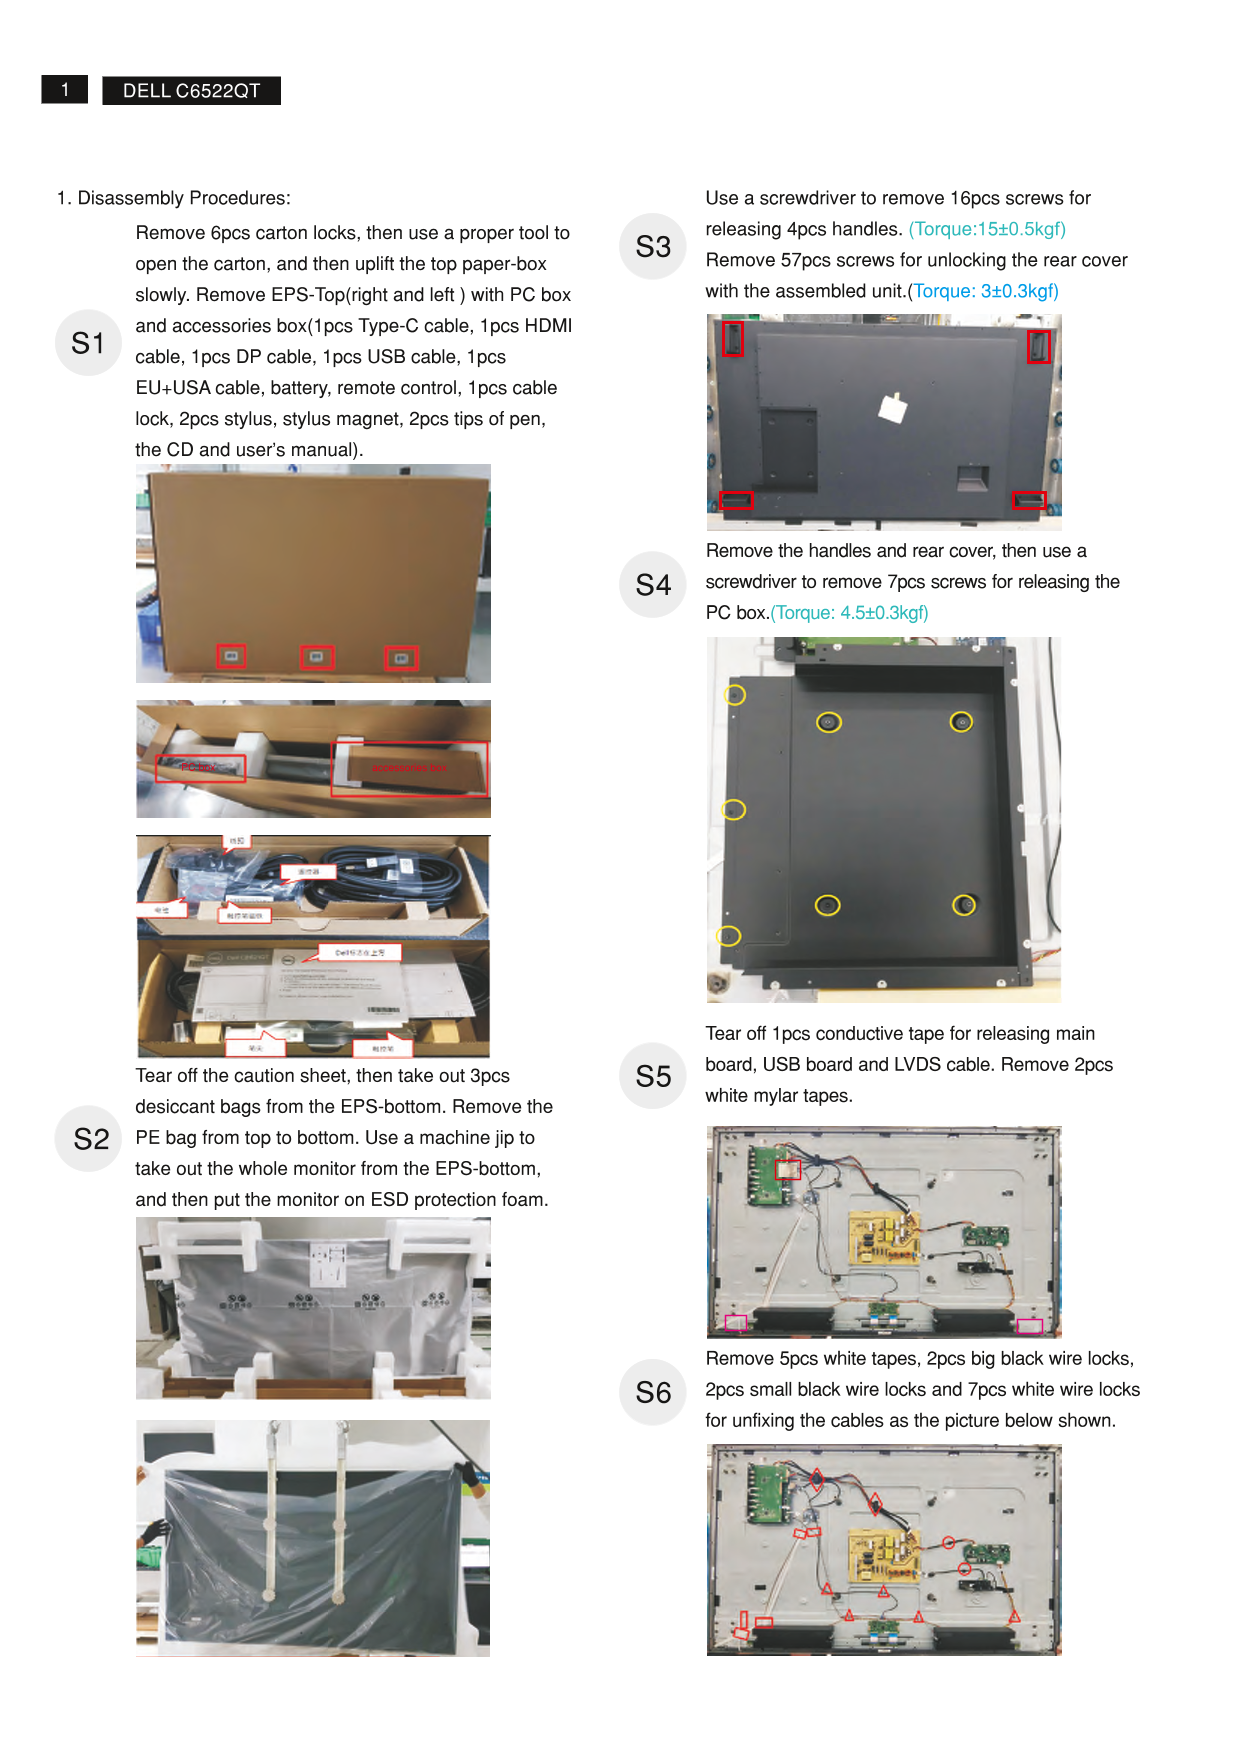
Page 1 Text Content
DELL C6522QT
1. Disassembly Procedures: Use a screwdriver to remove 16pcs screws for
Remove 6pcs carton locks, then use a proper tool to releasing 4pcs (Torque:15±0.5kgf) handles.
S3 open the carton, and then uplift the top paper-box Remove 57pcs screws for unlocking the rear cover slowly. Remove EPS-Top(right and left ) with PC box with the assembled unit.( Torque: 3±0.3kgf)
and accessories box(1pcs Type-C cable, 1pcs HDMI S1 cable, 1pcs DP cable, 1pcs USB cable, 1pcs EU+USA cable, battery, remote control, 1pcs cable lock, 2pcs stylus, stylus magnet, 2pcs tips of pen, the CD and user’s manual).
Remove the handles and rear cover, then use a S4 screwdriver to remove 7pcs screws for releasing the PC box.(Torque: 4.5±0.3kgf)
PC box accessories box
Tear off 1pcs conductive tape for releasing main board, USB board and LVDS cable. Remove 2pcs
Tear off the caution sheet, then take out 3pcs S5
white mylar tapes.
desiccant bags from the EPS-bottom. Remove the S2 PE bag from top to bottom. Use a machine jip to take out the whole monitor from the EPS-bottom, and then put the monitor on ESD protection foam.
Remove 5pcs white tapes, 2pcs big black wire locks, S6 2pcs small black wire locks and 7pcs white wire locks for unfixing the cables as the picture below shown.
Page Summary Contents For Dell Monitor C6522QT Teardown Instructions
Manual Details
| Brand | Dell |
|---|---|
| Pages | 6 |
| File Size | 1.55 MB |
| Published | June 23, 2026 |
Enter the captcha to get the download link:

Frequently Asked Questions
What tools are required for disassembly?
Use #1 and #2 Phillips screwdrivers, a penknife, and a soldering iron with absorber.
What materials must be disposed of separately?
Electrolyte capacitors, PCBs over 10 sq cm, and external electric cables require separate disposal.
How do you remove the rear cover?
Remove 6 carton locks and 57 screws, then slowly uplift the top paper-box.
What is the torque for the rear cover screws?
The screws for the rear cover require a torque of 3±0.3kgf.