Dell E2420H Monitor Teardown Instructions
Summary
This teardown instruction document for the Dell E2420H monitor provides detailed step-by-step disassembly procedures for service and recycling purposes. It covers removing rear cover screws and stand, separating front and rear covers, removing aluminum foil and acetate cloth tape, disconnecting light bar and keypad cables, removing flat flexible cables (FFC), extracting PCBA1 and PCBA2 circuit boards, separating the keypad, and detaching the front cover from the LCD panel. Each step includes specific screw torque requirements and safety precautions. It targets Dell manufacturing technicians, repair center staff, and recycling facility operators responsible for monitor disassembly.
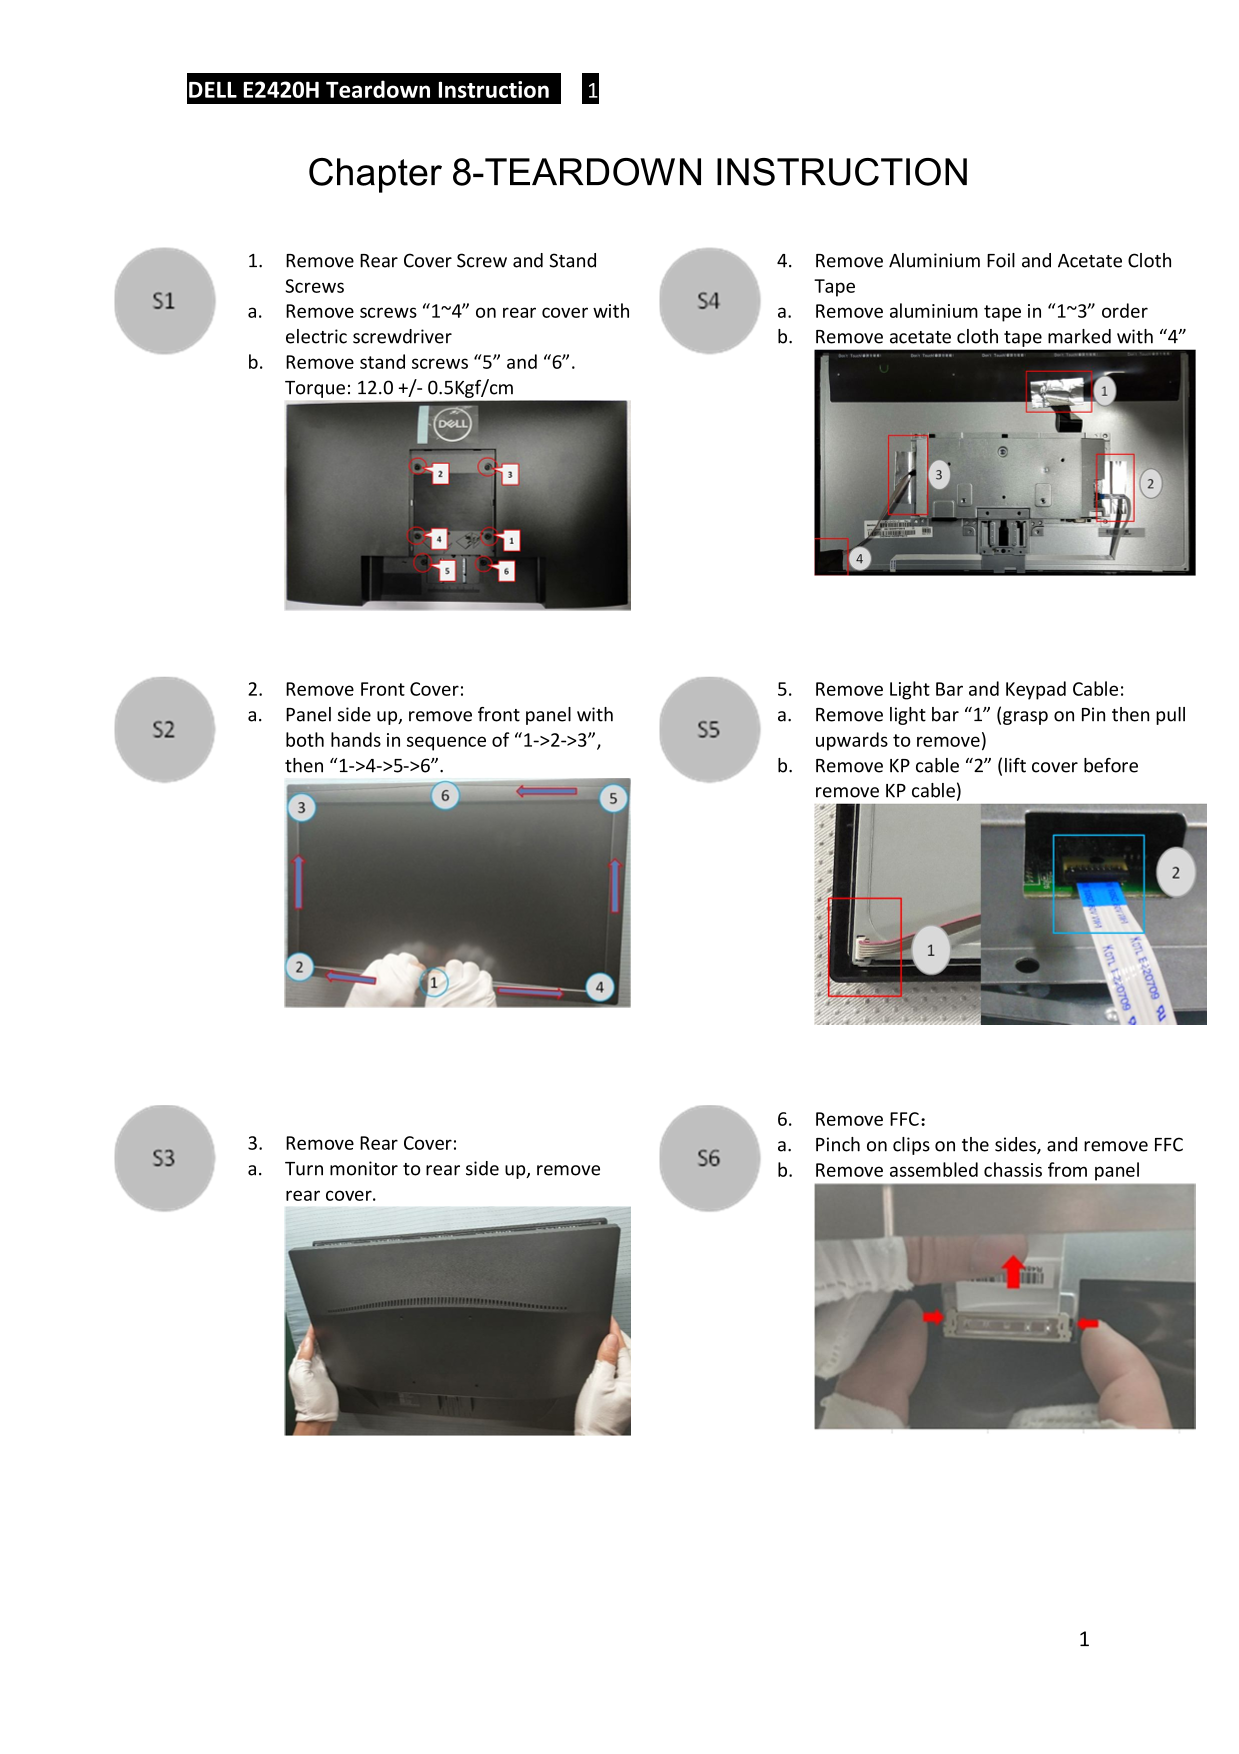
Page 1 Text Content
DELL E2420H Teardown Instruction 1
Chapter 8-TEARDOWN INSTRUCTION
1. Remove Rear Cover Screw and Stand 4. Remove Aluminium Foil and Acetate Cloth Screws Tape a. Remove screws “1~4” on rear cover with a. Remove aluminium tape in “1~3” order electric screwdriver b. Remove acetate cloth tape marked with “4” b. Remove stand screws “5” and “6”. Torque: 12.0 +/- 0.5Kgf/cm
2. Remove Front Cover: 5. Remove Light Bar and Keypad Cable: a. Panel side up, remove front panel with a. Remove light bar “1” (grasp on Pin then pull both hands in sequence of “1->2->3”, upwards to remove) then “1->4->5->6”. b. Remove KP cable “2” (lift cover before
remove KP cable)
6. Remove FFC:
3. Remove Rear Cover: a. Pinch on clips on the sides, and remove FFC a. Turn monitor to rear side up, remove b. Remove assembled chassis from panel rear cover.
Page Summary Contents For Dell E2420H Monitor Teardown Instructions
Manual Details
| Brand | Dell |
|---|---|
| Pages | 4 |
| File Size | 788.27 KB |
| Published | June 26, 2026 |
Enter the captcha to get the download link:

Frequently Asked Questions
What materials require separate disposal?
Capacitors, printed circuit boards, and electrolyte capacitors must be disposed of separately.
Are there specific tools needed for disassembly?
Tools include Philip head screwdrivers (Φ5 mm & Φ3 mm), Hexagonal screwdriver, soldering iron, and a knife.
How do I remove the main display panel?
You must pinch the side clips and follow the sequence: turn the monitor rear-side up to remove the rear cover, then remove it from the panel.
What torque settings are required for screws?
VGA connectivity requires a hexagonal screw; general screw removal uses various torques (e.g., 12.0 +/- 0.5Kgf/cm).
Which components contain hazardous materials?
LCD displays (>100 cm2), printed circuit boards, and electrolyte capacitors are mentioned in material disposal guidelines.