Dell E2220H Monitor Teardown Instructions
Summary
Dell E2220H Monitor Teardown Instruction manual providing detailed disassembly procedures. The guide includes step-by-step instructions for removing rear cover, stand, front bezel, PCBA boards, light bar, keypad, FFC cables, and panel separation with specific torque specifications for screws. Target users are repair technicians and service engineers performing monitor component replacement or recycling operations.
Page 1 Text Content
DELL E2220H Teardown Instruction 1
Chapter 8-TEARDOWN INSTRUCTION
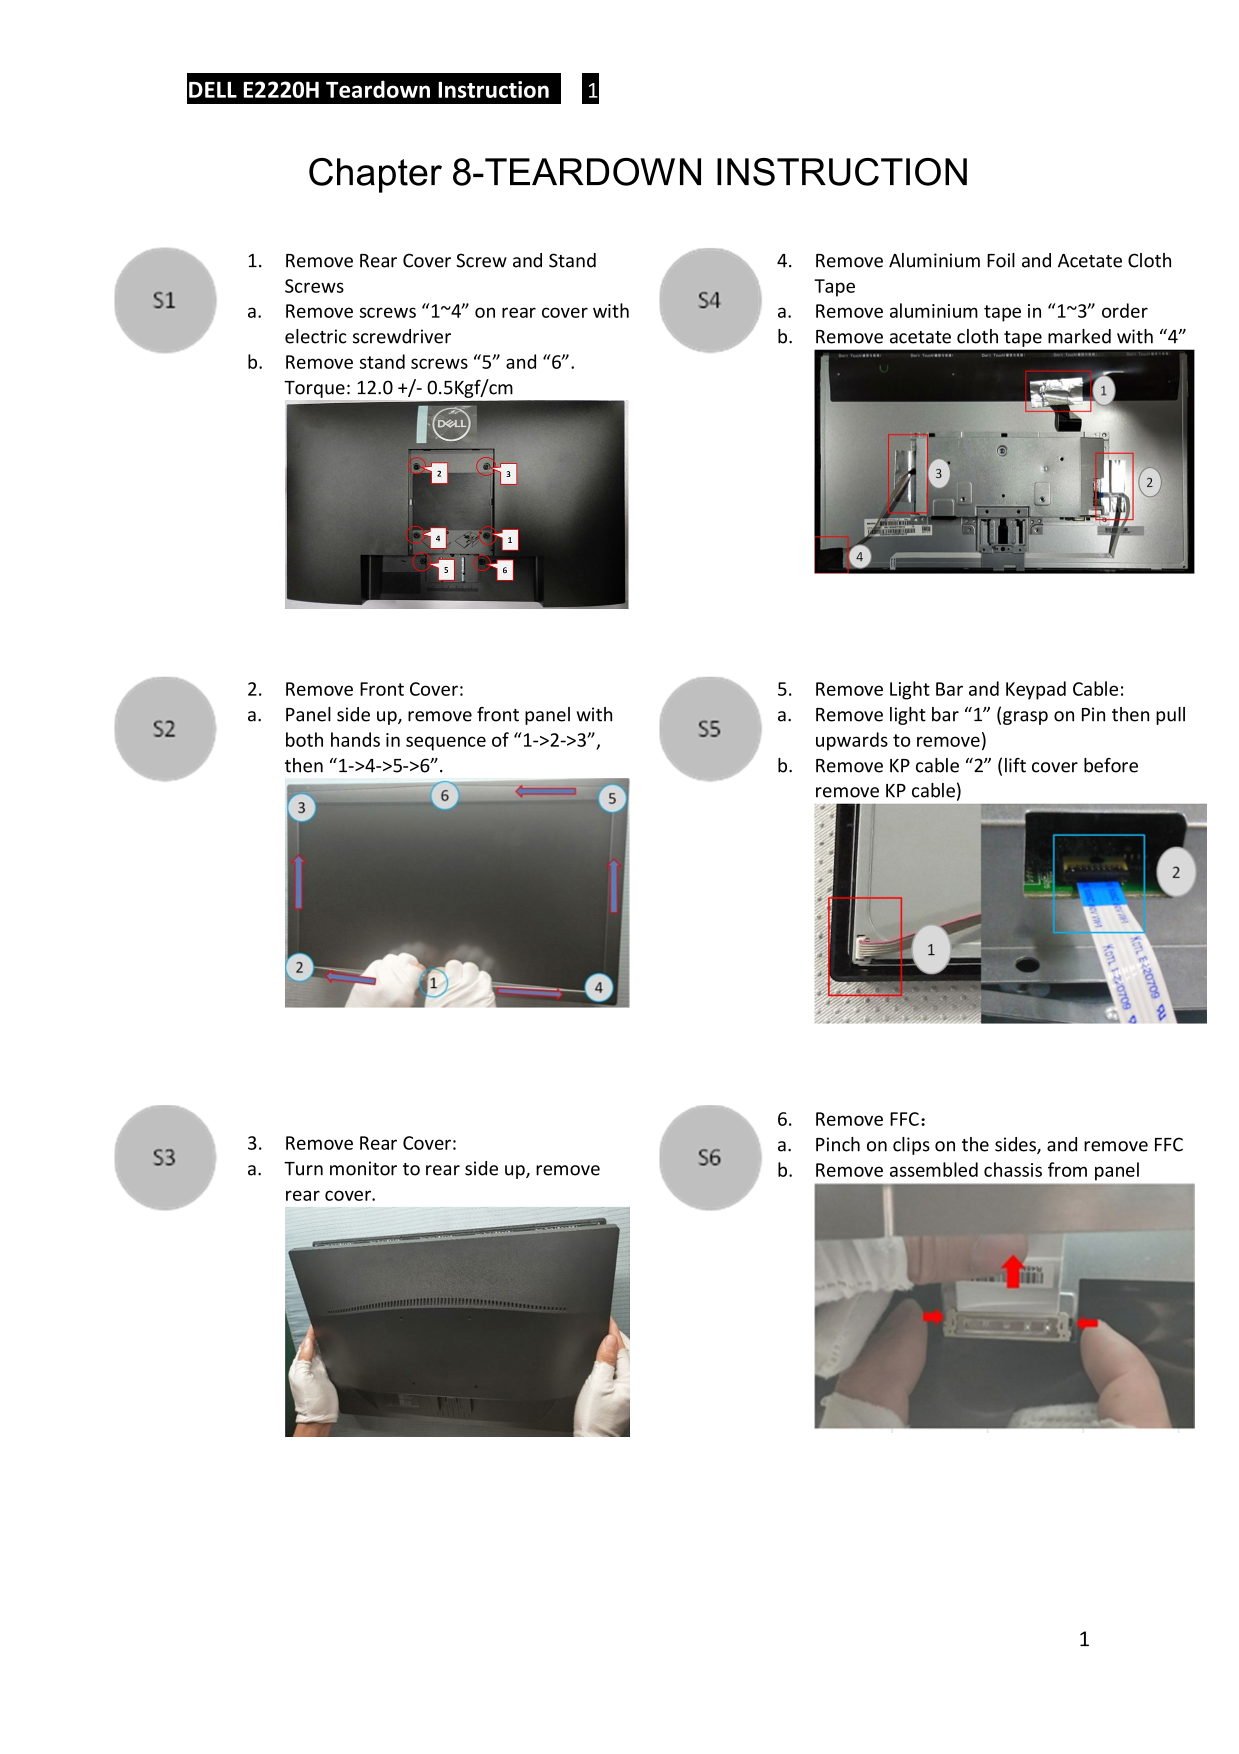
1. Remove Rear Cover Screw and Stand 4. Remove Aluminium Foil and Acetate Cloth Screws Tape a. Remove screws “1~4” on rear cover with a. Remove aluminium tape in “1~3” order electric screwdriver b. Remove acetate cloth tape marked with “4” b. Remove stand screws “5” and “6”. Torque: 12.0 +/- 0.5Kgf/cm
2. Remove Front Cover: 5. Remove Light Bar and Keypad Cable: a. Panel side up, remove front panel with a. Remove light bar “1” (grasp on Pin then pull both hands in sequence of “1->2->3”, upwards to remove) then “1->4->5->6”. b. Remove KP cable “2” (lift cover before
remove KP cable)
6. Remove FFC:
3. Remove Rear Cover: a. Pinch on clips on the sides, and remove FFC a. Turn monitor to rear side up, remove b. Remove assembled chassis from panel rear cover.
Page Summary Contents For Dell E2220H Monitor Teardown Instructions
Manual Details
| Brand | Dell |
|---|---|
| Pages | 4 |
| File Size | 753.95 KB |
| Published | June 25, 2026 |
Enter the captcha to get the download link:

Frequently Asked Questions
What materials require separate disposal from other WEEE waste?
Capacitors, printed circuit boards (>10 sq cm), electrolyte capacitors (height > 25mm), LCD displays (>100 cm2), and external electric cables need selective treatment.
How do I remove the main front cover of the monitor?
Pinch on clips on the sides, then lift the front panel up. Note that you must also disconnect the Keypad cable before removal.
What specific types of tools are recommended for disassembly?
The required tools include Philip head and Hexagonal screwdrivers (Φ5 mm & Φ3 mm), a soldering iron, and a knife.
How should I remove the PCBA 2 component?
Remove electrolyte capacitors >25mm height, cut the glue between bulk cap and PCBA with a knife, and then separate the IF board and Power board while keeping them away from the bulk capacitor.