Dell AW2521HF Monitor Teardown Instructions
Summary
Dell Alienware AW2521HF/AW2521HFL/AW2521HFA/AW2521HFLA disassembly procedures provide step-by-step instructions for service technicians to disassemble these gaming monitors. The guide details sequential removal of stand, I/O cover, rear cover, USB board, audio board, LED driver board, control board, interface board, and LCD panel with screw torque specifications. The four variants differ only in color. For authorized Dell repair technicians performing warranty service.
Page 1 Text Content
1 DELL AW2521HF/ AW2521HFL/ AW2521HFA/ AW2521HFLA
1. Disassembly Procedures
Note: The disassembly procedure for AW2521HF/ AW2521HFL/ AW2521HFA/ AW2521HFLA is the same. The difference is only the appearance color. The actual color of AW2521HF/ AW2521HFA is black, but AW2518HFL/ AW2521HFLA is Lunar Light.
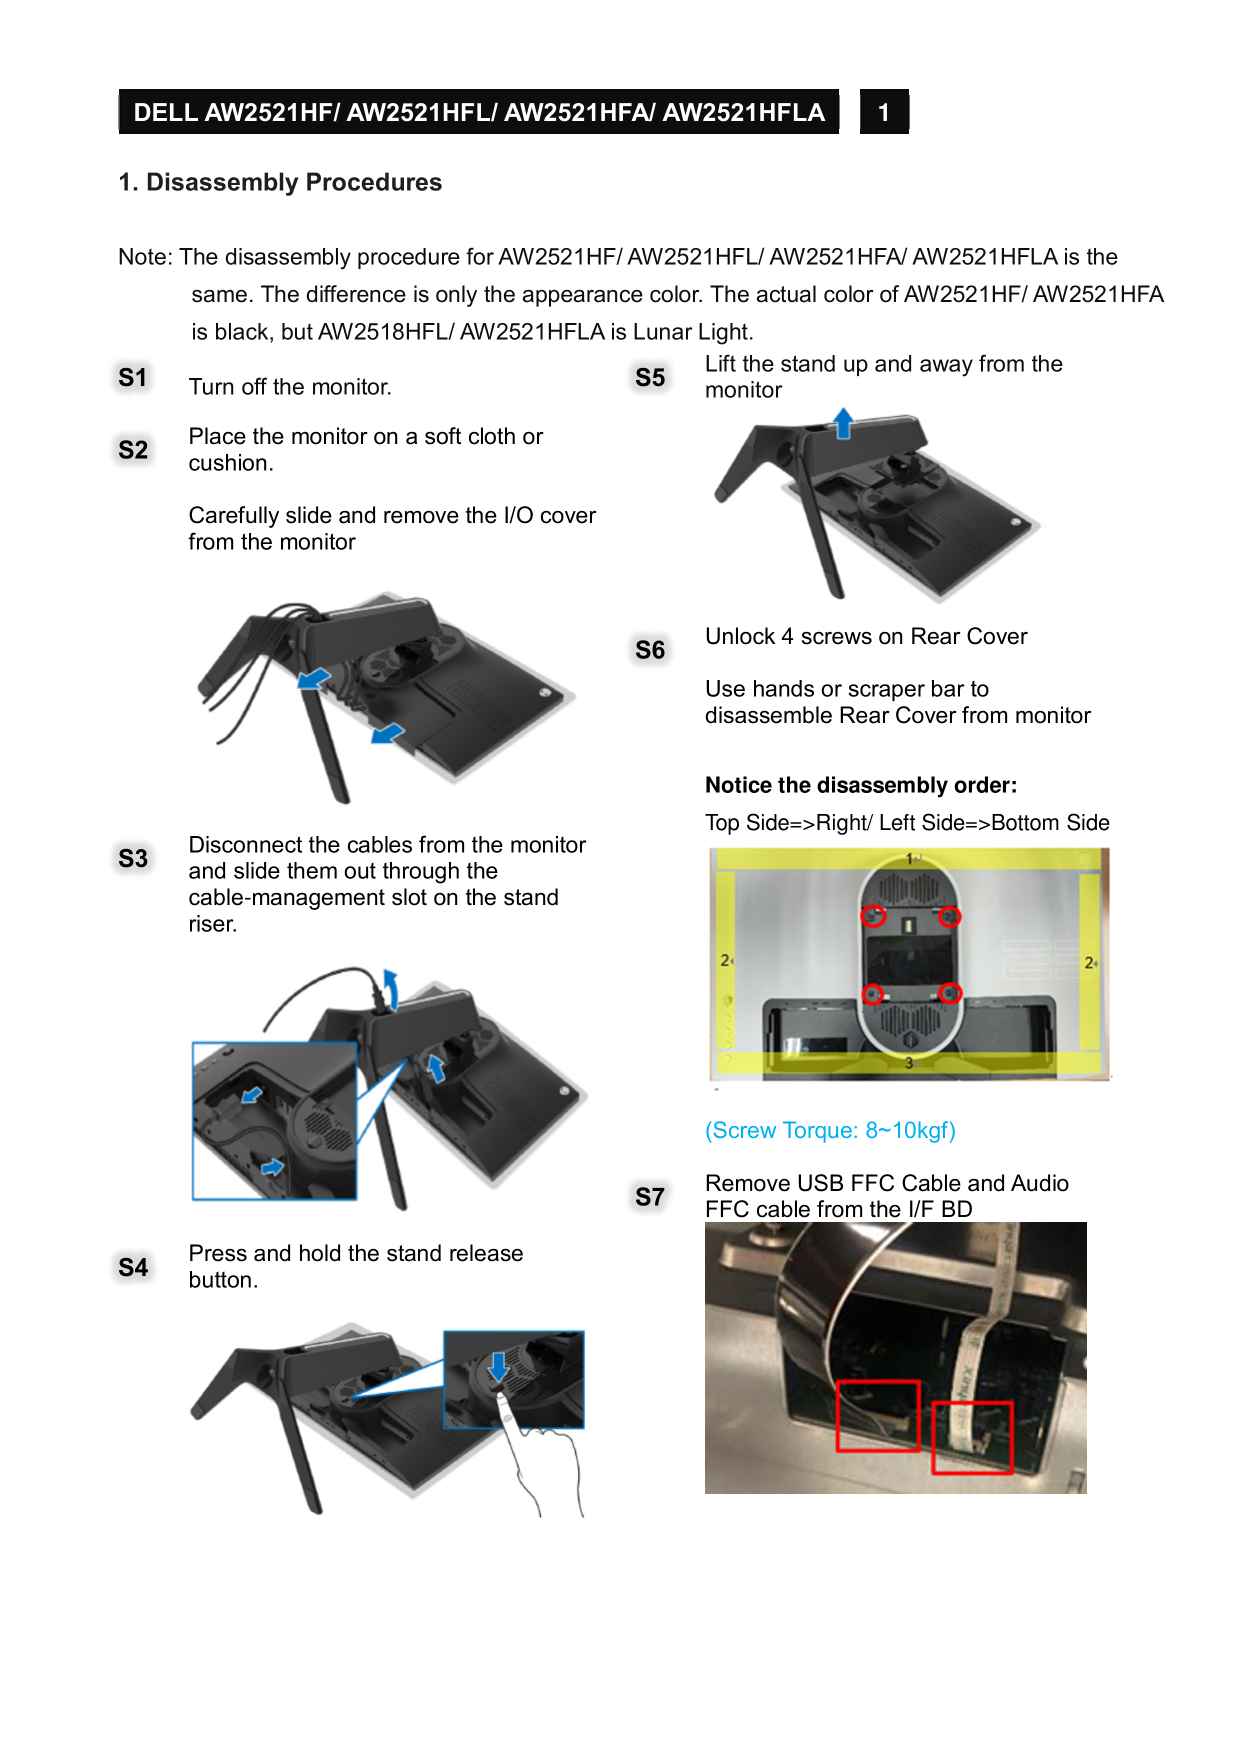
Lift the stand up and away from the
S1 Turn off the monitor. S5
monitor
Place the monitor on a soft cloth or S2 cushion.
Carefully slide and remove the I/O cover from the monitor
Unlock 4 screws on Rear Cover S6 Use hands or scraper bar to disassemble Rear Cover from monitor
Notice the disassembly order: Top Side=>Right/ Left Side=>Bottom Side
Disconnect the cables from the monitor S3 and slide them out through the cable-management slot on the stand riser.
(Screw Torque: 8~10kgf)
Remove USB FFC Cable and Audio S7 FFC cable from the I/F BD
Press and hold the stand release S4 button.
Page Summary Contents For Dell AW2521HF Monitor Teardown Instructions
Manual Details
| Brand | Dell |
|---|---|
| Pages | 8 |
| File Size | 3.37 MB |
| Published | June 26, 2026 |
Enter the captcha to get the download link:

Frequently Asked Questions
How should I prepare for disassembly?
Torques range from 2.0±0.5kgf to 8.5±1.0 kgf for various components (e.g., Middle Frame, Docking BD).
How do I handle bulk capacitors during disassembly?
Components like Capacitors/condensers, PCBs (>10 sq cm), and Electrolyte capacitors must be separated for WEEE compliance.