Apple Mac Pro (Mid 2010) - Solid State Drive - Replacement Instructions
Summary
This comprehensive guide provides detailed instructions for upgrading or replacing the Solid-State Drive (SSD) in your Mac Pro. Learn how to safely open, swap, and close the unit, including necessary warnings for proper handling. The manual also walks you through formatting the new drive using Disk Utility and fully reinstalling Mac OS X and all bundled applications. Ideal for technically inclined users who need a step-by-step reference for maintaining peak system performance after an SSD replacement or major hardware upgrade.
Page 1 Text Content
Mac Pro
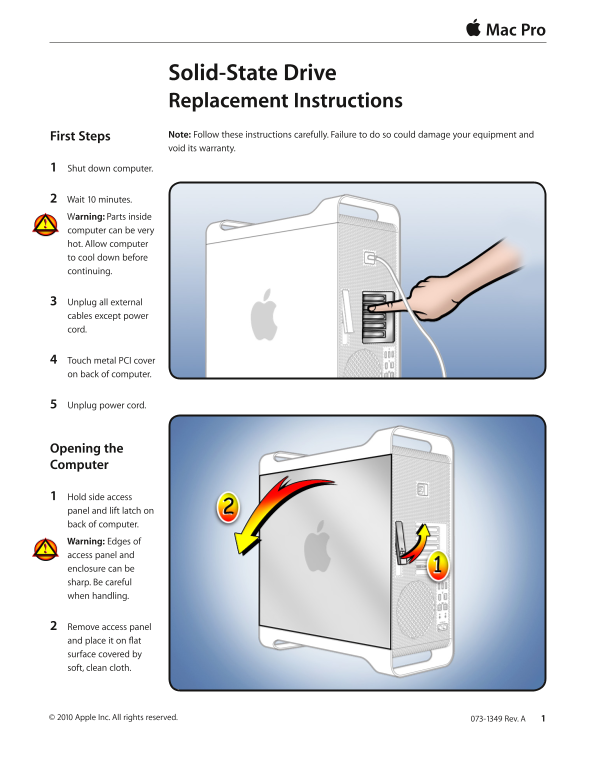
Solid-State Drive Replacement Instructions First Steps Note: Follow these instructions carefully. Failure to do so could damage your equipment and void its warranty.
1 Shut down computer.
2 Wait 10 minutes. Warning: Parts inside computer can be very hot. Allow computer to cool down before continuing.
3 Unplug all external cables except power cord.
4 Touch metal PCI cover on back of computer.
5 Unplug power cord.
Opening the Computer
1 Hold side access panel and lift latch on back of computer. Warning: Edges of access panel and enclosure can be sharp. Be careful when handling.
2 Remove access panel and place it on flat surface covered by soft, clean cloth.
073-1349 Rev. A 1© 2010 Apple Inc. All rights reserved.
Page Summary Contents For Apple Mac Pro (Mid 2010) - Solid State Drive - Replacement Instructions
Manual Details
| Brand | Apple |
|---|---|
| Pages | 7 |
| File Size | 898.51 KB |
| Published | May 14, 2026 |
Enter the captcha to get the download link:

Frequently Asked Questions
What precautions must I take before opening the computer?
First, shut down the unit and wait 10 minutes, as internal parts can be very hot. Unplug all external cables except the power cord.
How do I format a brand new replacement solid-state drive?
Use Disk Utility, select the drive, go to Partition tab, click Options to verify GUID, and finally click 'Partition' to apply changes.
What is required after replacing the hard drive?
You must reformat the drive and then reinstall Mac OS X using software install discs; remember to back up data first.
If I installed Windows via Boot Camp, what happens during OS installation?
The full procedure for reinstalling or formatting will erase the specific partition you choose, including those used by Microsoft Windows/Boot Camp.