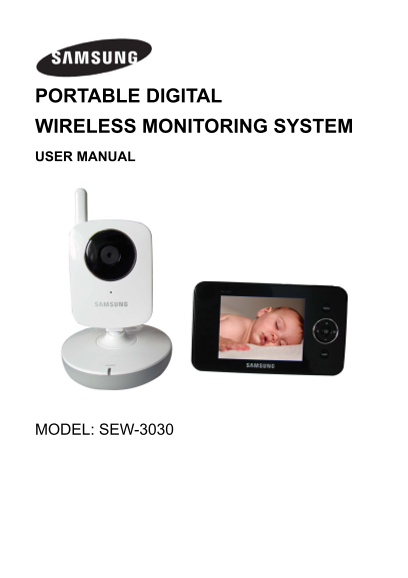
Page 1
PORTABLE DIGITAL WIRELESS MONITORING SYSTEM USER MANUAL MODEL: SEW-3030
Page 2
Wireless Monitoring System User Manual Copyright ©2010 Samsung Techwin Co., Ltd. All rights reserved.d. Trademark is the registered logo of Samsung Techwin Co., Ltd. The name of this product is the re...
Page 3
Caution if you use the system to watch a young child, do not place the camera where the child can reach. When using the system with only battery power and the charge is low, then the picture and or so...
Page 4
• This product is intended for indoor use only. • This product is not intended for use as a medical monitor and its use should not replace adult supervision. • Check reception regularly. Test monitor ...
Page 5
Features • Samsung’s digital wireless technology provides excellent image quality and clarity. • Virtually eliminates interference using a secure and private signal • Up to 100 m / 330 ft wireless ope...
Page 6
Contents Features . . . . . . . . . . . . . . . . . . . . . . . . . . . . . . . . . . . . . . . . . . . . . . . Getting Started . . . . . . . . . . . . . . . . . . . . . . . . . . . . . . . . . . . . ...
Page 7
Getting Started The system comes with the following components: Wireless Camera Wireless Receiver Power Adapter Power Adapter USB Cable RCA Cable CD User Manual Warranty Card Wire Clips Screws (For Ca...
Page 8
• Press the [M] key to manually switch between cameras. Menu Mode: Use the [+/–/A/M] keys to navigate in Menu Mode. Press the OK button to confirm the menu selection. 5. MENU Button – Press to access ...
Page 9
12. / Button – Press the button to start or stop the built-in tunes 13. Button – Press the button to play next tune. 14. TALK Button – Press down and hold the button to talk back to the camera current...
Page 10
Wireless Receiver Installation After opening the box, fully charge the monitor before use. After initial charge, recharge as needed. 1. Place the receiver in a place that will have clear reception wit...
Page 11
5. Microphone – Receives sounds for the area near the camera, and transmits sound from the camera to the receiver. 6. Pair Button – The pair button is located on the back of the camera behind by the s...
Page 12
Side Controls 9. Sound Alarm Trigger – Adjust the sensitivity knob to set the sound alarm sensitivity. The receiver will beep to alert you when the sound is above a preset sound level. Adjust to incre...
Page 13
Night Vision This camera has built-in IR LED’s, which provides the camera with the ability to view images in no/low light conditions. It is important to use the provided power adaptor (and not the bat...
Page 14
Connecting Camera Power The camera can be powered either by using the provided power adaptor or using batteries (requires 3 AA type batteries, not included). NOTE: Wireless cameras require a power sou...
Page 15
BATTERY WARNING When using the product in portable mode, check batteries regularly. DO NOT use the monitor in portable mode when batteries are low. • DISPOSE OF OR RECYCLE BATTERIES PROPERLY IN ACCORD...
Page 16
Adjusting the Receiver Volume The receiver volume can be adjusted by using the [+/–] keys when viewing a camera. Press the [–] key to decrease the volume, and press the [+] key to increase the volume....
Page 17
Brightness The Brightness menu is used to adjust the brightness of the image. Use the [+] and [–] keys to change the bar from DARKEST to BRIGHTEST. Press the OK button to confirm the change. Zoom The ...
Page 18
If POWER SAVING mode is deactivated by pushing [A], [M] and SLEEP, the monitor will go back to black screen after the time you set if there is no sound trigger during that time. If POWER SAVING mode i...
Page 19
Auto mute This function automatically cuts off the audio when there is only slight environmental noise on the camera side. Choose Yes to enable this function. Use the [+] and [–] keys to select the Au...
Page 20
Date Setting You can set the date value with year, month, date to show in the monitor screen. Use the [+] and [–] keys to select the Date Setting, Press [M] key to submenu on the right .Use [A] and [M...
Page 21
Temp. Unit You can select the temperature unit ℃ or ℉ for you option to show in the screen Use the [+] and [–] keys to select the Temp. Unit, Press [M] key to submenu on the right .Use the [+] and [–]...
Page 22
Factory Reset Choose Yes to reset the receiver to factory defaults – all menu settings will be reset. NOTE: Camera pairing settings will NOT be affected by a reset. The camera will remain paired with ...
Page 23
1. Power on the camera by connecting the power adaptor or battery pack, and turning the switch to ON. The power LED for the camera should be ON. 2. Power on the receiver by connecting the power adapto...
Page 24
Hardware and CD driver installation 1. Put CD into CD ROM on computer and click the icon of Install USB Driver to run installation program. 2. Click the “Next>” button to continue
Page 25
3. Select “I accept the terms of the license agreement” and then press “Next>” button. 4. Click the “Browse” button, select the destination folder and then press “Next>” button.
Page 26
5. Press the “Finish” button to complete the driver program. 6. Power on the camera and receiver. Use the included USB cable to connect the receiver to the computer. You will see “Found New Hardware” ...
Page 27
7. After connecting the USB cable to the computer, you will see “Found New Hardware Wizard”. Select “No, not at this time” and press the “Next” button to continue. 8. Select “Install the software auto...
Page 28
9. Select “Continue Anyway” 10. Copy the driver and wait to finish. 11. After installation is finished, you can find “Wireless Monitoring System” in the Device Manager (Note: It can also work as a wir...
Page 29
Troubleshooting If you have problems with the system, there is often a quick and simple solution. Please try the following: Problem Solution 1. Check all connections to the camera. Make sure the adapt...
Page 30
Appendix #1 - Receiver Specifications Receiver Receiving Frequency Range 2.400GHz~2.4835GHz Data Rate 2.0 Mbps Receiving Sensitivity -81d Bm Demodulation Type GFSK with FHSS Resolution 320 (RGB) x 240...
Page 31
Appendix #2 - Camera Specifications Camera(s) Transmit Frequency Range 2.400GHz~2.4835GHz Data Rate 2.0 Mbps Transmitting Power 14d Bm (TYP) Modulation Type GFSK with FHSS Transmitting Distance 100m (...
Page 32
TEMPLATE This template is used to install the camera on the wall 67mm [2.638inch] Screw holes for the Camera installation CAMERA FRONT