Netgear WN203v2 - ProSAFE Wireless N Access Point Installation Guide
Summary
Enhance your network infrastructure with this dedicated Single Band 802.11n Wireless Access Point, offering robust and reliable connectivity. This comprehensive guide serves as your step-by-step manual, covering initial hardware setup, advanced IP configuration, securing multiple wireless profiles, and detailed antenna connection for optimal performance. Essential reading for IT professionals or network administrators who require a stable, scalable, and secure solution to broadcast powerful wireless coverage throughout their premises.
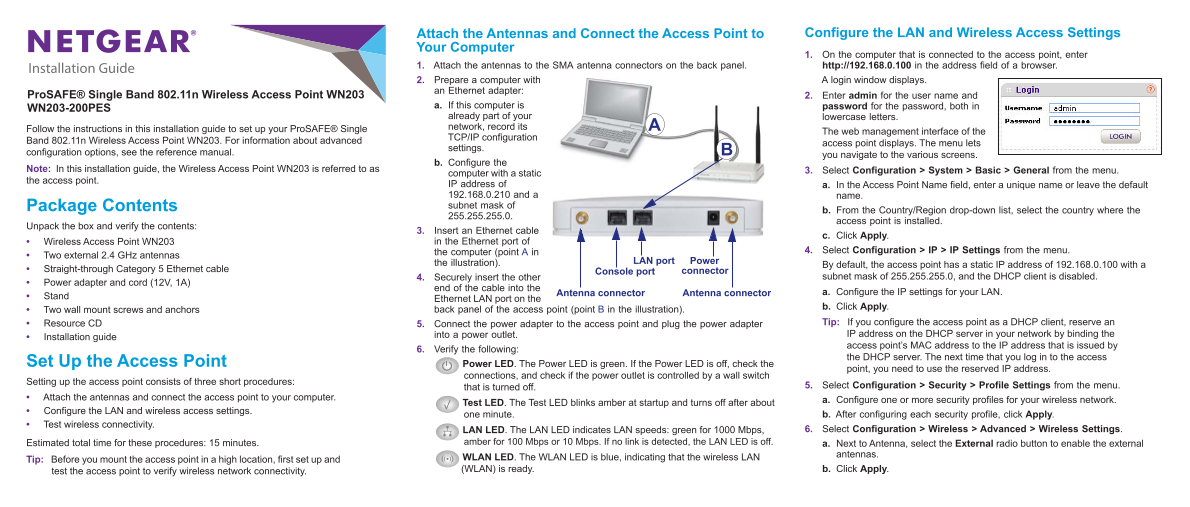
Page 1 Text Content
Attach the Antennas and Connect the Access Point to Configure the LAN and Wireless Access Settings
Your Computer
1. On the computer that is connected to the access point, enter
1. Attach the antennas to the SMA antenna connectors on the back panel. http://192.168.0.100 in the address field of a browser.
Installation Guide
2. Prepare a computer with A login window displays. an Ethernet adapter:
Pro SAFE® Single Band 802.11n Wireless Access Point WN203 2. Enter admin for the user name and
a. If this computer is password for the password, both in
WN203-200PES
already part of your lowercase letters. Follow the instructions in this installation guide to set up your Pro SAFE® Single network, record its
The web management interface of the
TCP/IP configuration
Band 802.11n Wireless Access Point WN203. For information about advanced
access point displays. The menu lets
settings.
configuration options, see the reference manual.
you navigate to the various screens.
b. Configure the
Note: In this installation guide, the Wireless Access Point WN203 is referred to as 3. Select Configuration > System > Basic > General from the menu.
computer with a static
the access point.
IP address of a. In the Access Point Name field, enter a unique name or leave the default 192.168.0.210 and a name. Package Contents subnet mask of
b. From the Country/Region drop-down list, select the country where the
access point is installed.
Unpack the box and verify the contents:
3. Insert an Ethernet cable
c. Click Apply.
Wireless Access Point WN203 in the Ethernet port of
the computer (point A in 4. Select Configuration > IP > IP Settings from the menu.
Two external 2.4 GHz antennas
the illustration). LAN port Power
By default, the access point has a static IP address of 192.168.0.100 with a
Straight-through Category 5 Ethernet cable connector
Console port
4. Securely insert the other subnet mask of 255.255.255.0, and the DHCP client is disabled.
Power adapter and cord (12V, 1A)
end of the cable into the
Antenna connector Antenna connector a. Configure the IP settings for your LAN.
Stand
Ethernet LAN port on the
b. Click Apply.
Two wall mount screws and anchors back panel of the access point (point B in the illustration).
Resource CD 5. Connect the power adapter to the access point and plug the power adapter Tip: If you configure the access point as a DHCP client, reserve an into a power outlet. IP address on the DHCP server in your network by binding the
Installation guide
access point’s MAC address to the IP address that is issued by
6. Verify the following:
the DHCP server. The next time that you log in to the access
Set Up the Access Point Power LED. The Power LED is green. If the Power LED is off, check the
point, you need to use the reserved IP address.
connections, and check if the power outlet is controlled by a wall switch
Setting up the access point consists of three short procedures:
that is turned off. 5. Select Configuration > Security > Profile Settings from the menu.
Attach the antennas and connect the access point to your computer.
a. Configure one or more security profiles for your wireless network.
Test LED. The Test LED blinks amber at startup and turns off after about
Configure the LAN and wireless access settings.
one minute. b. After configuring each security profile, click Apply.
Test wireless connectivity.
LAN LED. The LAN LED indicates LAN speeds: green for 1000 Mbps, 6. Select Configuration > Wireless > Advanced > Wireless Settings.
Estimated total time for these procedures: 15 minutes. amber for 100 Mbps or 10 Mbps. If no link is detected, the LAN LED is off. a. Next to Antenna, select the External radio button to enable the external
antennas.
Tip: Before you mount the access point in a high location, first set up and WLAN LED. The WLAN LED is blue, indicating that the wireless LAN test the access point to verify wireless network connectivity. (WLAN) is ready. b. Click Apply.
Page Summary Contents For Netgear WN203v2 - ProSAFE Wireless N Access Point Installation Guide
Manual Details
| Brand | NETGEAR |
|---|---|
| Pages | 2 |
| File Size | 151.64 KB |
| Published | June 05, 2026 |
Enter the captcha to get the download link:

Frequently Asked Questions
What is the default IP address for the WN203 access point?
The default static IP address is 192.168.0.100.
How do I set up my LAN and general network settings?
Navigate to Configuration > System > Basic > General to set the unique name, country/region, etc.
What steps are needed after initial setup?
Verify power connections, test wireless connectivity by connecting a device, then ensure Internet access using a browser.
What should I do if the WLAN or LAN LEDs are off?
Check that the power adapter is properly plugged into the unit and the wall switch controlling the outlet. Restart your computer as well.