CASIO XJ-S33 XJ-S38 , XJ-S43 XJ-S48 , XJ-S53 XJ-S58 , XJ-S63 XJ-S68 DATA PROJECTOR User Guide Manual User Manual
Summary
This comprehensive User's Guide is designed for owners of select CASIO E DATA Projectors (XJ series with USB ports). It provides detailed instructions necessary for setting up, operating, and customizing your projector for professional presentations and high-definition viewing. Learn everything from basic connectivity and adjusting image brightness to configuring advanced system settings, optimizing aspect ratios, and ensuring perfect signal compatibility across various input sources.
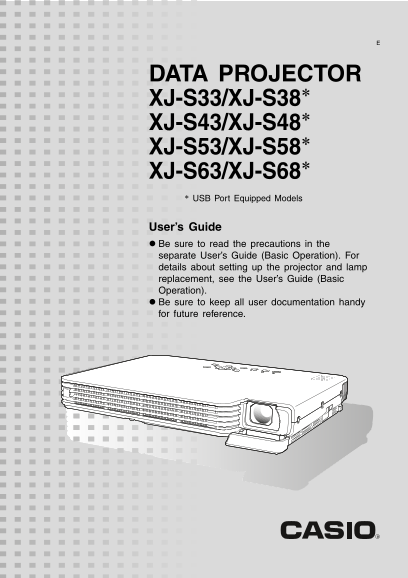
Page 1 Text Content
DATA PROJECTOR XJ-S33/XJ-S38* XJ-S43/XJ-S48* XJ-S53/XJ-S58* XJ-S63/XJ-S68* * USB Port Equipped Models User’s Guide Be sure to read the precautions in the separate User’s Guide (Basic Operation). For details about setting up the projector and lamp replacement, see the User’s Guide (Basic Operation). Be sure to keep all user documentation handy for future reference.
Page Summary Contents For CASIO XJ-S33 XJ-S38 , XJ-S43 XJ-S48 , XJ-S53 XJ-S58 , XJ-S63 XJ-S68 DATA PROJECTOR User Guide Manual User Manual
Page 1
DATA PROJECTOR XJ-S33/XJ-S38* XJ-S43/XJ-S48* XJ-S53/XJ-S58* XJ-S63/XJ-S68* * USB Port Equipped Models User’s Guide Be sure to read the precautions in the separate User’s Guide (Basic Operation). For d...
Page 2
DLP is a registered trademark of Texas Instruments of the United States. Microsoft, Windows, and Windows Vista are registered trademarks or trademarks of Microsoft Corporation in the United States and...
Page 3
Contents About this manual... USB Port Equipped Model Users................................................................................. Operation During Projection Image Operations During Project...
Page 4
Appendix........................................................................ Remote Controller Signal Range Projection Distance and Screen Size........................................................
Page 5
Operation During Projection This section explains the various types of operations you can perform while the projector is projecting an image. Image Operations During Projection You can perform the fol...
Page 6
Selecting the Color Mode You can select from among five different color mode settings to optimize the projected image in accordance with image contents and projection conditions. To change the color m...
Page 7
Momentarily Cutting Off the Input Source Image Press the [BLANK] key. This temporarily cuts off the image from the input source and projects a black screen in its place. To resume projection of the im...
Page 8
Displaying a Pointer in the Projected Image You can select from among different pointer styles, including various arrow styles, for display in the projected image. Pointers can be used during a presen...
Page 9
To select the pointer type Press the [POINTER] key to display the pointer. Keep pressing the [POINTER] key until the pointer you want is displayed. Each press of the [POINTER] key cycles through the a...
Page 10
Eco Mode Turning on the Eco Mode reduces lamp brightness to save power. The projector’s cooling fan also operates at a slower speed while the Eco Mode is turned on, which results in quieter operation....
Page 11
Configuring Advanced Projector Settings Your projector has a setup menu that you can use to configure advanced settings. Basic Setup Menu Operations Displaying the Setup Menu Pressing the [MENU] key d...
Page 12
Basic Setup Menu Example The procedure below shows how to configure the following three settings: Image Adjustment 1 Contrast Image Adjustment 1 Color Mode Option Settings 1 Eco Mode Note Certain sett...
Page 13
To configure the “Image Adjustment 1 Color Mode” setting Press the [ ] key once to select “Color Mode”. Press the [ENTER] key. This displays the color mode menu. Use the [ ] and [ ] keys to select the...
Page 14
Password Protecting the Projector The password feature lets you keep unauthorized individuals from using the projector. You can specify whether password input is required whenever you turn on the proj...
Page 15
Keep a written record of your password! You will not be able to use the projector if you forget its password. We strongly suggest that you keep a written or other type of record of the password so you...
Page 16
To turn password protection on and off Display the Power On Password setting screen by performing steps 1 through 5 of the procedure under “To change the password” on page 15. At this time, make sure ...
Page 17
Restoring Projector Settings to Their Initial Factory Defaults You can use the procedures in this section to restore all of the settings on a particular main menu or all of the settings on the setup m...
Page 18
To restore all settings on the setup menu to their initial factory defaults Press the [MENU] key to display the setup menu. Use the [ ] key to select “Restore All Defaults”, and then press the [ENTER]...
Page 19
Image Adjustment 1 Main Menu Setting Setting Name Input Description Brightness RCVU Source Use this sub-menu to adjust the brightness of the Specific projected image. A larger value produces a brighte...
Page 20
Setting Setting Name Input Description Noise Filter RCV Source This setting is valid when VIDEO is selected as the input Specific source. Normal*: Select this setting when projecting a movie. High: Se...
Page 21
Setting Setting Name Input Description Restore Menu RCV Source Use this sub-menu to return all of the sub-menu items on Defaults Specific the Image Adjustment 2 main menu to their initial default sett...
Page 22
Screen Settings Main Menu Setting Setting Name Input Description Keystone RCVUN Single Use this sub-menu to correct vertical keystoning of the Correction projected image. Aspect Ratio RCV Source Use t...
Page 23
Setting Setting Name Input Description Startup Screen RCVUN Single Use this sub-menu to specify whether or not a startup screen should be projected whenever the projector is turned on. Logo: Select th...
Page 24
Input Settings Main Menu Setting Setting Name Input Description COMPUTER RCUVN Single Use this sub-menu to specify manually the type of signal Terminal being input from the projector’s COMPUTER termin...
Page 25
Option Settings 1 Main Menu Setting Setting Name Input Description Auto Keystone RCVUN Single Use this sub-menu to turn auto keystone correction on or Correction off. On*: Select this option to turn o...
Page 26
Setting Setting Name Input Description Language RCVUN Single Use this sub-menu to specify the language to use for messages, setup menus, etc. English / French / German / Italian / Spanish / Swedish / ...
Page 27
Setting Setting Name Input Description USB Audio Out RCVUN Single When playing back a movie file stored on a USB memory (USB port device, you can select audio output from the projector’s equipped buil...
Page 28
USB Settings Main Menu Items (USB Port Equipped Models Only) The USB Settings main menu is available only when there is an external device connected to the USB port of the XJ-S38/XJ-S48/XJ-S58/XJ-S68 ...
Page 29
Restore All Defaults Main Menu Setting Setting Name Input Description Unit Operating RCVUN Single This sub-menu item shows the cumulative operating time Time of this unit. This time cannot be initiali...
Page 30
Appendix Remote Controller Signal Range When performing an operation on the remote controller, point it at the remote control signal receiver on the back or front of the projector. The following illus...
Page 31
Projection Distance and Screen Size Screen Size 200 5.7 m to 11.3 m (18.70 feet to 37.07 feet) Screen Size 40 1.1 m to 2.2 m (3.61 feet to 7.22 feet) Screen Size 60 1.7 m to 3.4 m (5.58 feet to 11.15 ...
Page 32
Aspect Ratio Setting and Projection Image during RGB Input The video resolution of the projected image is 1024 × 768 pixels (4:3 aspect ratio). When RGB is input from a computer and projected by the p...
Page 33
Supported Signals RGB Signal Horizontal Vertical Signal Name Resolution Frequency (k Hz) Frequency (Hz) VESA 640 × 480/60 640 × 480 31.5 Other 1152 × 864/70 1152 × 864 64.0 If these signals do not pro...
Page 34
Component Signal Horizontal Vertical Signal Name Frequency (k Hz) Frequency (Hz) HDTV 1080p/50 62.5 SDTV 576p50 31.3 Video Signal Horizontal Vertical Signal Name Frequency (k Hz) Frequency (Hz) NTSC 1...
Page 35
MA0906-A
Manual Details
| Brand | Casio |
|---|---|
| Pages | 35 |
| File Size | 835.26 KB |
| Published | June 05, 2026 |
47 views
Enter the captcha to get the download link:

Frequently Asked Questions
How do I adjust the input signal if projection is incorrect?
Change the “Option Settings 1 Auto Adjust” J setting to “2”.
Can I restore the settings to their factory defaults?
Yes, there is a process for restoring projector settings to their initial factory defaults.