# A B C D E F G H I J K L M N O P Q R S T U V W X Y Z

Carrier Omnizone™ Constant Volume Remote Air-Cooled Cooling Unit 50XCR 50XCR06-24 Omnizone™ Remote Air-Cooled Indoor Self-Contained Systems

Summary

This comprehensive manual provides essential instructions for the professional installation, safe startup, and routine servicing of your Omnizone™ indoor self-contained air-cooling system. It guides trained HVAC professionals through detailed procedures covering everything from initial unit placement and complex electrical connections to running diagnostics and maintenance tasks like coil cleaning and refrigerant recovery. Use this guide to ensure proper setup, optimize performance, and safely maintain your air conditioning equipment.
📄 Preview 📖 Table of Contents Contents PAGE OF 40

Page 1 Text Content

Omnizone™ 50XCR06-24 Remote Air-Cooled

Indoor Self-Contained Systems

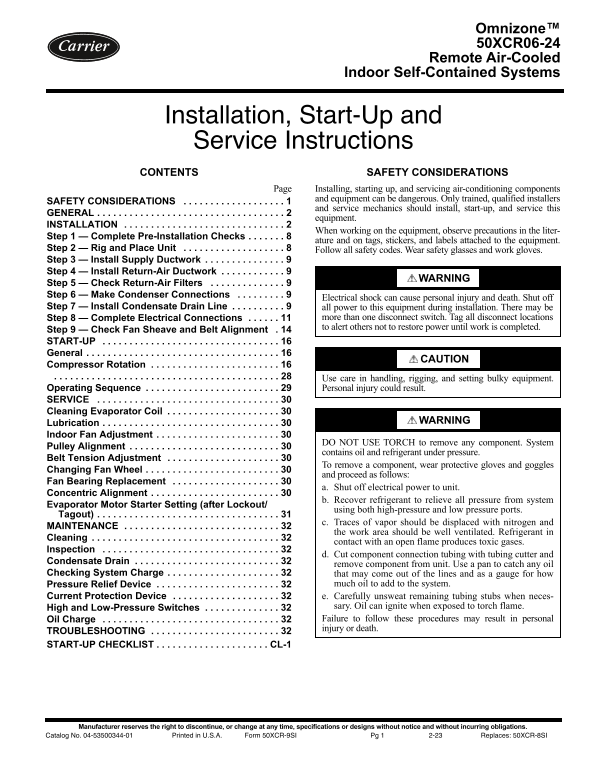
Installation, Start-Up and Service Instructions CONTENTS SAFETY CONSIDERATIONS

Page Installing, starting up, and servicing air-conditioning components

and equipment can be dangerous. Only trained, qualified installers

SAFETY CONSIDERATIONS . . . . . . . . . . . . . . . . . . .

and service mechanics should install, start-up, and service this

GENERAL . . . . . . . . . . . . . . . . . . . . . . . . . . . . . . . . . . .

equipment.

INSTALLATION . . . . . . . . . . . . . . . . . . . . . . . . . . . . . .

When working on the equipment, observe precautions in the liter-

Step 1 — Complete Pre-Installation Checks . . . . . . .

ature and on tags, stickers, and labels attached to the equipment.

Step 2 — Rig and Place Unit . . . . . . . . . . . . . . . . . . . Follow all safety codes. Wear safety glasses and work gloves. Step 3 — Install Supply Ductwork . . . . . . . . . . . . . . . Step 4 — Install Return-Air Ductwork . . . . . . . . . . . .

WARNING

Step 5 — Check Return-Air Filters . . . . . . . . . . . . . . Step 6 — Make Condenser Connections . . . . . . . . .

Electrical shock can cause personal injury and death. Shut off

Step 7 — Install Condensate Drain Line . . . . . . . . . . all power to this equipment during installation. There may be

Step 8 — Complete Electrical Connections . . . . . . more than one disconnect switch. Tag all disconnect locations to alert others not to restore power until work is completed.

Step 9 — Check Fan Sheave and Belt Alignment . START-UP . . . . . . . . . . . . . . . . . . . . . . . . . . . . . . . . . General . . . . . . . . . . . . . . . . . . . . . . . . . . . . . . . . . . . .

CAUTION

Compressor Rotation . . . . . . . . . . . . . . . . . . . . . . . . . . . . . . . . . . . . . . . . . . . . . . . . . . . . . . . . . . . . . . . . . . Use care in handling, rigging, and setting bulky equipment. Operating Sequence . . . . . . . . . . . . . . . . . . . . . . . . . Personal injury could result. SERVICE . . . . . . . . . . . . . . . . . . . . . . . . . . . . . . . . . . Cleaning Evaporator Coil . . . . . . . . . . . . . . . . . . . . .

WARNING

Lubrication . . . . . . . . . . . . . . . . . . . . . . . . . . . . . . . . . Indoor Fan Adjustment . . . . . . . . . . . . . . . . . . . . . . .

DO NOT USE TORCH to remove any component. System

Pulley Alignment . . . . . . . . . . . . . . . . . . . . . . . . . . . .

contains oil and refrigerant under pressure.

Belt Tension Adjustment . . . . . . . . . . . . . . . . . . . . .

To remove a component, wear protective gloves and goggles

Changing Fan Wheel . . . . . . . . . . . . . . . . . . . . . . . . .

and proceed as follows:

Fan Bearing Replacement . . . . . . . . . . . . . . . . . . . .

a. Shut off electrical power to unit.

Concentric Alignment . . . . . . . . . . . . . . . . . . . . . . . .

b. Recover refrigerant to relieve all pressure from system

Evaporator Motor Starter Setting (after Lockout/

using both high-pressure and low pressure ports.

Tagout) . . . . . . . . . . . . . . . . . . . . . . . . . . . . . . . . . .

c. Traces of vapor should be displaced with nitrogen and

MAINTENANCE . . . . . . . . . . . . . . . . . . . . . . . . . . . . .

the work area should be well ventilated. Refrigerant in

Cleaning . . . . . . . . . . . . . . . . . . . . . . . . . . . . . . . . . . .

contact with an open flame produces toxic gases.

Inspection . . . . . . . . . . . . . . . . . . . . . . . . . . . . . . . . .

d. Cut component connection tubing with tubing cutter and

Condensate Drain . . . . . . . . . . . . . . . . . . . . . . . . . . .

remove component from unit. Use a pan to catch any oil

Checking System Charge . . . . . . . . . . . . . . . . . . . . . that may come out of the lines and as a gauge for how

Pressure Relief Device . . . . . . . . . . . . . . . . . . . . . . . much oil to add to the system.

Current Protection Device . . . . . . . . . . . . . . . . . . . . e. Carefully unsweat remaining tubing stubs when neces-

High and Low-Pressure Switches . . . . . . . . . . . . . . sary. Oil can ignite when exposed to torch flame. Oil Charge . . . . . . . . . . . . . . . . . . . . . . . . . . . . . . . . . Failure to follow these procedures may result in personal injury or death.

TROUBLESHOOTING . . . . . . . . . . . . . . . . . . . . . . . . START-UP CHECKLIST . . . . . . . . . . . . . . . . . . . . . CL-1

Manufacturer reserves the right to discontinue, or change at any time, specifications or designs without notice and without incurring obligations.

Catalog No. 04-53500344-01 Printed in U.S.A. Form 50XCR-9SI Pg 1 2-23 Replaces: 50XCR-8SI

Page Summary Contents For Carrier Omnizone™ Constant Volume Remote Air-Cooled Cooling Unit 50XCR 50XCR06-24 Omnizone™ Remote Air-Cooled Indoor Self-Contained Systems

Page 1 Omnizone™ 50XCR06-24 Remote Air-Cooled Indoor Self-Contained Systems Installation, Start-Up and Service Instructions CONTENTS SAFETY CONSIDERATIONS Page Installing, starting up, and servicing air-cond...
Page 2 INSTALLATION CAUTION Omnizone 50XCR units are intended for indoor installation only. Determine building alterations required to run piping, wiring and DO NOT re-use compressor oil or any oil that has ...
Page 3 DISCH LIQUID COND EVAP EVAP RETURN DISCH LIQUID EVAP SUPPLY DUCT DIAMETER DIAMETER UNIT WIDTH HEIGHT DEPTH SECTION SECTION DUCT CONN CONN (Blower Opening) SWAGE SWAGE 50XCR (ID) (ID) NOTE: Dimensions ...
Page 4 DISCH LIQUID COND EVAP EVAP RETURN DISCH LIQUID EVAP SUPPLY DUCT DIAMETER DIAMETER UNIT WIDTH HEIGHT DEPTH SECTION SECTION DUCT CONN CONN (Blower Opening) SWAGE SWAGE 50XCR (ID) (ID) NOTE: Dimensions ...
Page 5 DISCH LIQUID COND EVAP EVAP RETURN DISCH LIQUID EVAP SUPPLY DUCT DIAMETER DIAMETER UNIT WIDTH HEIGHT DEPTH SECTION SECTION DUCT CONN CONN (Blower Opening) SWAGE SWAGE 50XCR (ID) (ID) NOTE: Dimensions ...
Page 6 DISCH LIQUID COND EVAP EVAP RETURN DISCH LIQUID EVAP SUPPLY DUCT DIA DIA UNIT WIDTH HEIGHT DEPTH SECTION SECTION DUCT CONN CONN (Blower Opening) SWAGE SWAGE 50XCR (ID) (ID) NOTE: Dimensions are in inc...
Page 7 DISCH LIQUID COND EVAP EVAP RETURN DISCH LIQUID EVAP SUPPLY DUCT DIA DIA UNIT WIDTH HEIGHT DEPTH SECTION SECTION DUCT CONN CONN (Blower Opening) SWAGE SWAGE 50XCR (ID) (ID) NOTE: Dimensions are in inc...
Page 8 Table 2 — Physical Data UNIT 50XCR TONS 7.5 UNIT OPERATING WEIGHT (lb) COMPRESSOR Scroll Compressor Model ZPS60 ZPS60a / ZPS67b ZP54 / ZP49 ZP61 / ZP57 ZP91 / ZP67 ZP122 / ZP91 Qty Steps of Control (s...
Page 9 duct sizing. If the unit will be connected to an existing duct system, check that the existing duct system has the capacity to handle the required airflow for the unit application at an Spreader Bar a...
Page 10 NOTE: A = min. straight duct length. Fig. 8 — Typical Fan Discharge Connections for Multiple Fan Units Table 3 — Recommended Line Sizes (in.) LENGTH OF RUN (ft) CIRCUIT 0 to 15 16 to 25 26 to 50 51 to...
Page 11 Step 8 — Complete Electrical Connections This amount of phase imbalance is satisfactory as it is below the maximum allowable 2%. GENERAL Verify that nameplate electrical requirements match available I...
Page 12 Table 4 — Electrical Dataa,b,c,d VOLTAGE COMPRESSOR COMPRESSOR V-PH-Hz RANGE NO. 1 NO. 2 50XCR Min Max RLA LRA RLA LRA NOTE(S): a. In compliance with NEC requirements for multimotor and combination lo...
Page 13 CK1 Y1 (12 Size Unit and Larger) Ground Wire Nut Shield (Cut and Tape Back) Remote Room Sensor (P/N ZONECCORRS01) RS GND 33CS250-01 NOTE: Remote sensor is field-installed option. Fig. 10 — Typical The...
Page 14 Step 9 — Check Fan Sheave and Belt Alignment After 24 hours of unit operation, the drive belts may stretch. Check the belt tension after 24 hours of operation and adjust if Factory-supplied drives are...
Page 15 Center lines must coincide. Lines must be String parallel. DEFLECTION FORCE (lb) Bearing SMALL Support BELT STEEL SHEAVE SUPER NOTCH CROSS CABLE Channel PD RANGE BELTS BELTS SECTION BELTS (in.) Straig...
Page 16 START-UP Compressor Rotation To determine whether or not compressor is rotating in the proper CAUTION direction: 1. Connect service gauges to suction and discharge pressure To prevent injury, ensure t...
Page 17 Table 6 — Evaporator Fan Performance — 50XCW06, 50XCA06, 50XCR06 Unitsa,b,c,d,e ESP (in. wg) cfm 0.00 0.10 0.20 0.30 0.40 0.50 0.60 0.70 0.80 0.90 rpm bhp rpm bhp rpm bhp rpm bhp rpm bhp rpm bhp rpm b...
Page 18 Table 7 — Evaporator Fan Performance — 50XCW08, 50XCA08, 50XCR08 Unitsa,b,c,d,e ESP (in. wg) cfm 0.00 0.10 0.20 0.30 0.40 0.50 0.60 0.70 0.80 0.90 rpm bhp rpm bhp rpm bhp rpm bhp rpm bhp rpm bhp rpm b...
Page 19 Table 8 — Evaporator Fan Performance — 50XCW12, 50XCA12, 50XCR12 Unitsa,b,c,d,e ESP (in. wg) cfm 0.00 0.10 0.20 0.30 0.40 0.50 0.60 0.70 0.80 0.90 rpm bhp rpm bhp rpm bhp rpm bhp rpm bhp rpm bhp rpm b...
Page 20 Table 9 — Evaporator Fan Performance — 50XCW14, 50XCA14, 50XCR14 Unitsa,b,c,d,e ESP (in. wg) cfm 0.00 0.10 0.20 0.30 0.40 0.50 0.60 0.70 0.80 0.90 rpm bhp rpm bhp rpm bhp rpm bhp rpm bhp rpm bhp rpm b...
Page 21 Table 10 — Evaporator Fan Performance — 50XCW16, 50XCA16, 50XCR16 Unitsa,b,c,d,e ESP (in. wg) cfm 0.00 0.10 0.20 0.30 0.40 0.50 0.60 0.70 0.80 0.90 rpm bhp rpm bhp rpm bhp rpm bhp rpm bhp rpm bhp rpm ...
Page 22 Table 11 — Evaporator Fan Performance — 50XCW24, 50XCA24, 50XCR24 Unitsa,b,c,d,e ESP (in. wg) cfm 0.00 0.10 0.20 0.30 0.40 0.50 0.60 0.70 0.80 0.90 rpm bhp rpm bhp rpm bhp rpm bhp rpm bhp rpm bhp rpm ...
Page 23 Table 12 — Condenser Fan Performance — 09XC06 Unitsa,b,c,d,e ESP (in. wg) cfm 0.00 0.10 0.20 0.30 0.40 0.50 0.60 0.70 0.80 0.90 rpm bhp rpm bhp rpm bhp rpm bhp rpm bhp rpm bhp rpm bhp rpm bhp rpm bhp ...
Page 24 Table 13 — Condenser Fan Performance — 09XC08 Unitsa,b,c,d,e ESP (in. wg) cfm 0.00 0.10 0.20 0.30 0.40 0.50 0.60 0.70 rpm bhp rpm bhp rpm bhp rpm bhp rpm bhp rpm bhp rpm bhp rpm bhp ESP (in. wg) cfm 0...
Page 25 Table 14 — Condenser Fan Performance — 09XC12 Unitsa,b,c,d,e ESP (in. wg) cfm 0.00 0.10 0.20 0.30 0.40 0.50 0.60 0.70 rpm bhp rpm bhp rpm bhp rpm bhp rpm bhp rpm bhp rpm bhp rpm bhp ESP (in. wg) cfm 0...
Page 26 Table 15 — Condenser Fan Performance — 09XC14 Unitsa,b,c,d,e ESP (in. wg) cfm 0.00 0.10 0.20 0.30 0.40 0.50 0.60 0.70 rpm bhp rpm bhp rpm bhp rpm bhp rpm bhp rpm bhp rpm bhp rpm bhp ESP (in. wg) cfm 0...
Page 27 Table 16 — Condenser Fan Performance — 09XC16 Unitsa,b,c,d,e ESP (in. wg) cfm 0.00 0.10 0.20 0.30 0.40 0.50 0.60 0.70 0.80 0.90 rpm bhp rpm bhp rpm bhp rpm bhp rpm bhp rpm bhp rpm bhp rpm bhp rpm bhp ...
Page 28 Table 17 — Condenser Fan Performance — 09XC24 Unitsa,b,c,d,e ESP (in. wg) cfm 0.00 0.10 0.20 0.30 0.40 0.50 0.60 0.70 rpm bhp rpm bhp rpm bhp rpm bhp rpm bhp rpm bhp rpm bhp rpm bhp ESP (in. wg) cfm 0...
Page 29 Operating Sequence Table 18 — VFD Parameters All units require the addition of a thermostat accessory package to PARAMETER PARAMTER CHANGES FROM STANDARD complete the control circuit. The sequence of ...
Page 30 SERVICE Changing Fan Wheel If a fan wheel should fail, it may be replaced as follows: Cleaning Evaporator Coil 1. Shut off unit power supply. Lock out power supply and tag Do not use high-pressure wat...
Page 31 Evaporator Motor Starter Setting (after Lockout/ 4. Turn the Power Switch/Disconnect Switch of the Start/Stop Tagout) Station to the ON Position. Motor starter is factory set. If starter is replaced i...
Page 32 MAINTENANCE Cleaning WARNING The unit should be thoroughly cleaned inside and out. Frequency To prevent personal injury, wear safety glasses and gloves of cleaning will depend on unit location and are...
Page 33 Table 22 — Troubleshooting Procedure PROBLEM POSSIBLE CAUSE CORRECTION PROCEDURE Check power source. Loss of unit power Check fuses, circuit breakers, disconnect switch. Check electrical contacts. U...
Page 34 LEGEND AND NOTES FOR FIG. 18-22 LEGEND NOTES: Compressor Contactor OFM Outdoor-Fan Motor 1. Fan motors are inherently thermally protected. CH Crankcase Heater OFR Outdoor-Fan Relay 2. Three-phase moto...
Page 35 Continued on Line Voltage Diagram 504/RED RED YEL TB3 REMOVE 601/RED JUMPER BLK/600 509/BRN 604/BRN HR1 IFR 510/BLK BIFC CONNECTING BLK YEL BRN AIR-SIDE Y1 602/BLU ECONOMIZER Y2 608/PNK OCCUPANCY 507/...
Page 36 DISC1* IFC/IFR 100/BLK 103/BLK T1L1 106/BLK IFM L2 101/BLK 104/YEL T2L2 107/YEL 109/GRN Hz L3 102/BLK 105/BLU T3L3 108/BLU GND GND 125/BLK Phase rotation 126/BLK USE COPPER sequence is C1 CLO1-Loop CO...
Page 37 DISC1* TB1 IF VFD 460V L1 100/BLK 103/BLK U1 U2 106/BLK L2 101/BLK 104/YEL V1 V2 107/YEL IFM Hz L3 102/BLK 105/BLU W2W1 108/BLU 140/GRN GPE 109/GRN GND GND 140/GRN USE COPPER SUPPLY WIRES. C1 CLO1-Loo...
Page 38 IF VFD 711/VIO 710/BRN 710/BRN 713/BLU 714/YELCR1 Continued on Line Voltage Diagram 504/RED RED YEL TB3 REMOVE 601/RED 2/ VI JUMPER BLK/600 509/BRN 604/BRN HR1 510/BLK 3FR1 CONNECTING BLK YEL BRN AIR-...
Page 39 START-UP CHECKLIST (Fill out this form on Start-Up and file in job folder) NOTE: To avoid injury to personnel and damage to equipment or property when completing the procedures listed in this start-up...
Page 40 MAXIMUM DEVIATION FROM AVERAGE VOLTAGE = V VOLTAGE IMBALANCE = 100 X (MAX DEVIATION)/(AVERAGE VOLTAGE) = % IF OVER 2% VOLTAGE IMBALANCE, DO NOT ATTEMPT TO START SYSTEM! CALL LOCAL POWER COMPANY FOR AS...

Manual Details

Brand Carrier
Pages 40
File Size 1.91 MB
Published June 05, 2026
50 views

Enter the captcha to get the download link:

captcha

Frequently Asked Questions

What safety precautions must be observed during unit installation?

Always wear safety glasses and work gloves, and ensure all electrical power is shut off and tagged before starting work.

Should I attempt startup if there is a voltage imbalance?

No; if the voltage imbalance exceeds 2%, do not operate the system and call your local power company for assistance.

What are the critical initial steps for replacing a fan bearing?

First, shut off all electrical power to the unit, recover refrigerant to relieve pressure, and use protective gloves and goggles.