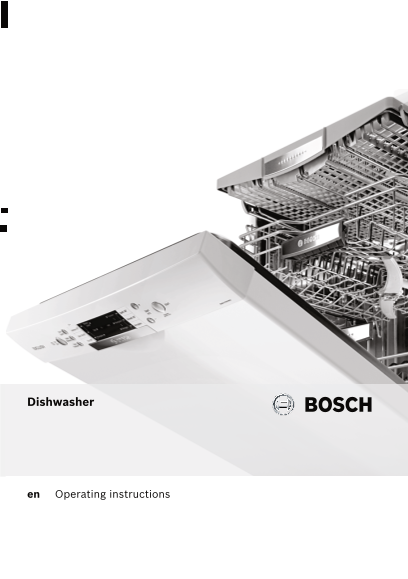
BOSCH Dishwasher User Manual (Part 1) Quick Guide)
Summary
Master the care and operation of your new dishwasher with this comprehensive guide. This manual provides everything from professional installation instructions to detailed program settings, ensuring optimal cleaning performance for all types of dishes. Designed for home users seeking reliable daily results, it covers advanced features like water softening, maintenance tips, troubleshooting guides, and critical safety protocols, guaranteeing years of efficient use.
-
*9000506481*
-
9000506481 en (9111) 640MV
-
en Table of contents
-
Before you switch ON the appliance 4
-
Delivery 4
-
Installation 4
-
In daily use 4
-
Children in the household 5
-
Door lock 5
-
Damage 5
-
Disposal 5
-
Control panel 6
-
Appliance interior 6
-
Overview of menu 6
-
Setting 7
-
Water hardness table 7
-
Using special salt 8
-
Detergents with salt component 8
-
Switching off water softening system 8
-
Setting amount of rinse aid 9
-
Switching off rinse aid refill indicator 9
-
Not suitable 10
-
Glass and utensil damage 10
-
Loading the dishwasher 10
-
Unloading the dishwasher 10
-
Cups and glasses 10
-
Pans 11
-
Cutlery basket 11
-
Etagere 11
-
Folding spikes 11
-
Small accessories holder 12
-
Knife shelf 12
-
Adjusting the height of the basket 12
-
Adding detergent 14
-
Combination detergent 14
-
Programme selection 16
-
Information for test institutes 16
-
Express Wash/ Speed Perfect (VarioSpeed) 17
-
Half load 17
-
Hygiene 17
-
Intensive zone 17
-
Extra drying 17
-
Programme data 17
-
Aqua sensor 17
-
Switching on the appliance 17
-
Optical display while the programme is running 18
-
Remaining running time display 18
-
Timer programming 18
-
End of programme 18
-
Switching off automatically after the end of the programme 19
-
Switching off the appliance 19
-
Interrupting the programme 19
-
Terminating the programme 19
-
Changing the programme 19
-
Intensive drying 20
-
Overall condition of the machine 20
-
Special salt and rinse aid 20
-
Filters 21
-
Spray arms 21
-
Waste water pump 22
-
... when the appliance is switched on 23
-
... changing settings 23
-
... on the appliance 23
-
... during the wash cycle 24
-
... on the utensils 24
-
Safety instructions 25
-
Delivery 26
-
Technical specifications 26
-
Installation 26
-
Waste-water connection 26
-
Fresh water connection 26
-
Warm water connection 27
-
Electrical connection 27
-
Removing the appliance 27
-
Transportation 28
-
Protection against frost (Emptying the appliance) 28
-
Packaging 28
-
Old appliances 28
-
Safety instructions
-
Before you switch ON the appliance
-
-
-
Please read the operating and installation instructions carefully. They contain important information on how to install, use and maintain the appliance.
-
Retain all documents for subsequent use or for the next owner.
-
Delivery
-
Installation
-
-
Read the “Installation” chapter to learn how to install and connect the appliance correctly.
-
In daily use
-
-
m Warning
-
Knives and other utensils with sharp points must be placed in the cutlery basket with the points downwards or horizontally on the knife shelf *.
-
* depending on model
-
Children in the household
-
Childproof lock (door lock)Door lock *
-
-
The description of the childproof lock is at the back in the envelope.
-
* depending on model
-
Damage
-
Disposal
-
-
m Warning
-
Children could become locked in the appliance (risk of suffocation) or find themselves in other dangerous situations.
-
Therefore: Pull out the mains plug, sever and dispose of the power cord. Destroy the door lock so that the door can no longer be closed.
-
Getting to know your appliance
-
-
Diagrams of the control panel and the interior of the appliance can be found in the envelope at the front.
-
Individual positions are referred to in the text.
-
Control panel
-
-
(
-
ON/OFF switch
-
0
-
Programme buttons **
-
8
-
Display “Check water supply”
-
@
-
Salt refill indicator
-
H
-
Rinse aid refill indicator
-
P
-
Timer programming *
-
X
-
Additional options **
-
`
-
START button
-
h
-
Digital display
-
)"
-
Door opener
-
* depending on model
-
** Number depending on model
-
Appliance interior
-
-
1"
-
Top basket
-
1*
-
Knife shelf *
-
12
-
Tablet collecting tray
-
1:
-
Top spray arm
-
1B
-
Bottom spray arm
-
1J
-
Dispenser for special salt
-
1R
-
Filters
-
1Z
-
Cutlery basket
-
1b
-
Bottom basket
-
1j
-
Dispenser for rinse aid
-
9"
-
Detergent dispenser
-
9*
-
Lock for detergent dispenser
-
92
-
Rating plate
-
* depending on model
-
Overview of menu
-
-
The settings can be found in the individual chapters.
-
•
-
Water Hardness •:‹‹ - •:‹ˆ
-
š
-
Intensive drying š:‹‹ - š:‹‚
-
§
-
Rinse aid §:‹‹ - §:‹‡
-
‘
-
Hot water ‘:‹‹ - ‘:‹‚
-
›
-
End of programme buzzing sound ›:‹‹ - ›:‹„
-
˜
-
Automatic disconnection ˜:‹‹ - ˜:‹ƒ
-
‚
-
Optical display while the programme is running ‚:‹‹ -‚:‹‚
-
Water softening system
-
-
To ensure good washing results, the dishwasher requires soft water, i.e. containing low amounts of lime, otherwise white limescale will be deposited on the utensils and inner container.
-
Tap water above 9° Clarke must be softened. The water is softened with salt (regeneration salt) in the water softening system of the dishwasher.
-
The setting and therefore the required amount of salt depends on the degree of hardness of your tap water (see table).
-
Setting
-
-
The amount of salt dispensed can be set from •:‹‹ to •:‹ˆ.
-
Salt is not required at the set value •:‹‹.
-
Water hardness table
-
Special salt $
-
Using special salt
-
-
-
Always refill with special salt immediately before switching on the appliance. This ensures that overrun special salt solution is immediately washed out and does not corrode the rinsing tank.
-
As soon as the salt refill indicator @ on the fascia is lit, top up the salt.
-
* depending on model
-
Detergents with salt componentUsing detergents with salt component
-
-
If combined detergents with a salt component are used, salt can usually be omitted up to a water hardness of 21° dH (37° fH, 26° Clarke, 3.7 mmol/l). If the water hardness is over 21° dH, special salt must be used.
-
Switching off water softening systemSwitching off salt refill indicator/ water softening system
-
-
If the salt refill indicator @ is impaired (e.g. when using combined detergents containing salt component), it can be switched off.
-
m Warning
-
Never fill the salt dispenser with detergent. You will destroy the water softening system.
-
Rinse aid %
-
-
As soon as the rinse-aid refill indicator H is lit on the fascia, there is still a rinse-aid reserve of 1 – 2 rinsing processes. Refill with rinse aid.
-
The rinse aid is required for stain-free utensils and clear glasses. Use only rinse aid for domestic dishwashers.
-
Combined detergents with rinse-aid component may be used up to a water hardness of 21° dH (37° fH, 26° Clarke, 3.7 mmol/l) only. If the water hardness is over 21° dH, rinse aid must be used.
-
Setting amount of rinse aid
-
-
The amount of rinse aid can be set from §:‹‹ to §:‹‡. Please set rinse aid on §:‹† to obtain very good drying results (§:‹† is already set in factory).
-
Change this setting, only if streaks (select lower setting) or water stains (select higher setting) are left on the utensils.
-
Switching off rinse aid refill indicator
-
-
If the rinse-aid refill indicator H is impaired (e.g. when using combined detergents containing rinse aid component), it can be switched off.
-
The rinse aid refill indicator H is now switched off.
-
Utensils
-
Not suitable
-
-
-
Aluminium and silver parts have a tendency to discolour and fade during the wash cycle. Even some types of glass (e.g. crystal glass objects) may turn cloudy after many wash cycles.
-
Glass and utensil damage
-
-
Causes:
-
Recommendation:
-
Loading the dishwasher
-
-
Very small utensils should not be washed in the machine, as they may fall out of the baskets.
-
Unloading the dishwasher
-
-
To prevent water from dripping off the upper basket onto the utensils in the lower basket, it is recommended to empty the appliance from the bottom up.
-
Hot utensils are sensitive to shock! Therefore, when the programme ends, leave the utensils to cool down in the dishwasher until they can be handled.
-
Cups and glasses
-
-
Top basket 1"
-
Pans
-
-
Bottom basket 1b
-
Tip
-
Heavily soiled utensils (pans) should be placed in the bottom basket. The more powerful spray jet provides a better dishwashing result.
-
Tip
-
Other examples, such as the best way of loading your dishwasher, can be found on our homepage as a free download. The corresponding Internet address can be found on the back page of these instructions for use.
-
Cutlery basket
-
-
You should always place cutlery unsorted with the points downwards.
-
To prevent injuries, place long, pointed implements and knives on the knife shelf.
-
EtagereEtagere *
-
-
The etagere and the space underneath can be used for small cups and glasses or for larger items of cutlery, such as wooden spoons or serving cutlery. The etagere can be folded up if not required.
-
* Depending on the model, a 3-fold height adjustment is possible. To do this, first place the etagere vertically and pull up, then place at a slight angle, push down to the required height (1, 2, or 3) and snap into place.
-
Folding spikesFolding spikes *
-
-
* depending on model
-
The spikes can be folded down to improve arrangement of pans, bowls and glasses.
-
Small accessories holder *Small accessories holder
-
-
* depending on model
-
Light-weight plastic accessories, e.g. cups, lids, etc. can be held securely in the small accessories holder.
-
Knife shelf *Knife shelf
-
-
* depending on model
-
Long knives and other utensils can be arranged horizontally.
-
Adjusting the height of the basketAdjusting the height of the basket *
-
-
* depending on model
-
If required, the height of the upper utensils basket 1" can be adjusted to provide more space for tall utensils either in the upper or lower basket.
-
Appliance height 81.5 cm
-
Top basket
-
Bottom basket
-
Setting 1 max. ø
-
22 cm
-
30 cm
-
Setting 2 max. ø
-
24.5 cm
-
27.5 cm
-
Setting 3 max. ø
-
27 cm
-
25 cm
-
Appliance height 86.5 cm
-
Top basket
-
Bottom basket
-
Setting 1 max. ø
-
24 cm
-
33 cm
-
Setting 2 max. ø
-
26.5 cm
-
30.5 cm
-
Setting 3 max. ø
-
29 cm
-
28 cm
-
Select one of the two following procedures according to the design of the top basket for your appliance model:
-
Top basket with side levers
-
Top basket with upper and lower roller pairs
-
Detergent
-
-
You can use tablets as well as powder or liquid detergents for dishwashers, but never use washing up liquid. The dosage can be individually adjusted with powder or a liquid detergent according to the degree of soiling. Tablets contain an adequately l...
-
Note
-
To ensure a good washing result, always follow the instructions on the detergent packaging!
-
If you have further questions, we recommend that you contact the detergent manufacturers’ helpline.
-
m Warning
-
Read and observe the safety information and instructions for use on the packaging for cleaning and rinsing agents.
-
Adding detergent
-
-
Tip
-
If the utensils are only lightly soiled, slightly less than the indicated amount of detergent is usually adequate.
-
Suitable detergents and care products can be purchased online via our website or via customer service (see back page).
-
Combination detergent
-
-
Apart from conventional detergents (Solo), a number of products are offered with additional functions. These products contain not only the detergent but also rinse-aid and salt replacement substances (3in1) and, depending on the combination (4in1, 5i...
-
As soon as combined detergents are used, the rinse programme is adjusted automatically to ensure the best possible rinsing and drying result.
-
Overview of programmes
-
-
The max. possible number of programmes is illustrated in this overview. The corresponding programmes for your appliance can be found on the fascia.
-
Type of utensils
-
Type of soiling
-
Programme
-
Possible additional options
-
Programme sequence
-
pots and pans, non-sensitive utensils and cutlery
-
very adhesive burned-in or dried-on food remnants containing starch or protein
-
± / °
-
Intensive 70°
-
all
-
Prerinse
-
Clean 70°
-
Intermediate rinse
-
Final rinse 65°
-
Dry
-
Á
-
Auto 45° – 65°
-
Is optimised according to the soiling with the aid of sensors.
-
mixed utensils and cutlery
-
part dried, common household food remnants
-
á / à
-
Eco 50°
-
Prerinse
-
Clean 50°
-
Intermediate rinse
-
Final rinse 65°
-
Dry
-
sensitive utensils, cutlery, temperature- sensitive plastic and glasses
-
slightly adhesive, fresh food remnants
-
é / è
-
Gentle 40°
-
Intensive zone
-
Express Wash/ Speed Perfect (VarioSpeed)
-
Half load
-
Extra drying
-
Prerinse
-
Clean 40°
-
Intermediate rinse
-
Final rinse 55°
-
Dry
-
ñ / ð
-
Quick 45°
-
Extra drying
-
Clean 45°
-
Intermediate rinse
-
Final rinse 55°
-
all types of utensils
-
cold rinsing, intermediate cleaning
-
ù / ø
-
Prerinse
-
none
-
Prerinse
-
Programme selection
-
-
You can select a suitable programme according to the type of utensils and degree of soiling.
-
Information for test institutes
-
-
Test institutes can request the conditions for running comparison tests by sending an e-mail to
-
[email protected].
-
Quote the appliance number (ENr.) and the production date (FD) which you can find on the rating plate 92 on the appliance door.
-
Additional options
-
-
* depending on model
-
Additional options can be set with the buttons X.
-
Express Wash/ Speed Perfect (VarioSpeed)Ÿ Express Wash/ Speed Perfect/ (VarioSpeed) *
-
-
This function can reduce the running time by approx. 20% to 50% depending on the selected rinse programme. The change in the running time is indicated on the digital display h. To obtain optimum cleaning results at a reduced running time, water and e...
-
Half load§ Half load *
-
-
If you have only a few items to wash (e.g. glasses, cups, plates), you can switch to “half load”. This will save water, energy and time. It is recommended to put a little less detergent in the detergent dispenser than for a full load.
-
· Hygiene *Hygiene
-
-
The temperature is increased during the cleaning process. This increases the hygiene status. This additional option is ideal for cleaning e.g. chopping boards and baby bottles.
-
Ï Intensive zone *Intensive zone
-
-
Perfect for a mixed load. You can wash very soiled pots and pans in the lower basket together with normally soiled utensils in the upper basket. The spray pressure in the lower basket is intensified, the rinsing temperature is increased slightly.
-
¿ Extra drying *Extra drying
-
-
An increased temperature during the final rinse and an extended drying phase ensure that even plastic parts dry better. There is a slight increase in the energy consumption.
-
Washing the dishes
-
Programme data
-
-
-
The programme data (consumption values) can be found in the summary of instructions. They refer to normal conditions and the water hardness set value •:‹…. Different influencing factors such as e.g. water temperature or line pressure may result...
-
Aqua sensorAqua sensor *
-
-
* depending on model
-
The Aqua sensor is an optical measuring device (light barrier) which measures the turbidity of the rinsing water.
-
The Aqua sensor is used according to the programme. If the Aqua sensor is active, “clean” rinsing water can be transferred to the next rinse bath and water consumption can be reduced by 3–6 litres. If the turbidity is greater, the water is drai...
-
Switching on the appliance
-
Optical display while the programme is runningOptical display while the programme is running *
-
-
* depending on model
-
While the programme is running, a light spot shines on the floor under the appliance door. Do not open the dishwasher door until the light point is no longer visible on the floor.
-
If the appliance is installed at eye-level, with flush furniture front, the light point is not visible.
-
This function can be changed as follows:
-
Remaining running time display
-
-
When the programme is selected, the remaining running time of the programme is indicated on the digital display h.
-
The running time is determined during the programme by the water temperature, the number of utensils as well as the degree of soiling and may vary (depending on the selected programme).
-
Timer programmingTimer programming *
-
-
* depending on model
-
You can delay the start of the programme in 1-hour steps up to 24 hours.
-
End of programme
-
-
The programme has ended when the value ‹:‹‹ is indicated on the numerical display h.
-
The end of the programme is also indicated by an acoustic signal. This function can be changed as follows:
-
Switching off automatically after the end of the programmeSwitching off automatically after the end of the programme *
-
-
* depending on model
-
To save energy, the dishwasher is switched off 1 minute after the programme ends (factory setting).
-
Automatic disconnection can be adjusted from ˜:‹‹ to ˜:‹ƒ.
-
˜:‹‹
-
Appliance does not switch off automatically
-
˜:‹‚
-
Off after 1 min
-
˜:‹ƒ
-
Off after 120 min
-
Switching off the appliance
-
-
Short time after the end of the programme:
-
m Warning
-
At the end of the programme please open the door fully and not partially when emptying the dishwasher. Any escaping water vapour could damage sensitive worktops.
-
Interrupting the programme
-
Terminating the programmeTerminating the programme (Reset)
-
Changing the programme
-
-
When the START button ` has been pressed, the programme cannot be changed.
-
The only way a programme can be changed is by Cancel programme (Reset).
-
Intensive drying
-
-
The final rinse uses a higher temperature which improves the drying result. The running time may increase slightly. (Caution if utensils are delicate!)
-
Maintenance and care
-
-
A regular inspection and maintenance of your machine will help to prevent faults. This saves time and prevents problems.
-
Overall condition of the machine
-
-
If you find such deposits:
-
Clean the appliance with detergents/ appliance cleaners which are particularly suitable for use with dishwashers.
-
Never use a steam cleaner to clean your dishwasher. The manufacturer is not liable for any consequential damage.
-
Regularly wipe the front of the appliance and fascia with a damp cloth; water and a little washing up liquid are adequate. Do not use sponges with a rough surface or abrasive detergents, as these could scratch the surfaces.
-
Stainless steel appliances: To prevent corrosion, avoid using sponge cloths or wash them out thoroughly several times before using for the first time.
-
m Warning
-
Never use other chlorinated household detergents! Health hazard!
-
Special salt and rinse aid
-
Filters
-
-
The filters 1R keep large foreign objects in the rinsing water away from the pump. These foreign objects may occasionally block the filters.
-
The filter system consists of a coarse filter, a flat fine filter and a microfilter.
-
Spray arms
-
-
Limescale and contaminants in the rinsing water may block nozzles and bearings on the spray arms 1: and 1B.
-
Troubleshooting
-
-
The majority of faults which could occur in daily operation can be rectified by the user. This ensures that the appliance is quickly available for use again. The following overview will help you locating the causes and gives helpful advise to elimina...
-
Note
-
If the appliance stops during dishwashing or does not start for no obvious reason, first run the Abort programme function (Reset).
-
(See chapter entitled “Dishwashing”)
-
m Warning
-
If on the digital display h an error code (“:‹‚ to “:„‹), always disconnect the appliance from the power supply and then turn off the tap.
-
You can rectify certain faults yourself (see following fault description), for all other faults please contact customer service and state the indicated fault “:XX.
-
m Warning
-
Don’t forget: Repairs may be carried out by technicians only. If a component has to be replaced, ensure that only original spare parts are used. Improper repairs or use of non-original spare parts may cause considerable damage and put the user at c...
-
Waste water pump
-
-
Large food remnants or foreign objects which were not captured by the filters may block the waste water pump. The rinsing water will then be above the filter.
-
In this case:
-
... when the appliance is switched on
-
... changing settings
-
... on the appliance
-
... during the wash cycle
-
... on the utensils
-
-
If phosphate-free detergents are used with hard tap water, white deposits may be deposited more easily on utensils and the container walls.
-
Contact the detergent manufacturer, in particular if:
-
Customer service
-
-
If the advice given does not resolve your problem, please contact your customer service. Contact details can be found on the back cover of this instruction manual or in the enclosed customer service list. When calling , please quote the appliance num...
-
Rely on the expertise of the manufacturer. Call us to ensure that the repair will be carried out by fully-trained service engineers, who are equipped with original spare parts for your appliance.
-
Installation
-
-
The dishwasher must be connected correctly, otherwise it will not function properly. The specifications for the inlet and outlet as well as the electrical connected loads must correspond with the required criteria as specified in the following paragr...
-
Install the appliance in the correct sequence:
-
Safety instructions
-
-
m Warning
-
If the appliance is not in a cavity and a side panel is accessible, the door hinge area must be covered at the side for reasons of safety (risk of injury). The covers are available as optional accessories from customer service or specialist outlets.
-
Delivery
-
-
Your dishwasher has been checked thoroughly in the factory to ensure that it is in working order. This may cause small water stains. These will disappear after the first wash cycle.
-
Technical specifications
-
-
Weight:
-
max. 60 kg
-
Voltage:
-
220–240 V, 50 Hz or 60 Hz
-
Connected load:
-
2.0–2.4 kW
-
Fuse:
-
10/16 A (UK 13A)
-
Water pressure:
-
at least 0.05 MPa (0.5 bar), maximum 1 MPa (10 bar). At a higher water pressure: connect pressure-reducing valve ahead.
-
Inlet rate:
-
minimum 10 litres/minute
-
Water temperature:
-
cold water; hot water max. temperature 60 °C.
-
Installation
-
-
The required installation dimensions can be found in the installation instructions. Level the appliance with the aid of the height-adjustable feet. Ensure that the appliance is situated securely on the floor.
-
Waste-water connection
-
Fresh water connection
-
Warm water connectionWarm water connection *
-
-
* depending on model
-
The dishwasher can be connected to cold or hot water up to max. 60 °C.
-
Connection to hot water is recommended if the hot water can be supplied by energetically favourable means and from a suitable installation, e.g. solar heating system with circulation line.
-
This will save energy and time.
-
The hot water setting ‘:‹‚ allows you to adjust your appliance optimally to operation with hot water.
-
It is recommended to have a water temperature (temperature of the incoming water) of at least 40 °C and no more than 60 °C.
-
It is not recommended to connect the appliance to hot water if the water is supplied from an electric boiler.
-
Electrical connection
-
Removing the appliance
-
-
Also observe the sequence of worksteps here.
-
Transportation
-
-
Empty the dishwasher and secure loose parts.
-
Transport appliance upright only.
-
(This prevents residual water from running into the machine control and damaging the programme sequence.)
-
Protection against frost (Emptying the appliance)Protection against frost
-
-
If the appliance is in a room where there is a risk of frost (e.g. holiday home), empty the appliance completely (see Transportation).
-
Waste disposal
-
-
Both the packaging of new appliances and the old appliances themselves contain valuable raw materials and recyclable materials.
-
Please dispose of the individual parts separated according to type.
-
Please ask your dealer or inquire at your local authority about current means of disposal.
-
Packaging
-
-
All plastic parts of the appliance are identified with internationally standardised abbreviations (e.g. >PS< polystyrene). Therefore, plastic waste can be sorted out when the appliance is being disposed of.
-
Please follow the safety instructions under “Delivery”.
-
Old appliances
-
-
Please follow the safety instructions under “Disposal of your appliance”.
-
This appliance is identified according to the European guideline 2002/96/EC on waste electrical and electronic equipment – WEEE. The guideline specifies the framework for an EU-wide valid return and re-use of old appliances.
-
*9000506481*
-
9000506481 en (9111) 640MV
Page 1 Text Content
Page Summary Contents For BOSCH Dishwasher User Manual (Part 1) Quick Guide)
Manual Details
| Brand | Bosch |
|---|---|
| Pages | 30 |
| File Size | 2.18 MB |
| Published | May 16, 2026 |
Enter the captcha to get the download link:

Frequently Asked Questions
What steps are necessary for initial installation?
The appliance requires connections for fresh water, warm water, waste-water, and electrical wiring.
How should I maintain the machine in areas with hard water?
Use a water softening system or specialty salt according to the provided water hardness table.
What are key safety guidelines mentioned for home use?
The manual provides specific Safety instructions intended for use in the general home environment, including child precautions.
Where can I find maintenance tips for optimal performance?
Check the sections detailing 'Filters,' 'Spray arms,' and ‘Water softening system’ under Maintenance and care.
Related Manuals
- BOSCH dishwasher User Manual (Part 3) Service Guide
- BOSCH dishwasher Installation and User Guide
- Bosch Custom dishwasher Planning Guide
- BOSCH 6 Series Built-In Dishwasher 55 cm Black SKS66BB00C Installation Guide
- BOSCH 4 Series Built-In Dishwasher 60 cm Black SEU4XKB88C Installation and User Guide
- BOSCH 4 Series Semi-Integrated Dishwasher 60 cm Stainless Steel SJI4HKS00C Installation and User Guide
- BOSCH GBM Professional Manual User Guide
- Bosch PCH615B90A, PCQ715B90A User Manual
- Bosch BGS5SILCN Manual
- Bosch MUMPC33S00 Manual