# A B C D E F G H I J K L M N O P Q R S T U V W X Y Z

Casio QV-700 Digital Camera User's Manual

Summary

Capture brilliant memories with the QV-700 LCD Digital Camera, featuring an integrated color monitor for instant image review. This comprehensive manual is your complete guide to mastering every function of your camera, from initial setup and power management to advanced photography modes like macro and panorama. It details everything a user needs, including recording images, shooting outdoors, accessing memory cards, connecting to PCs, and integrating with external printers. Essential reading for new owners who want detailed operational instructions and maximum photographic performance.
📄 Preview PAGE OF 25

Page 1 Text Content

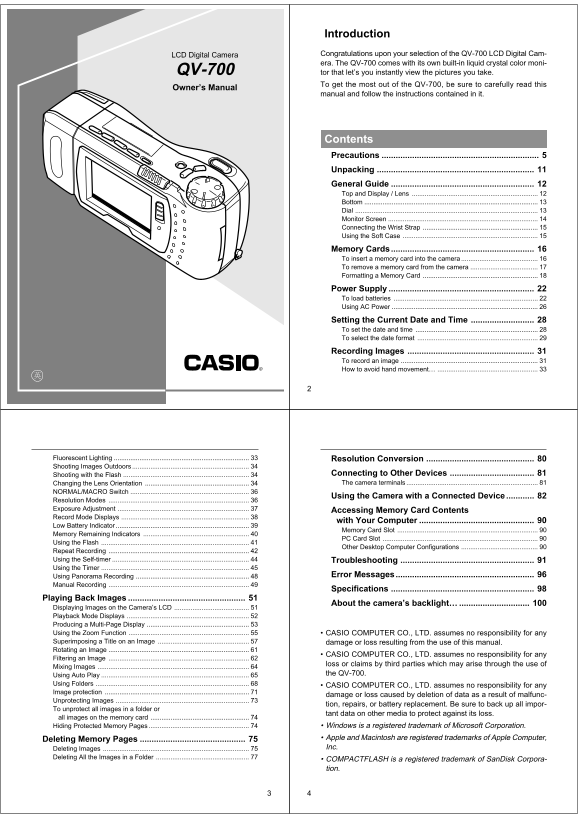
Introduction LCD Digital Camera Congratulations upon your selection of the QV-700 LCD Digital Cam- era. The QV-700 comes with its own built-in liquid crystal color moni- QV-700 tor that let’s you instantly view the pictures you take. To get the most out of the QV-700, be sure to carefully read this

Owner’s Manual

manual and follow the instructions contained in it.

Contents Precautions Unpacking General Guide Top and Display / Lens

Dial Monitor Screen Connecting the Wrist Strap Using the Soft Case

Memory Cards............................................................. To insert a memory card into the camera To remove a memory card from the camera Formatting a Memory Card

Power Supply To load batteries Using AC Power

Setting the Current Date and Time To set the date and time To select the date format

Recording Images To record an image How to avoid hand movement…

Fluorescent Lighting Resolution Conversion Shooting Images Outdoors

Shooting with the Flash Connecting to Other Devices Changing the Lens Orientation The camera terminals

NORMAL/MACRO Switch

Using the Camera with a Connected Device

Resolution Modes Exposure Adjustment

Accessing Memory Card Contents

Record Mode Displays

with Your Computer

Low Battery Indicator

Memory Card Slot

Memory Remaining Indicators

PC Card Slot

Using the Flash

Other Desktop Computer Configurations

Repeat Recording Using the Self-timer Troubleshooting Using the Timer

Using Panorama Recording Error Messages...........................................................

Manual Recording

Specifications

Playing Back Images

About the camera’s backlight…

Displaying Images on the Camera’s LCD Playback Mode Displays Producing a Multi-Page Display Using the Zoom Function CASIO COMPUTER CO., LTD. assumes no responsibility for any Superimposing a Title on an Image damage or loss resulting from the use of this manual. Rotating an Image

CASIO COMPUTER CO., LTD. assumes no responsibility for any

Filtering an Image

loss or claims by third parties which may arise through the use of

Mixing Images

Using Auto Play the QV-700.

Using Folders CASIO COMPUTER CO., LTD. assumes no responsibility for any Image protection

damage or loss caused by deletion of data as a result of malfunc-

Unprotecting Images

tion, repairs, or battery replacement. Be sure to back up all impor-

To unprotect all images in a folder or

tant data on other media to protect against its loss.

all images on the memory card

Hiding Protected Memory Pages Windows is a registered trademark of Microsoft Corporation. Deleting Memory Pages Apple and Macintosh are registered trademarks of Apple Computer, Deleting Images Inc.

Deleting All the Images in a Folder

COMPACTFLASH is a registered trademark of San Disk Corpora- tion.

Page Summary Contents For Casio QV-700 Digital Camera User's Manual

Page 1 Introduction LCD Digital Camera Congratulations upon your selection of the QV-700 LCD Digital Cam- era. The QV-700 comes with its own built-in liquid crystal color moni- QV-700 tor that let’s you inst...
Page 2 Precautions Precautions LCD Digital Camera General Precautions Never use the unit inside of an air craft or in any other areas where its use is prohibited. Doing so can result in an accident. Be sure ...
Page 3 Precautions LCD Digital Camera GUIDELINES LAID DOWN BY FCC RULES FOR USE OF Declaration of Conformity THIS UNIT IN THE U.S.A. (not applicable to other areas). This device complies with Part 15 of the ...
Page 4 General Guide Getting Acquainted Tripod hole Monitor Screen Recording Mode Battery compartment Recording Mode (Not normally displayed Battery compartment cover during image recording.) BRIGHT (brightn...
Page 5 Memory Cards Getting Acquainted To remove a memory card from the camera Formatting a Memory Card You can format a memory card to delete all of the data stored on it. 1. Open the memory card slot cover...
Page 6 Memory Cards Getting Acquainted Power Supply Renaming After Move The camera features a two-way power supply that lets you use either batteries (AA-size Alkaline or Lithium) or household AC current. CA...
Page 7 Power Supply Getting Acquainted Low Battery Indicator Using AC Power The low battery indicator ( ) appears in the center of the LCD To power the camera from standard AC power, use the optional AC when...
Page 8 Setting the Current Date and Time Getting Acquainted 4. Use [+] and [–] to select ADJUST, and then press the shut- 3. Use [+] and [–] to select ADJUST, and then press the shut- ter button. ter button....
Page 9 Recording Images Operation Caution Shooting Images Outdoors Never open the battery compartment cover, disconnect the AC Note that strong direct or reflected light can cause vertical lines in an adapto...
Page 10 Recording Images Operation Exposure Adjustment Notes This camera features an program AE function that automatically Exposure adjustment is generally expressed in terms of an expo- changes shutter spee...
Page 11 Recording Images Operation Using the Flash Repeat Recording You can use the camera’s built in flash when recording images. You can use any of the three following methods to record a consecu- tive seri...
Page 12 Recording Images Operation 4. Use [+] and [–] to select the type of self-timer recording you To record using timer recording want to perform, and then press the shutter button. 1. Mount the camera ont...
Page 13 Recording Images Operation Manual Recording 4. Use [+] and [–] to select the APT (Aperture Priority) setting With manual recording, you can set the aperture and white balance you want, and then press ...
Page 14 Playing Back Images Operation Producing a Multi-Page Display 5. Scroll through the images. Four or nine memory pages can be displayed at the same time. This Use the [+] and [–] buttons to scroll image...
Page 15 Playing Back Images Operation Notes 5. Press the shutter button. If the page number is displayed in the upper right corner of the The title is recorded at the brightness level you specified in screen ...
Page 16 Playing Back Images Operation Rotating an Image 7. Use the MENU button to select the background color. Use the following procedure to rotate an image in 90° increments. Each press of [+] cycles forwar...
Page 17 Playing Back Images Operation 6. Use [+] and [–] to select the locations you want to use, and 2. Start the auto play operation. then press the shutter button. Hold down the [+] and [–] buttons until t...
Page 18 Playing Back Images Operation 3. Use [+] and [–] to select FOLDER, and then press the shut- 3. Use [+] and [–] to select FOLDER, and then press the shut- ter button. ter button. FOLDER is located in M...
Page 19 Playing Back Images Operation 4. Use [+] and [–] to select ALL, and then press the shutter To unprotect all images in a folder or all images button. on the memory card Now when the playback mode displ...
Page 20 Deleting Memory Pages Operation Note 3. Use [+] and [–] to select FOLDER, and then press the Deleting a page causes the remaining pages to be renumbered. shutter button. Blank pages are not left inser...
Page 21 Connecting to Other Devices Using the Camera with a Connected Device Using the Camera with a Connected Device Using the Camera with a Connected Device The camera terminals The following section provid...
Page 22 Using the Camera with a Connected Device Using the Camera with a Connected Device Connecting to another CASIO Digital Camera 4. Use the [+] and [–] buttons to move the pointer to the send icon. DIGITA...
Page 23 Accessing Memory Card Contents with ec or di ng ow er up pl Using the Camera with a Connected Device Using the Camera with a Connected Device Your Computer Computer (Video Capture) VIDEO You can use a...
Page 24 th er la yb ac Troubleshooting Reference Symptom Probable Cause Action Symptom Probable Cause Action Camera is con- 1. Incorrect camera-TV 1. Connect correctly us- Delete opera- 1. Al pages are pro- 1...
Page 25 Error Messages Reference Sp cifications Recording System Digital (JPEG base) SYSTEM ERROR Problem with internal memory. Contact your dealer or Signal System NTSC CALL TECH an authorized CASIO service ...

Manual Details

Brand Casio
Pages 25
File Size 570.94 KB
Published June 05, 2026
56 views

Enter the captcha to get the download link:

captcha

Frequently Asked Questions

How do I format a memory card?

Follow the instructions in the manual under the section 'Formatting a Memory Card.'

Can I connect the QV-700 to another device for data transfer?

Yes, you can use the optionally available QV-Link Software and connection cable to transfer images to a computer.

How do I set the date and time on the camera?

Refer to the manual's section 'Setting the Current Date and Time.'

What are the resolution options for shooting?

The camera offers various resolutions, including FINE, NORMAL, QUARTER, and potentially others depending on connecting software.