Page 1
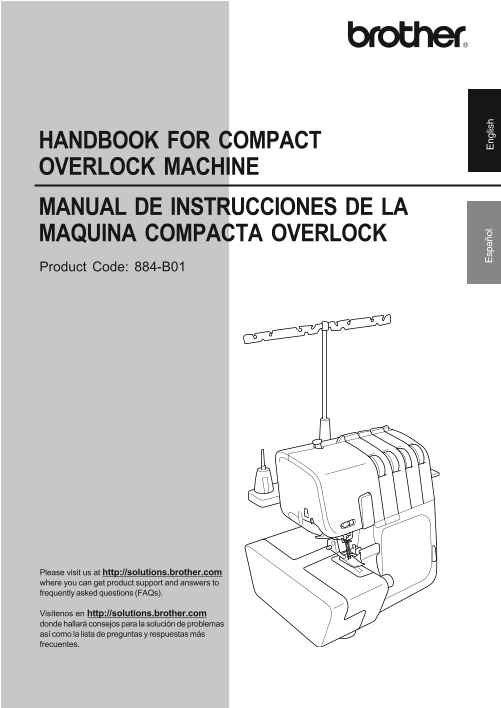
HANDBOOK FOR COMPACT OVERLOCK MACHINE MANUAL DE INSTRUCCIONES DE LA MAQUINA COMPACTA OVERLOCK Product Code: 884-B01 sp añ ol ng lis Please visit us at http://solutions.brother.com where you can get pr...
Page 2
IMPORTANT SAFETY INSTRUCTIONS When using the sewing machine, basic safety precautions should always be followed, including the following. Read all instructions before using. DANGER To reduce the risk ...
Page 3
To give your machine a longer life 1. Do not store this machine in direct sunlight or in high humidity conditions. Do not use or store the machine near a heater, iron, halogen lamp or other hot object...
Page 4
CONGRATULATIONS ON CHOOSING THIS COMPACT OVERLOCK MACHINE Your machine is a high quality, easy-to-use product. To fully enjoy all the features, we suggest that you study this booklet. If you need more...
Page 5
Contents IMPORTANT SAFETY INSTRUCTIONS WARNING LABELS ...................................................................................................................III Contents .....................
Page 6
CHAPTER 1 NAMES OF PARTS AND THEIR FUNCTIONS 1 Thread tree Inside of the front cover 2 Presser foot pressure adjustment screw <A> Tweezers (accessory) 3 Spool pin L Lower looper threading lever ...
Page 7
Optional accessory Accessories For further information about the following items, see CHAPTER 8. Included accessory D Blind stitch foot: X76590002 Soft cover: X77871000 Accessory bag: 122991052 Tweeze...
Page 8
Powering the machine Opening/ Closing front cover It is necessary to open the front cover when threading Turning on the machine this machine. Slide it to the right 1 and open 2, or 1. Insert the three...
Page 9
2. Position the fabric, and start sewing. (See CHAPTER Trim trap 5.) The optional trim trap <A> holds the trimmed fabric and thread produced when sewing. Wide table Using the wide table <A>...
Page 10
Retracting knife Stitch length To sew without cutting the fabric edge, you need to The normal stitch length setting is 3 mm. To change the retract the knife as follows. stitch length, turn the stitch ...
Page 11
An example Differential feed When stretch material is sewn without using the differential feed, the edge will be wavy. This serger is equipped with two sets of feed dogs under the presser foot to move...
Page 12
Tension adjustment dial There is a thread tension dial for each needle thread, the lower looper thread and the upper looper thread. The correct thread tension may vary according to the type and thickn...
Page 13
Chart of thread tension adjustment, Two-needle (Four-thread) A: Reverse B: Surface C: Left needle thread D: Right needle thread E: Upper looper thread F: Lower looper thread Left needle Tighten left t...
Page 14
Chart of thread tension adjustment, One-needle (Three-thread) A: Reverse B: Surface C: Needle thread D: Upper looper thread E: Lower looper thread Needle thread is Tighten needle loose. thread. (yello...
Page 15
To remove: Needle 1. Turn the main power and light switch to the OFF position. This machine uses a standard home sewing 2. Turn the hand wheel so that the mark on the machine needle. hand wheel is ali...
Page 16
CHAPTER 2 PREPARATION BEFORE THREADING Thread tree Before threading Raise the telescoping thread tree to its highest 1. Turn off the main power and light switch for position. Make sure that the thread...
Page 17
CHAPTER 3 THREADING Thread for two-needle four-thread Thread for one-needle three-thread overlock stitch overlock stitch (right needle) needle needle Thread for one-needle three-thread overlock stitch...
Page 18
Threading has to be done in the following order. Thread for one-needle two-thread 1. Lower looper 2. Upper looper overlock stitch (right needle) 3. Right needle 4. Left needle Threading the lower loop...
Page 19
5. Guide the thread down the channel and pass 3. Pass the thread through the eye of the lower the thread through the threading points looper. 5678 next to the blue color marks following the numerical ...
Page 20
5. Guide the thread down the channel and pass Threading the upper looper the thread through the threading points 5678 next to the pink color marks following Run the thread in the sequence illustrated,...
Page 21
CAUTION · Turn off the machine before threading for safety. · Turn the hand wheel so that the mark on the hand wheel is aligned to the line on the machine (See CHAPTER 1 "Turning direction of han...
Page 22
4. Lower the needle threader lever 6 on the left Threading the needle side of the machine as much as possible. (using the needle threader) The needle can be threaded by one-touch operation using the n...
Page 23
CHAPTER 4 SEWING MATERIALS,THREADS AND NEEDLES COMPARISON CHART Stitch Length Material Thread Needle Stitch Fine materials: Spun #80 - 90 SCHMETZ Georgette Cotton #100 130/705H Lawn Filament #80 - 100...
Page 24
CHAPTER 5 SEWING Two-thread overlock stitch 2.8 mm Stitch selection (7/64 inch) Use two threads and the right needle, producing Select the stitch pattern before you start sewing. 2.8 mm (7/64 inch) se...
Page 25
3. Place a piece of scrap material under the presser foot for test sewing. To start sewing NOTE: 1. Thread the machine and pull all threads out Always lift the presser foot before placing the fabric a...
Page 26
3. Lower the needles and the presser foot at the To secure chain same position. 4. Serge over the seam, taking care not to cut the There are two methods available to secure the serged seam with a knif...
Page 27
If threads break during sewing To use the stitch finger W Remove the material and re-thread in the correct When sewing stretch fabrics, using the included order, Lower looper, Upper looper, right need...
Page 28
5. Push the thread change assembly 2 fully Two-thread sewing downward until the tip 3 of the thread change assembly is put in the eye of the upper looper 4. How to set the thread change assembly NOTE:...
Page 29
4. Store the removed stitch finger <A> and/or Narrow overlock/ Rolled hemming stitch stitch finger W <B> inside of the bed extension. The Narrow overlock/Rolled hemming stitch is a decorat...
Page 30
Chart of narrow overlock/ Rolled hemming stitch Narrow overlock stitch Rolled hemming stitch Underside of material Stitch Style Underside of material Top of material Top of material See CHAPTER 4 &quo...
Page 31
CHAPTER 6 TROUBLESHOOTING This sewing machine is designed for trouble-free operation. However, the following chart indicates trouble which may occur if basic adjustments are not made properly. Trouble...
Page 32
CHAPTER 7 MAINTENANCE Cleaning CAUTION Turn off the machine before cleaning. Turn the hand wheel and move the needles down. Periodically clean dust, trimmed fabric and thread with the included cleanin...
Page 33
CHAPTER 8 INTRODUCTION OF OPTIONAL FEET CAUTION 6. Lower the presser foot lever, adjust the fabric guide toward the folded edge. Turn off the machine while replacing the presser 7. Adjust the guide po...
Page 34
Procedure 9. When stiching is finished, pull the fabric open 1. Attach the blind stitch foot (see CHAPTER 1 (flat). "Attaching/ Removing presser foot"). 2. Set up the machine for 3 thread ov...
Page 35
8. Align the fold with the guide and insert the Machine setting (type of stitch): fabric up to the needle position. 2 needle 4 thread overlock 1 needle 3 thread overlock (Either needle can be used.) H...
Page 36
5. Set the stitch length control lever. How to adjust the machine - Tapes: between "3" and "4" 1. Adjust the stitch length according to the length - Elastics: "4" as <...
Page 37
How to set fabric and piping tape Piping foot Features By using the piping foot, you can attach piping at the edge of material. Piping is used to decorate the edge of fabric (pajamas, sports ware), co...
Page 38
4. Adjust the other settings to those used during Gathering foot normal overlock sewing. 5. Sew while keeping the fabric aligned with the Features fabric guide 3. You can create beautiful gathers usin...
Page 39
SPECIFICATIONS Specifications Use Fine to heavy materials Sewing speed Maximum 1,300 stitches per minute Stitch width 2.3 mm to 7 mm (3/32 to 9/32 inch) Stitch length (pitch) 2 mm to 4 mm (5/64 to 5/3...
Page 40
INSTRUCCIONES IMPORTANTES DE SEGURIDAD Cuando utilice esta máquina, deberá tomar siempre medidas de seguridad básicas, incluidas las que se enumeran a continuación. Lea todas las instrucciones antes d...