Page 1
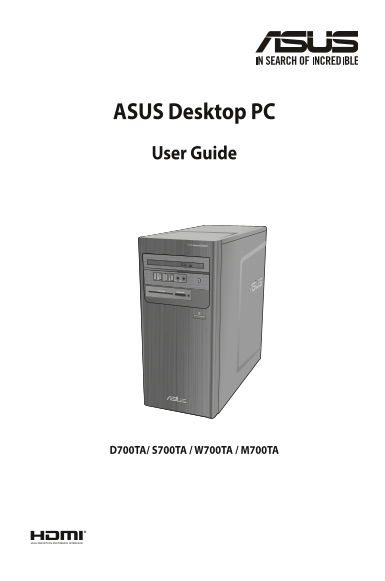
ASUS Desktop PC User Guide D700TA/ S700TA / W700TA / M700TA
Page 2
Revised Edition v4 October 2021 Copyright © 2021 ASUSTe K Computer Inc. All Rights Reserved. No part of this manual, including the products and software described in it, may be reproduced, transmitted...
Page 3
Contents Notices ................................................................................................................................................ Safety information ......................
Page 4
Appendix Working with Windows® Starting for the first time .............................................................................................................63 Start menu .....................
Page 5
Notices ASUS Recycling/Takeback Services ASUS recycling and takeback programs come from our commitment to the highest standards for protecting our environment. We believe in providing solutions for yo...
Page 6
Avertissement relatif aux batteries Lithium ATTENTION ! Danger d’explosion si la batterie n’est pas correctement remplacée. Remplacer uniquement avec une batterie de type semblable ou équivalent, reco...
Page 7
Canadian Department of Communications Statement This digital apparatus does not exceed the Class B limits for radio noise emissions from digital apparatus set out in the Radio Interference Regulations...
Page 8
RF Equipment Notices CE: European Community Compliance Statement The equipment complies with the RF Exposure Requirement 1999/519/EC, Council Recommendation of 12 July 1999 on the limitation of exposu...
Page 9
Simplified EU Declaration of Conformity ASUSTek Computer Inc. hereby declares that this device is in compliance with the essential requirements and other relevant provisions of Directive 2014/53/EU. F...
Page 10
ENERGY STAR is a joint program of the U.S. Environmental Protection Agency and the U.S. Department of Energy helping us all save money and protect the environment through energy efficient products and...
Page 11
Hazardous moving parts. Desktop should be completely shutdown before servicing product. Replacing fan components should only be attempted by qualified service personnel. Hazardous Moving Parts Warning...
Page 12
Package contents Smart Card SD/MMC/MS ASUS Desktop PC Keyboard x1 (Optional) Mouse x1 (Optional) Power cord x1 Support DVD x1 Recovery DVD x1 (Optional) Installation Guide ASUS mouse pad x 1 Installat...
Page 13
Chapter 1 Getting started Welcome! Thank you for purchasing the ASUS Desktop PC! The ASUS Desktop PC provides cutting-edge performance, uncompromised reliability, and user- centric utilities. All thes...
Page 14
D700TA/ S700TA / W700TA / M700TA Front panel Smart Card SD/MMC/MS 1. 5.25 inch optical disk drive bay. There is an optical disk drive in this bay. 2. Optical disk drive eject button. Press this button...
Page 15
D700TA/ S700TA / W700TA / M700TA Rear panel 1. Voltage selector. Use this switch to select the appropriate system input voltage according to the voltage supply in your area. If the voltage supply in y...
Page 16
7. VGA port. This port is for VGA-compatible devices such as a VGA monitor. 8. USB 3.2 Gen 1 port. The Universal Serial Bus 3.2 Gen 1 (USB 3.2 Gen 1) ports connect to USB 3.2 Gen 1 devices such as a m...
Page 17
19. LAN (RJ-45) port. This port allows Gigabit connection to a Local Area Network (LAN) through a network hub. LAN port LED indications ACT/LINK LED Activity/Link LED Speed LED SPEED LED Status Descri...
Page 18
Installing memory in your computer This desktop PC comes with four Double Data Rate 4 (DDR4) Dual Inline Memory Module (DIMM) sockets. The figure illustrates the location of the DDR4 DIMM sockets. DIM...
Page 19
5. Press down and outward on the DIMM ejector to unlock the DIMM socket. START RESET 6. Align the notch on the bottom edge of the DIMM with the key of the DIMM socket, and then firmly insert the DIMM ...
Page 20
Setting up your computer This section guides you through connecting the main hardware devices, such as the external monitor, keyboard, mouse, and power cord, to your computer. Connecting an external m...
Page 21
Using the onboard display output ports Connect your monitor to the onboard display output port. To connect an external monitor using the onboard display output ports: 1. Connect a monitor to a display...
Page 22
Connecting a USB keyboard and a USB mouse Connect a USB keyboard and a USB mouse to the USB ports on the rear panel of your computer. Connecting the power cord Connect one end of the power cord to the...
Page 23
Turning your computer ON This section describes how to turn on your computer after setting up your computer. Turning your computer ON To turn your computer ON: 1. Turn your monitor ON. 2. Press the po...
Page 24
EN LISH Chapter 1: Getting started EN LI SH
Page 25
Chapter 2 Connecting devices to your computer Connecting a USB storage device This desktop PC provides USB 3.2 Gen 1 and USB 2.0 ports on the front and rear panels. The USB ports allow you to connect ...
Page 26
Connecting microphone and speakers This desktop PC comes with microphone ports and speaker ports on both the front and rear panels. The audio I/O ports located on the rear panel allow you to connect 2...
Page 27
Connecting 2-channel Speakers Connecting 4-channel Speakers EN LI SH ASUS Desktop PC EN LISH
Page 28
Connecting 5.1-channel Speakers LIN E O Connecting 7.1-channel Speakers EN LISH Smart Card SD/MMC/MS Chapter 2: Connecting devices to your computer EN LI SH
Page 29
Changing to the external audio output When you connect an external audio device to your Desktop PC, enable the audio device output to ensure a clear audio quality. To change to the external audio outp...
Page 30
Connecting multiple external displays Your desktop PC may come with VGA, HDMI®, or DVI ports and allows you to connect multiple external displays. Setting up multiple displays When using multiple moni...
Page 31
Connecting an HDTV Connect a High Definition TV (HDTV) to the HDMI® port of your computer. • You need an HDMI® cable to connect the HDTV and the computer. The HDMI® cable is purchased separately. • To...
Page 32
EN LISH Chapter 2: Connecting devices to your computer EN LI SH
Page 33
Chapter 3 Using your computer Proper posture when using your Desktop PC When using your Desktop PC, maintaining the proper posture is necessary to prevent strain to your wrists, hands, and other joint...
Page 34
Using the memory card reader (Optional) Digital cameras and other digital imaging devices use memory cards to store digital picture or media files. The built-in memory card reader on the front panel o...
Page 35
Using the optical drive (on selected models only) Smart Card SD/MMC/MS Inserting an optical disc To insert an optical disc: 1. While your system is on, press the eject button below the drive bay cover...
Page 36
Configuring the USB ports using the BIOS You can enable or disable the front and rear USB 3.2 Gen 1 and USB 2.0 ports from the BIOS Setup. To disable or enable the front and rear USB 3.2 Gen 1 and USB...
Page 37
Configuring the HDD security setting using the BIOS You can set a password in the BIOS Setup to protect your HDD. To set a password for your HDD from the BIOS Setup: 1. Press <Delete> to enter t...
Page 38
EN LISH Chapter 3: Using your computer EN LI SH
Page 39
Chapter 4 Connecting to the Internet Wired connection Use an RJ-45 cable to connect your computer to a DSL/cable modem or a local area network (LAN). Connecting via a DSL/cable modem To connect via a ...
Page 40
Connecting via a local area network (LAN) To connect via a LAN: 1. Connect one end of an RJ-45 cable to the LAN (RJ-45) port on the rear panel of your computer and the other end to your LAN. RJ-45 cab...