Page 1
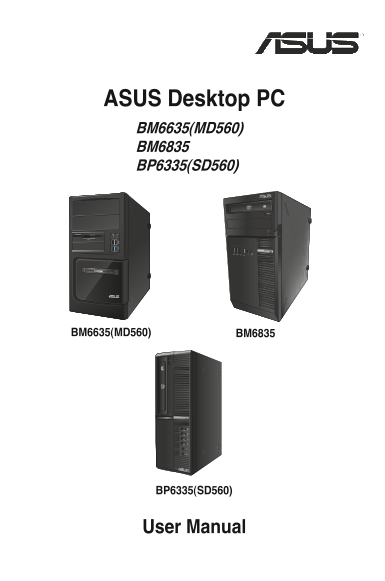
ASUS Desktop PC BM6635(MD560) BM6835 BP6335(SD560) BM6835BM6635(MD560) BP6335(SD560) User Manual
Page 2
First Edition May �01 Copyright © 2012 ASUSTe K Computer Inc. All Rights Reserved. No part of this manual, including the products and software described in it, may be reproduced, transmitted, transcri...
Page 3
Contents Notices .......................................................................................................... Safety information ............................................................
Page 4
Contents Nero 9 ........................................................................................................ Recovering your system ...........................................................
Page 5
Notices ASUS Recycling/Takeback Services ASUS recycling and takeback programs come from our commitment to the highest standards for protecting our environment. We believe in providing solutions for yo...
Page 6
RF exposure warning This equipment must be installed and operated in accordance with provided instructions and the antenna(s) used for this transmitter must be installed to provide a separation distan...
Page 7
Safety information Disconnect the AC power and peripherals before cleaning. Wipe the Desktop PC using a clean cellulose sponge or chamois cloth dampened with solution of nonabrasive detergent and a fe...
Page 8
Conventions used in this guide To ensure that you perform certain tasks properly, take note of the following symbols used throughout this manual. DANGER/WARNING: Information to prevent injury to yours...
Page 9
Package contents ASUS Desktop PC Keyboard x1 Mouse x1 Power cord x1 Support DVD x1 (Optional) Recovery DVD x1 (Optional) Installation Guide Nero 9 burning software Installation Guide x1 Warranty card ...
Page 11
Chapter 1 Getting started Welcome! Thank you for purchasing the ASUS Desktop PC! The ASUS Desktop PC provides cutting-edge performance, uncompromised reliability, and user-centric utilities. All these...
Page 12
Front panel Front USB 2.0 port 3 Front USB 2.0 port 4 Front USB 3.0 port 1 Front USB 3.0 port 2 BM6635(MD560) 1. 2 x 5.25 inch optical disk drive bays. The 5.�5 inch optical disk drive bays are for 5....
Page 13
Front USB 3.0 port 1 Front USB 3.0 port 2 Front USB 2.0 port 3 Front USB 2.0 port 4 BM6835 1. 5.25 inch optical disk drive bay. The 5.�5 inch optical disk drive bay is for 5.�5 inch DVD-ROM / CD-RW / ...
Page 14
Front USB 3.0 port 2 Front USB 3.0 port 1 Front USB 2.0 port 3 Front USB 2.0 port 4 BP6335(SD560) 1. Optical disk drive eject button. Press this button to eject the optical disk drive tray. 2. 5.25 in...
Page 15
Rear panel Rear USB 3.0 port 2 Rear USB 3.0 port 1 Rear USB 2.0 port 3 Rear USB 2.0 port 46 BM6635(MD560) 1. Power connector. Plug the power cord to this connector. 2. PS/2 mouse port (green). This po...
Page 16
7. Microphone port (pink). This port connects to a microphone. 8. Line Out port (lime). This port connects to a headphone or speaker. In a 4, 6, or 8-channel configuration, the function of this port b...
Page 17
Rear USB 3.0 port 2 Rear USB 3.0 port 1 Rear USB 2.0 port 3 Rear USB 2.0 port 48 BM6835 1. Power switch. Switch to turn ON/OFF the power supply to your computer. 2 . �oltage selector. Use this switch ...
Page 18
7. USB 3.0 ports. These Universal Serial Bus �.0 (USB �.0) ports connect to USB �.0 devices such as a mouse, printer, scanner, camera, PDA, and others. • DO NOT connect a keyboard / mouse to any USB �...
Page 19
14. Air vents. These vents allow air ventilation. DO NOT block the air vents on the chassis. Always provide proper ventilation for your computer. 15. �GA port. This port is for VGA-compatible devices ...
Page 20
5. USB 2.0 ports. These Universal Serial Bus �.0 (USB �.0) ports connect to USB �.0 devices such as a mouse, printer, scanner, camera, PDA, and others. 6. Microphone port (pink). This port connects to...
Page 21
Setting up your computer This section guides you through connecting the main hardware devices, such as the external monitor, keyboard, mouse, and power cord, to your computer. Using the onboard displa...
Page 22
BM6835 BP6335(SD560) ENG LISH • If your computer comes with an ASUS Graphics Card, the graphics card is set as the primary display device in the BIOS. Hence, connect your monitor to a display output p...
Page 23
Connecting a USB keyboard and a USB mouse Connect a USB keyboard and a USB mouse to the USB ports on the rear panel of your computer. BM6635(MD560) BM6835 EN LI SH ASUS BM66�5(MD560), BM68�5, and BP6�...
Page 24
BP6335(SD560) Connecting the power cord Connect one end of the power cord to the power connector on the rear panel of your computer and the other end to a power source. BM6635(MD560) ENG LISH Chapter ...
Page 25
BM6835 BP6335(SD560) EN LI SH ASUS BM66�5(MD560), BM68�5, and BP6��5(SD560) ENG LISH
Page 26
Turning your computer ON/OFF This section describes how to turn on/off your computer after setting up your computer. Turning your computer ON To turn your computer ON: 1. Turn your monitor ON. . Turn ...
Page 27
Chapter 2 Using Windows® 7 Starting for the first time When you start your computer for the first time, a series of screens appear to guide you in configuring the basic settings of your Windows® 7 ope...
Page 28
Using Windows® 7 desktop Click the Start icon > Help and Support to obtain more information about Windows® 7. Using the Start menu The Start menu gives you access to programs, utilities, and other ...
Page 29
Pinning items on the jumplists When you right-click an icon on the taskbar, a jumplist launches to provide you with quick- access to the program’s or item’s related links.You may pin items on the jump...
Page 30
Using the notification area By default, the notification area shows these three icons: Action Center notification Click this icon to display all the alert messages/notifications and launch the Windows...
Page 31
Exploring files and folders To explore files and folders: 1. Launch Windows® Explorer. . From the navigation or view pane, browse for the location of your data. . From the breadcrumb bar, click the ar...
Page 32
Adding a new folder To add a new folder: 1. Launch Windows Explorer. . From the toolbar, click New folder. . Key in a name for the new folder. You may also right-click anywhere on the View pane, click...
Page 33
Protecting your computer Using Windows® 7 Action Center Windows® 7 Action Center provides you with alert notifications, security information, system maintenance information, and the option to automati...
Page 34
Setting up a user’s password To set up a user’s password: 1. Select the user that you would like to set a password. . Select Create a password. 3. Key in a password and confirm it. Key in your passwor...
Page 35
Chapter 3 Connecting devices to your computer Connecting a USB storage device This desktop PC provides USB �.0/1.1 and USB �.0 ports on both the front and rear panels. The USB ports allow you to conne...
Page 36
Rear panel BM6635(MD560) BM6835 BP6335(SD560) ENG LISH Chapter �: Connecting devices to your computer EN LI SH
Page 37
Connecting microphone and speakers This desktop PC comes with microphone ports and speaker ports on both the front and rear panels. The audio I/O ports located on the rear panel allow you to connect �...
Page 38
BP6335(SD560) Connecting 2-channel Speakers ENG LISH Chapter �: Connecting devices to your computer EN LI SH
Page 39
Connecting 4-channel Speakers Connecting 6-channel Speakers EN LI SH ASUS BM66�5(MD560), BM68�5, and BP6��5(SD560) ENG LISH
Page 40
Connecting 8-channel Speakers ENG LISH Chapter �: Connecting devices to your computer EN LI SH