# A B C D E F G H I J K L M N O P Q R S T U V W X Y Z

apple iMac G5 Optical Drive Replacement Instructions, 17-inch

Summary

Restore your iMac G5 (17-inch) functionality with this essential guide for optical drive replacement. This manual provides comprehensive, step-by-step instructions designed to safely remove the existing internal drive and correctly install a new unit. Ideal for DIY users or technicians needing reliable access to detailed procedures, including important warnings on hardware handling and static discharge precautions. Get your system fully functional again with confidence.
📄 Preview PAGE OF 13

Page 1 Text Content

i Mac G5

Optical Drive, 17-inch Replacement Instructions

Follow the instructions in this sheet carefully. Failure to follow these instructions could damage your equipment and void its warranty.

Note: Online instructions are available at http://www.apple.com/support/doityourself/.

Tools Required Use the screwdriver provided, or a Phillips #2 screwdriver, preferably with a magnetized tip Screw tray or equivalent to hold the screws

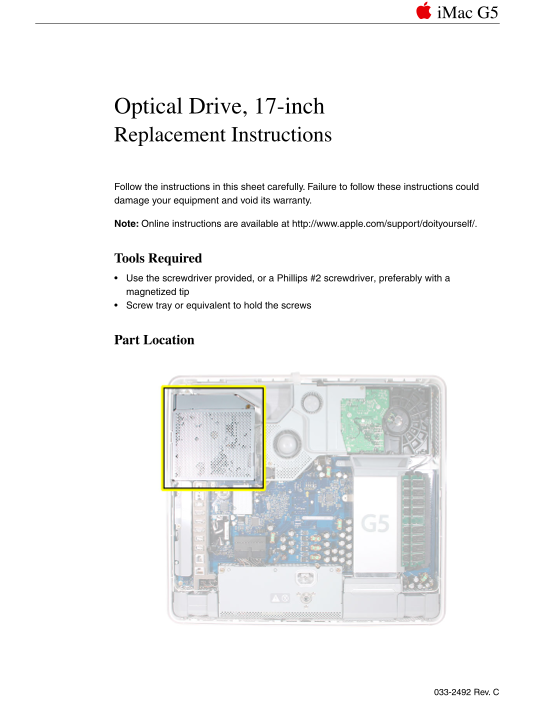
Part Location

033-2492 Rev. C

Page Summary Contents For apple iMac G5 Optical Drive Replacement Instructions, 17-inch

Page 1 i Mac G5 Optical Drive, 17-inch Replacement Instructions Follow the instructions in this sheet carefully. Failure to follow these instructions could damage your equipment and void its warranty. Note: ...
Page 2 Important Things to Know 1. All customer removable screws are brass colored. Do not remove screws unless they are brass colored, or you will void your warranty 2. A magnetized “L”-shaped Phillips scre...
Page 3 Opening the Computer Note: These instructions cover the i Mac G5 (17-inch) models. The models may look slightly different from one shown in the illustration; however, the following procedure applies t...
Page 4 4. Locate the three silver case screws circled below. You may have to lift the stand to locate the middle case screw. Note: These screws are captive; they are part of the display/bezel assembly and ca...
Page 5 Removing the Optical Drive 1. Ground yourself. Touch the metal surface (as shown below) on the inside of the computer to discharge any static electricity. Warning: Always discharge static electricity ...
Page 6 2. Locate the optical drive in the top left corner. 3. Using the tool provided, or a Phillips #2 screwdriver, remove the three optical drive screws circled below. Set the screws aside. 6 - i Mac G5 Op...
Page 7 4. Pull the optical drive tab straight up and then to the right. Set the optical drive aside. 5. Important: Return the optical drive to Apple in the packaging provided. i Mac G5 Optical Drive, 17-inch...
Page 8 Installing the Replacement Optical Drive 1. Remove the replacement optical drive from its packaging. 2. With your thumb on the pull tab and your index finger behind the tab, push the optical drive in ...
Page 9 4. Replace the three optical drive screws. i Mac G5 Optical Drive, 17-inch -
Page 10 Closing the Computer 1. Replace the cover so that the slots on the top edge of the cover mate with the tabs on the display housing. 2. Tilt the back cover slightly and align the top edge with the tabs...
Page 11 3. Tighten the three captive case screws by turning them to the right. Don’t overtighten the screws. 4. Reconnect the power cord while the computer is face down and then position the computer in the u...
Page 12 i Mac G5 (17-inch) Screw Locations Optical Drive (3 screws)Inverter (1 screw) Midplane (6 screws) Fan Cover (2 screws) Video Cable (2 screws) Hard Drive (3 screws) 12 - i Mac G5 Optical Drive, 17-inch
Page 13 Apple Computer, Inc. © 2005 Apple Computer, Inc. All rights reserved. This document is protected under U.S. Copyright Law and International Treaties, and no part of this document may be reproduced in ...

Manual Details

Brand Apple
Pages 13
File Size 2.12 MB
Published May 14, 2026
125 views

Enter the captcha to get the download link:

captcha

Frequently Asked Questions

What steps must I take regarding static electricity before starting the repair?

Always ground yourself by touching a metal surface on the inside of the computer to discharge any static electricity.

How can I tell which screws it is safe to remove?

Only remove screws that are brass colored; removing others will void the warranty.

How do I make sure the new optical drive works properly after installation?

Push the drive in the direction of the arrow and push down until it clicks into place. If it's not seated accurately, it may not function.

When closing up the computer, what should I be careful about?

Tighten the three captive case screws by turning them to the right, but do not overtighten them.